# Communication Centre
### **1. Overview**
The Communication Centre is a centralized feature in Bsharp Converse that allows admins to send emails and in-app notifications to users. It helps organizations communicate important updates, reminders, and announcements to the right audience at the right time. Messages can be targeted based on modules, forms, or specific users, ensuring relevant and effective communication.

### **2. When to Use**
Use the Communication Centre when you want to:
- Send **email communications** to users
- Send **in-app notifications** for quick updates
- Remind users about **pending modules or forms**
- Notify selected users or **all users** at once
- Share urgent or time-sensitive information
- Track communication status (Draft / Successful)
### **3. Concepts**
- **Communication Centre** – A hub to manage all email and notification communications
- **Email** – Sends messages to users’ registered email addresses
- **Notification** – Sends in-app notifications visible inside the platform
- **Sender Name** – Name shown to users as the message sender
- **Subject / Notification Title** – Headline of the communication
- **Message Body** – Main content of the email or notification
- **User Selection** – Method used to choose recipients
- **Draft** – Saved communication not yet sent
- **Successful** – Communication successfully delivered
### **4. Set Up Guide**
##### Step 1: Open Communication Centre
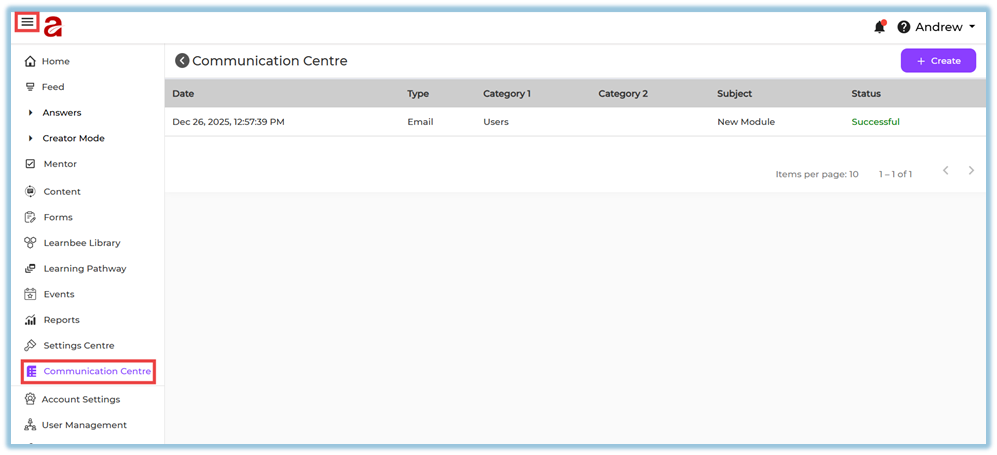
1. Click the **Menu (☰)** icon.
2. Select **Communication Centre** from the left navigation panel.
3. You will see the communication list page with:
- Date
- Type
- Category 1
- Category 2
- Subject
- Status
##### Step 2: Create a New Communication
1. Click **+ Create** on the top-right.
2. Choose one option:
- **Email**
- **Notification**
****

##### Step 3: Configure Email Communication
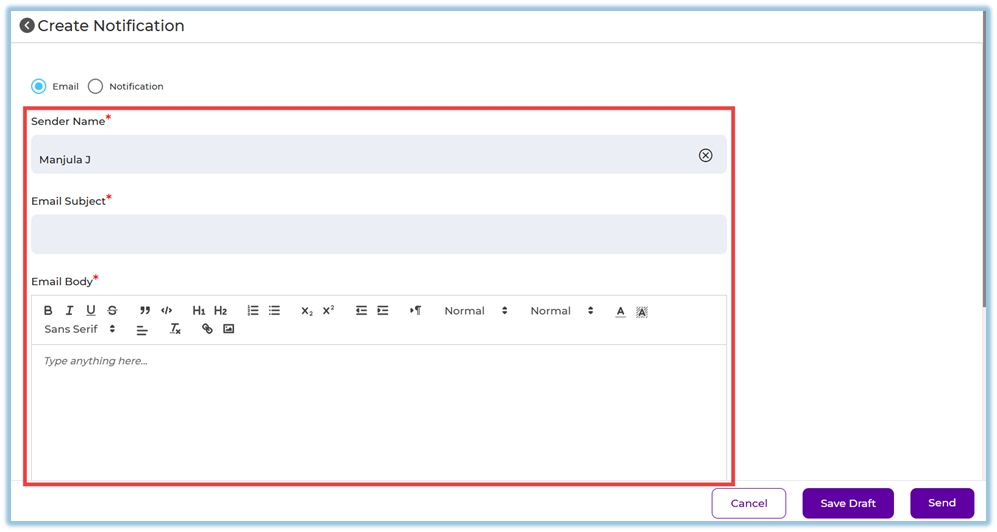
1. Enter **Sender Name**.
2. Enter **Email Subject**.
3. Enter **Email Body** (rich text editor available).
##### Step 4: Configure Notification Communication
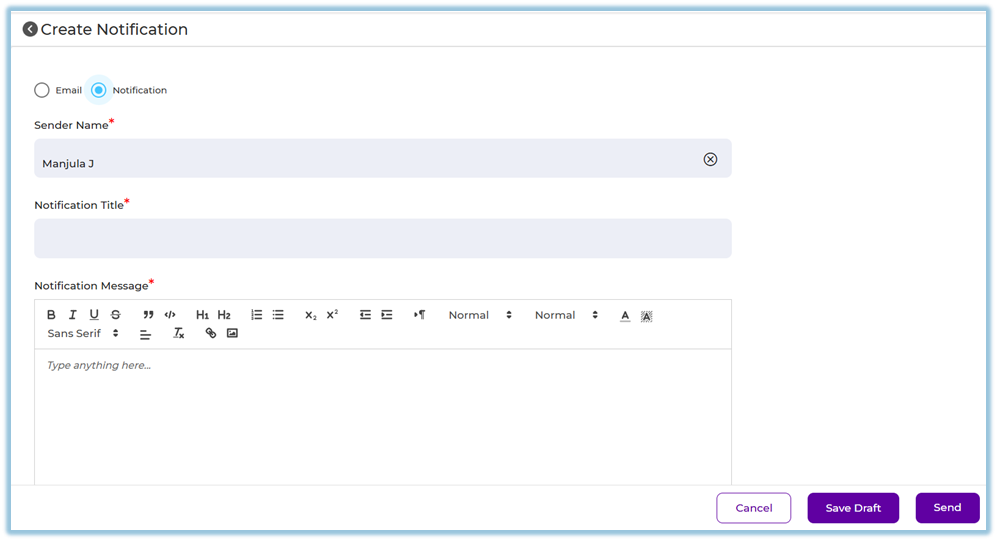
1. Enter **Sender Name**.
2. Enter **Notification Title**.
3. Enter **Notification Message**.
##### Step 5: Select Users (Mandatory)
Choose one of the following methods:
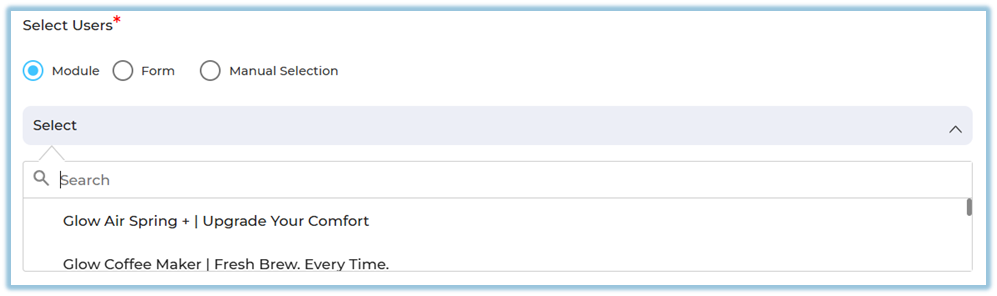
**Option 1: Module**
- Select **Module**
- Choose the module
- Notification/email goes to users mapped to that module
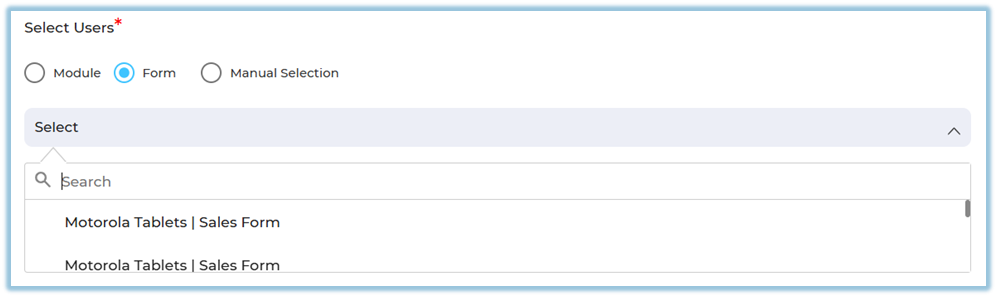
**Option 2: Form**
- Select **Form**
- Choose the published form
- Message goes to users associated with that form
**Option 3: Manual Selection**
- Select **Manual Selection**
- Click **Select Users**
- Choose:
- Individual Users
- By Attributes
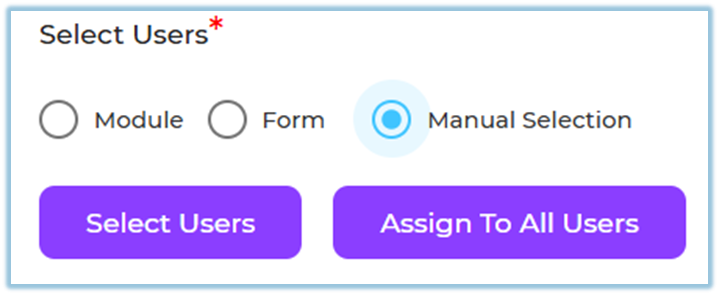
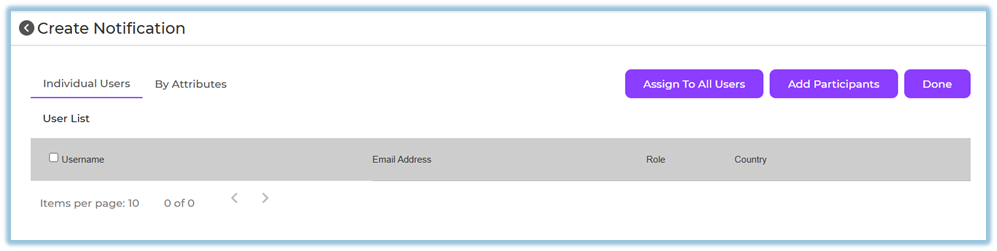
- Or click **Assign to All Users**
##### Step 6: Save or Send
- Click **Save Draft** to send later
- Click **Send** to deliver immediately
- Click **Cancel** to discard

### **5. User View**
- **Email**: Users receive the message in their email inbox
- **Notification**: Users see the notification inside the app
- Notifications are visible under the user’s notification panel
- Email content appears exactly as configured by the admin

### **6. Reporting**
Admins can track communication status from the Communication Centre list:

- **Draft** – Not sent
- **Successful** – Sent successfully
Additional details available:
- Date and time sent
- Communication type (Email / Notification)
- Target category (Users / Module / Form)
### **7. Best Practices**
- Keep subjects and titles short and clear
- Use notifications for urgent updates
- Use emails for detailed communication
- Verify user selection before sending
- Test using a small user group when needed
- Use Draft option to review content before sending
### **8. Related Links / FAQs**
**Q: Can I edit a communication after sending?**
No. Sent communications cannot be edited.
**Q: Can I send to all users at once?**
Yes, using **Manual Selection → Assign to All Users**.
**Q: Can I save and send later?**
Yes, use **Save Draft**.
**Q: Can the same message be sent as both email and notification?**
Yes, create separate entries for Email and Notification.
### **9. Version Notes**
**Last Updated:** 26 Dec 2025