# What are the functions of Quiz
### **1. Overview**
Quiz is a content item in Bsharp Converse used to assess learner understanding within a training module. It allows administrators to create structured assessments with different question types, scoring rules, timers, and evaluation settings, and to control how learners attempt and complete assessments.
### **2. When to Use**
Use Quiz when:
- You need to assess learner knowledge after training content
- You want to validate understanding before allowing learners to proceed
- You need scored assessments for compliance or certification
- You want to control attempts, pass percentage, or exam behavior
### **3. Concepts**
- **Quiz** – An assessment added inside a module page
- **Question Types** – Supported formats for quiz questions
- **Scoring & Points** – Marks assigned to questions and options
- **Partial Scoring** – Split scores for partially correct answers
- **Question Timer** – Time limit at question level
- **Quiz Pool** – Randomized question selection from a set
- **Quiz Bank** – Central repository of reusable questions
- **Quiz Settings** – Rules controlling attempts, feedback, and behavior
### **4. Set Up Guide**
##### Step 1: Add Quiz Content
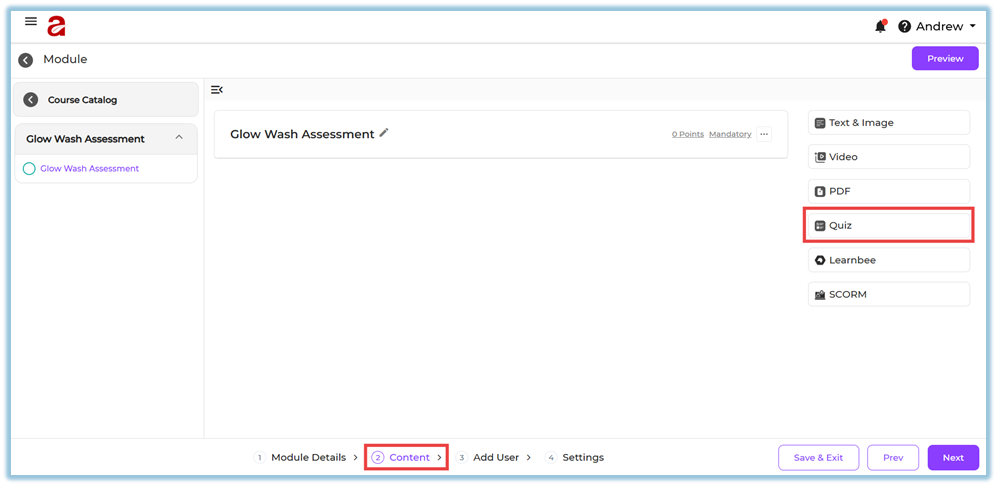
1. Go to the **Content** step while creating or editing a module.
2. Open a **Section** and select a **Page**.
3. Click **Add Content**.
4. Select **Quiz**.
##### Step 2: Create a Quiz
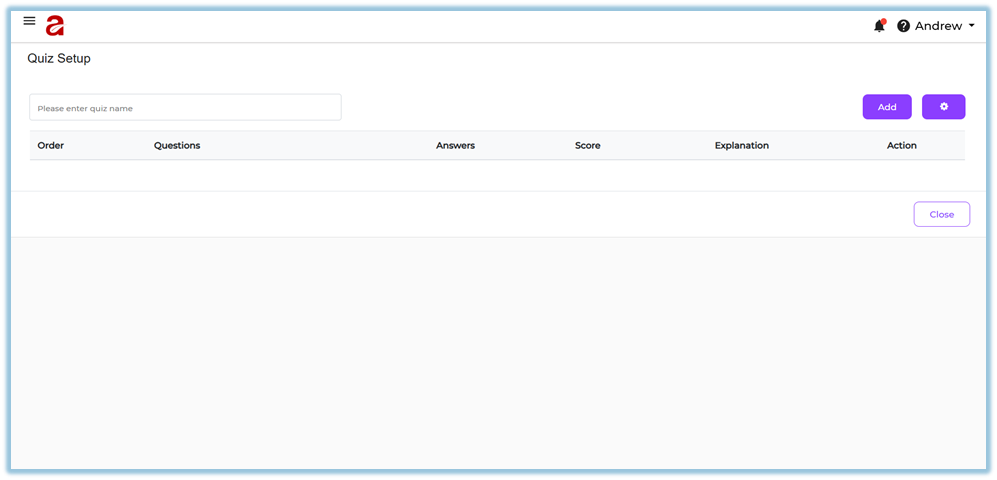
1. Enter the **Quiz Name**.
2. Use **Add** Section to start adding questions.
##### Step 3: Add Questions Manually
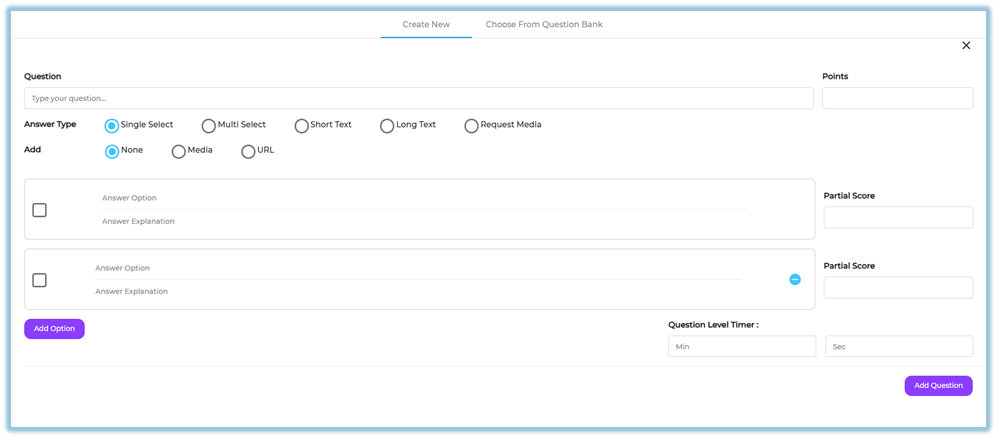
1. Click **Add Question**.
2. Enter the **question text**.
3. Select the **Answer Type**:
- Single Select
- Multi Select
- Short Text
- Long Text
4. Add **Options** where applicable.
5. Select the **correct answer(s)**.
6. Add **Answer Explanation** if required.
7. Assign **Points** for the question.
8. Configure **Partial Scoring** if needed.
9. Set the **Question-level Timer** (seconds or minutes).
10. Click **Add Question** to save the question.
##### Step 4: Add Media to Questions (Optional)
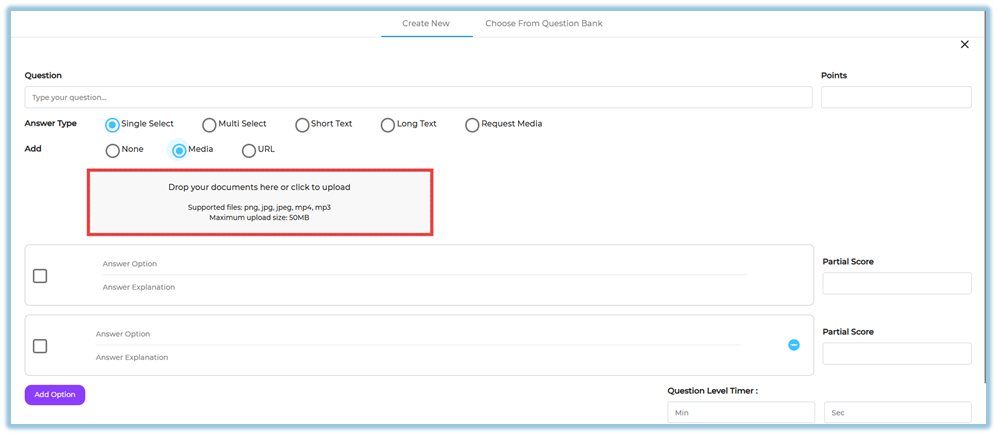
1. In **Request Media**, choose:
- Image
- Video
- Document / PDF
2. Upload or attach the required media.
3\. Click **Choose from Question Bank**.
1. View all quiz assessments that were previously created across different modules.
2. Use **Search** to find a required assessment if needed.
3. Select the assessment by checking the checkbox.
4. Review the list of available questions.
5. Click **Done**.
6. The selected questions are added to the current quiz.
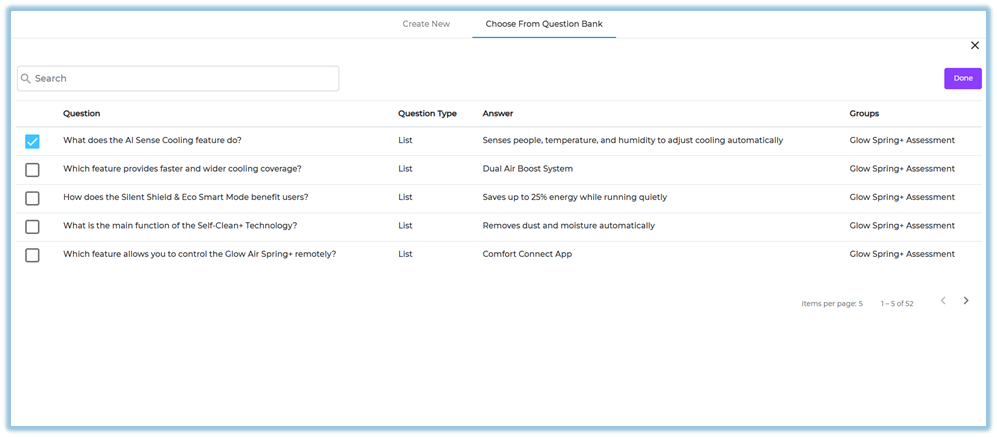
This allows you to reuse existing quiz questions without creating them again.
##### Step 5: Use Quiz Pool (Random Questions)
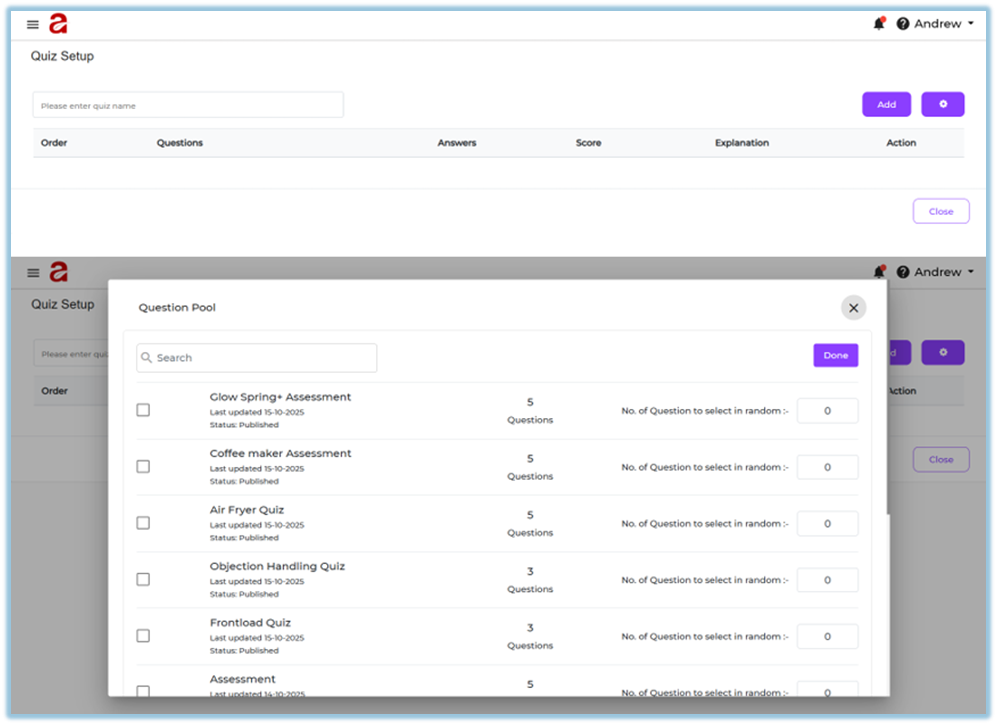
1. Click **Quiz Pool**.
2. Search and select an existing quiz from the **Question Pool**.
3. View the total number of available questions.
4. Enter how many questions should be selected **randomly**.
5. Click **Done**.
##### Step 6: Configure Quiz Settings
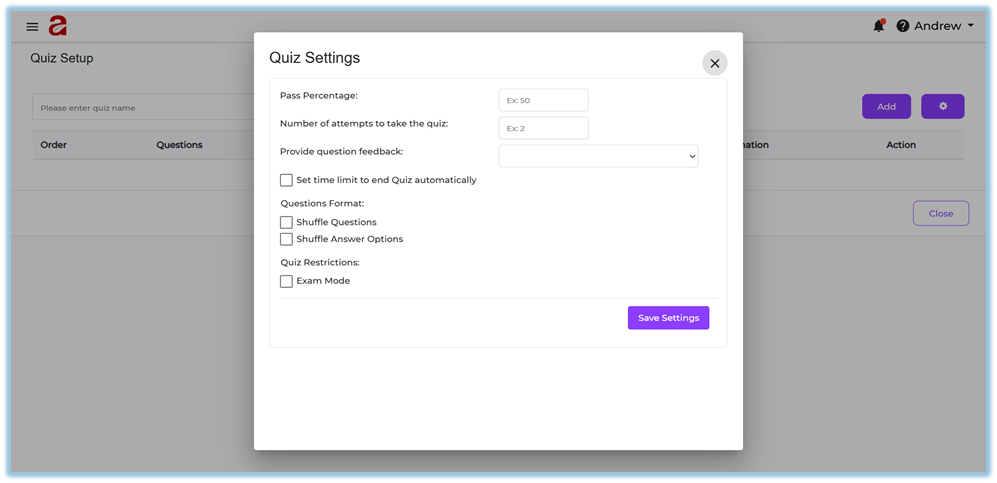
1. Open **Quiz Settings**.
2. Set **Pass Percentage**.
3. Set **Number of Attempts**.
4. Configure **Question Feedback**:
- After each question
- After completion
- No review
5. Enable **Time Limit** for the quiz (optional).
6. Configure:
- Shuffle questions
- Shuffle answer options
- Exam mode
7. Click **Save Settings**.
##### Step 7: Save and Continue
1. Close the quiz setup.
2. Click **Next** to proceed with **Add Users** or **Settings & Publish**.
### **5. User View**
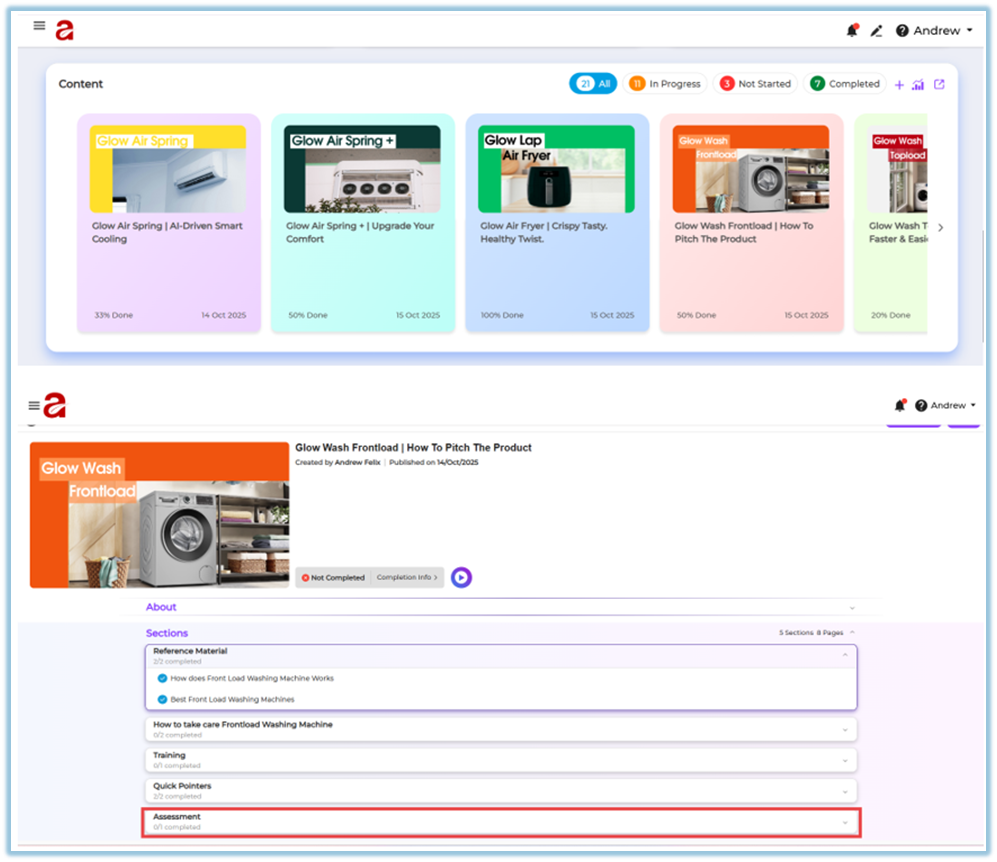
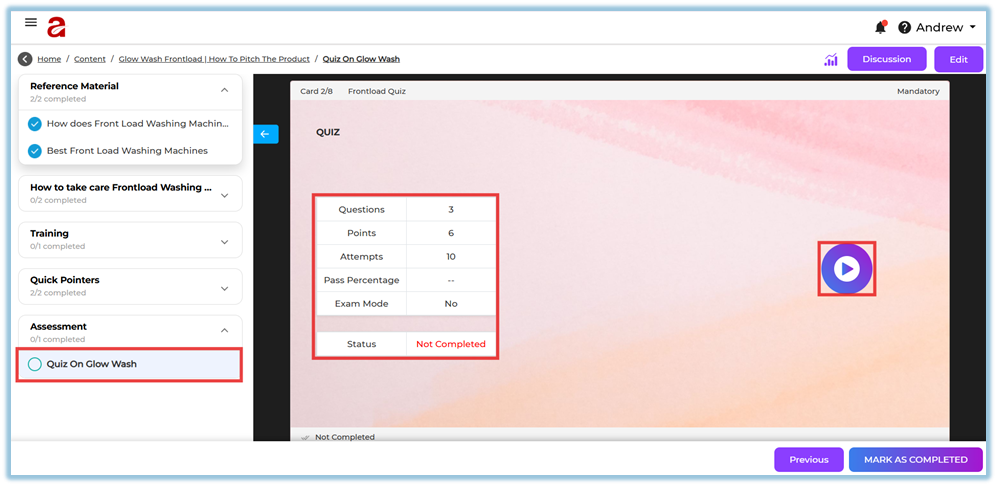
- Learners see quiz questions one by one during module consumption.
- Question timers are shown if enabled.
- Learners select or enter answers based on the question type.
- Feedback is shown based on quiz settings.
- Quiz completion status contributes to module completion.
### **6. Reporting**
Quiz-related reports show:
- Quiz completion status
- Scores achieved by learners
- Question-level responses
- Pass or fail status based on pass percentage
Reports are available in the **Reports** section with module and user filters.
### **7. Best Practices**
- Place quizzes after key learning content
- Use partial scoring only when appropriate
- Keep question timers reasonable
- Use quiz pools for large assessments to avoid repetition
- Clearly define pass percentage for compliance modules
### **8. Related Links / FAQs**
**Q: Can learners retry a quiz?**
A: Yes, based on the number of attempts configured in quiz settings.
**Q: Can quizzes be randomized?**
A: Yes, using Quiz Pool and shuffle options.
### **9. Version Notes**
**Last Updated:** 18 Dec 2025