# How to Create Content from Scratch in Learnbee++
### **1. Overview**
Creating content from scratch in Learnbee++ allows admins to manually build learning content starting from an empty topic. This option is used when content needs to be created without using templates or AI.
### **2. When to Use**
- When creating completely new content without any reference
- When full control over content structure is required
- When templates or AI-generated content are not needed
- When building custom training modules manually
### **3. Concepts**
- **Learnbee++ Library** – Stores all created topics
- **Create Topic** – Option to start creating new content
- **Create from Scratch** – Starts content creation without any predefined structure
- **Training Setup Page** – Initial page to configure topic details
### **4. Set Up Guide**
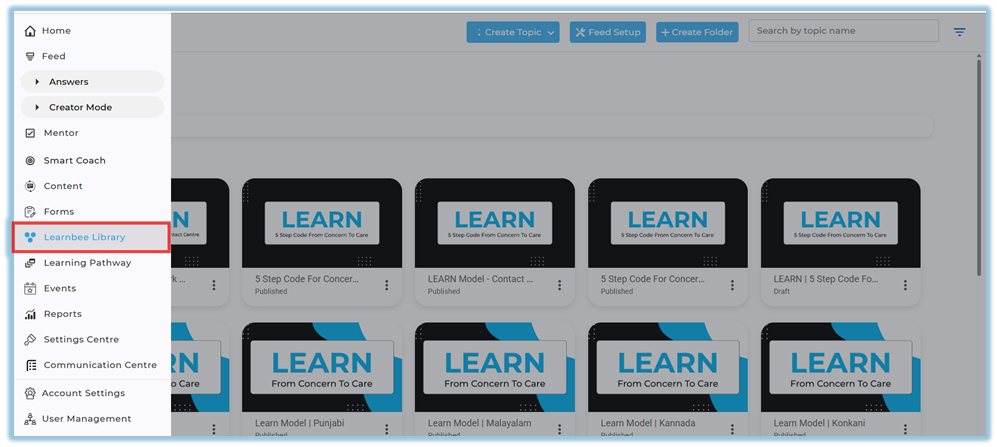
1. Go to the **Home Page**
2. Click the **menu bar** on the left side
3. Select **Learnbee++ Library**
- This opens the Learnbee++ Library page
- All previously created topics are displayed here
4. Click **Create Topic**
- Located at the top of the Learnbee++ Library page
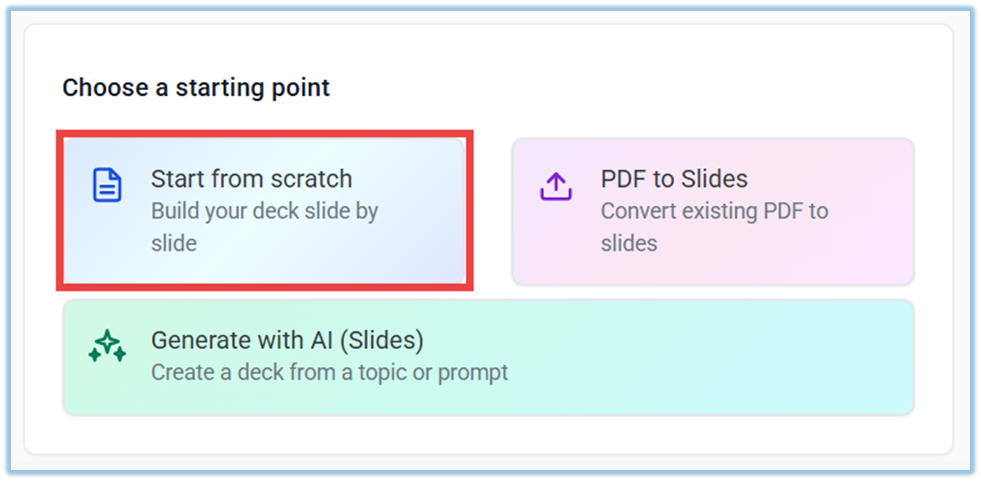
5. Select **Create from scratch**
- This option starts a new topic without using templates
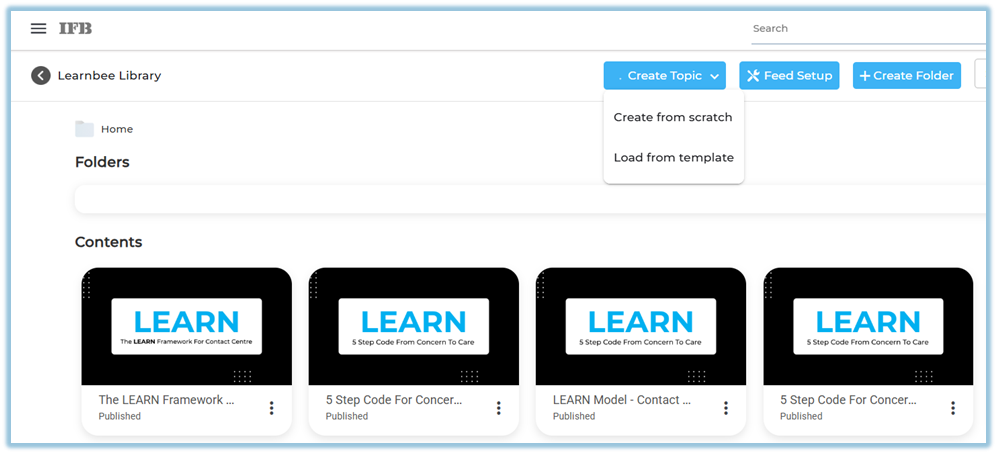
- No predefined content or structure is added
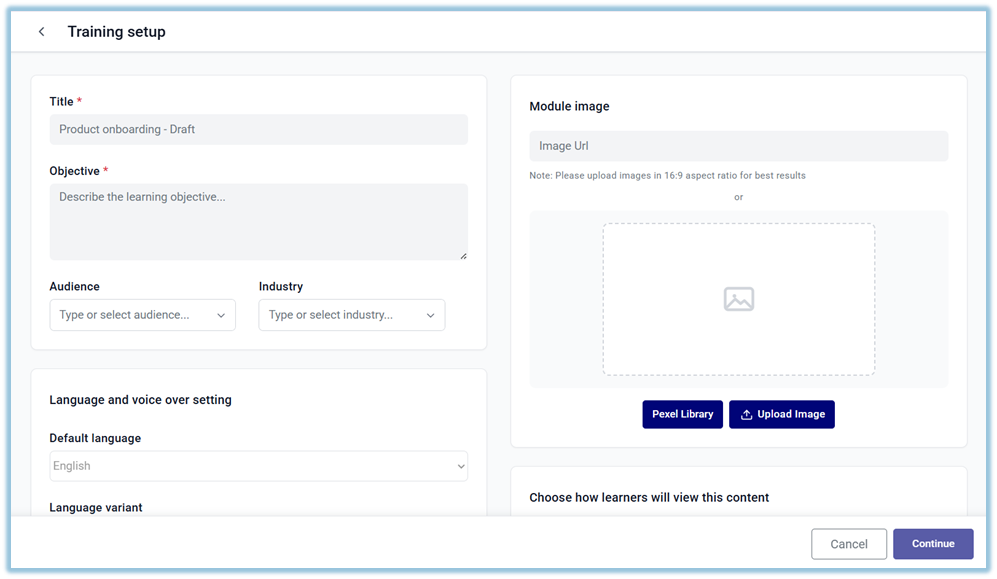
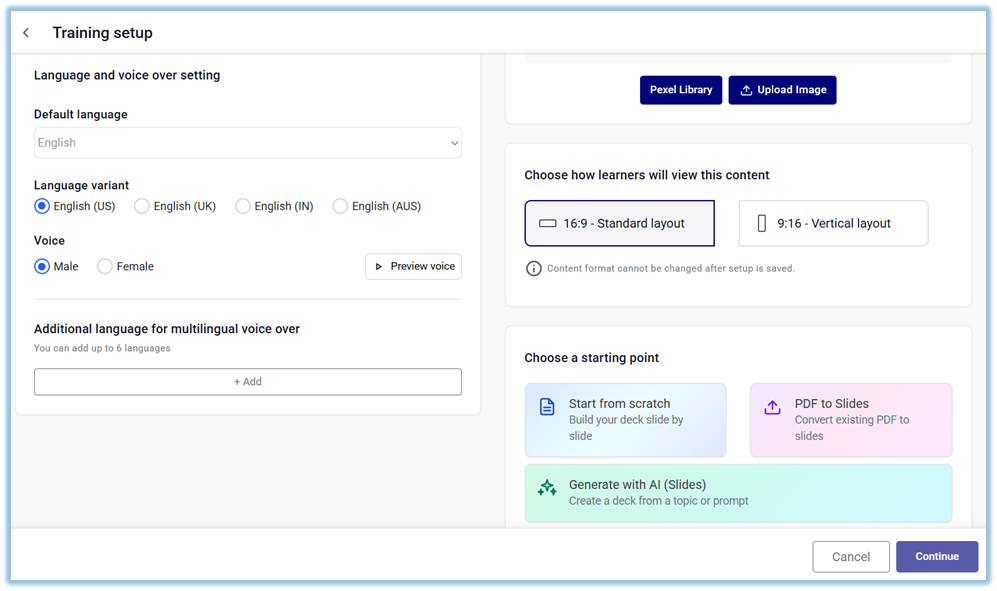
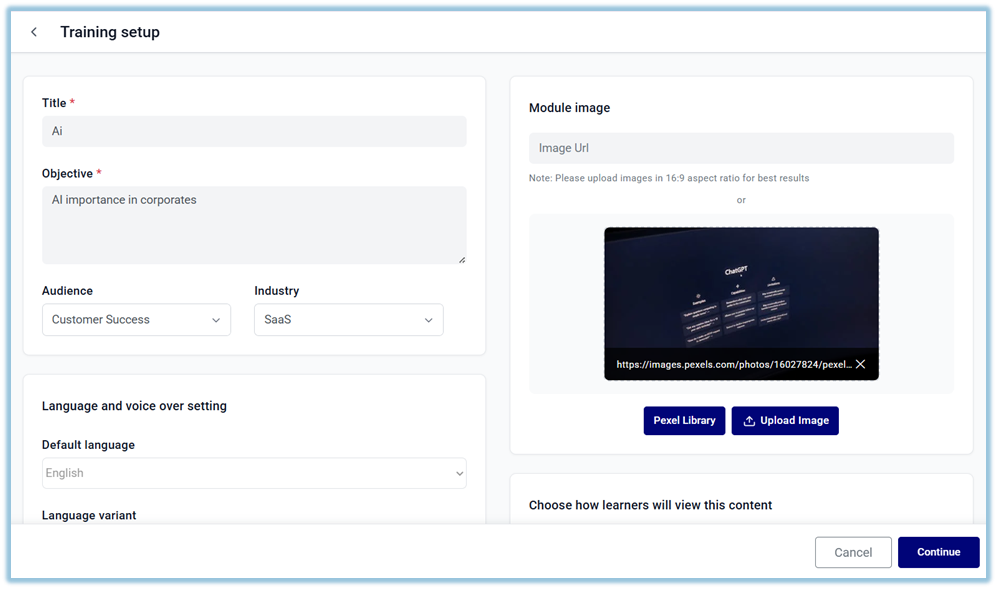
6. You will be redirected to the **Training Setup Page
**
7. Enter the required topic details
- **Title**
- **Objective**
- **Audience**
- **Industry / Domain**
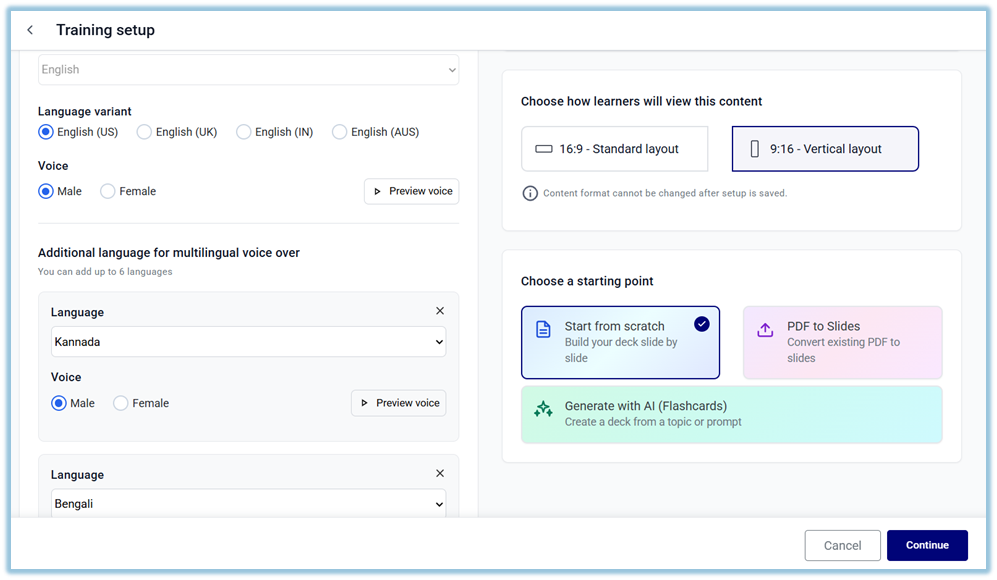
8. Configure content settings
- Select **Language**
- Select **Voice**
- Choose **Content Format** (e.g., 16:9 or 9:16)
9. In the **Starting Point** section, select **Start from scratch
**
10. Complete all required fields
11. Proceed to the next step to enter the **Topic Editor**
12. Click **Add Slide
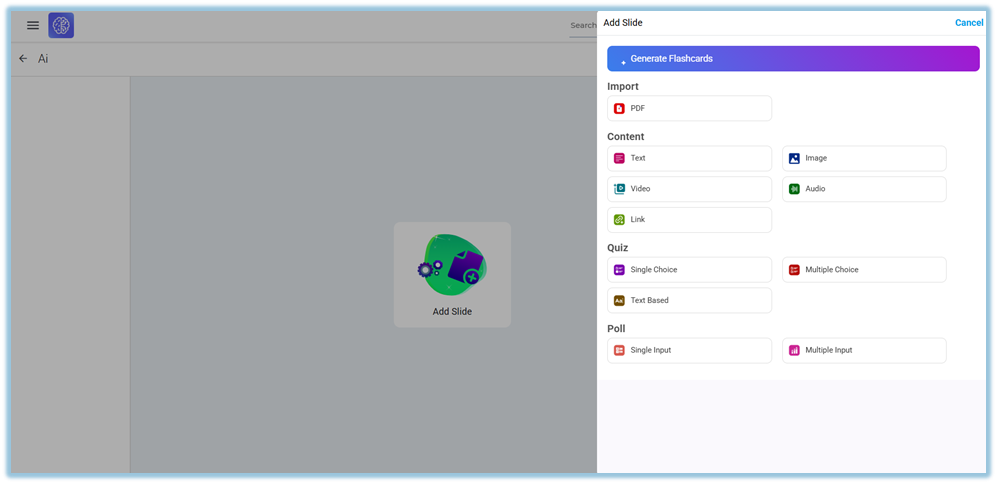**
13. Add learning content using available slide types
14. Translate content
15. Add **Voiceover**
16. Click **Preview**
17. Click **Publish**
### **5. User View**
##### **Admin View**
- All created topics are visible in the **Learnbee++ Library**
- Topics are displayed as cards with details like name and status
- Admin can open and edit any topic
##### **End User View**
- Learnbee++ content is **not directly visible in the Library**
- Users can access the content **only when it is used inside Content (modules)**
- Once assigned, users can view and consume the content as part of training
### **6. Best Practices**
- Use this option when full customization is required
- Clearly define objective before creating content
- Organize content into sections for better flow
- Review and validate content before publishing
### **7. Related Links / FAQs**
**Q: Does this option generate content automatically?**
No, content must be created manually.
**Q: Who can create topics in Learnbee++?**
Admins can create topics.
### **8. Version Notes**
Last Updated: 09 Apr 2026