# How do we set up Learning of the Day
### **1. Overview**
Learning of the Day allows admins to deliver learning content to users in small, daily portions. Instead of assigning a full module at once, content is published as learning cards on a scheduled basis. Learners receive a fixed number of cards each day at a predefined time, helping them consume learning regularly without overload.
[https://bsharpcorp.com/learning-cards-engage-learn-retain-old/](https://bsharpcorp.com/learning-cards-engage-learn-retain-old/)
### **2. When to Use**
- When learning should be delivered **daily instead of all at once**
- When users need **short, consistent learning**
- When engagement through **streaks and regular usage** is required
- When content should be scheduled for **specific days and time**
### **3. Concepts**
- **Learning of the Day** – Daily learning experience delivered to users
- **Learnbee Library** – Area where topics are created and managed
- **Learning Card** – A single piece of learning content
- **Feed Setup** – Configuration screen for Learning of the Day
- **Streak** – A count of consecutive days the learner completes learning
- **Review** – Option to revisit already completed cards
### **4. Set Up Guide**
##### Step 1: Create and Prepare the Topic
1. Click the **menu (three-line icon)**.
2. Go to **Learnbee Library**.
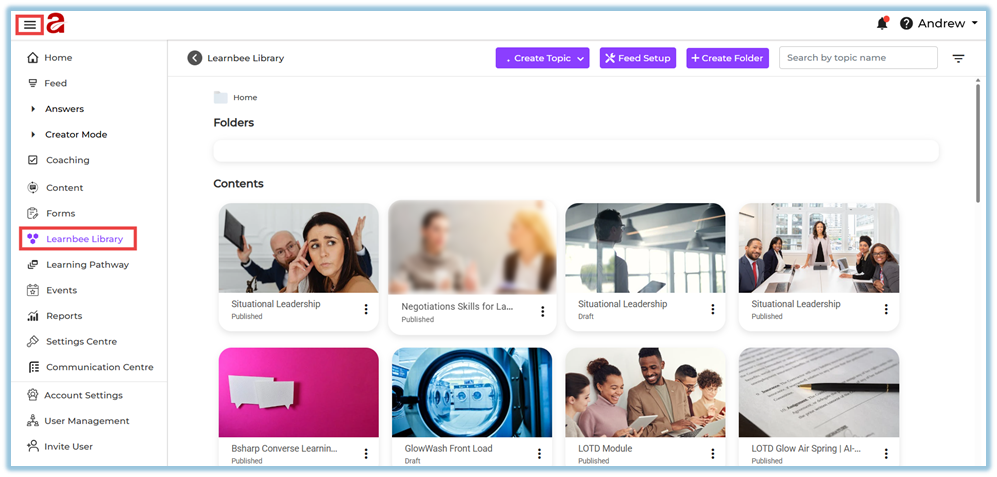
This page displays all topics that are created, published, and managed in Learnbee.
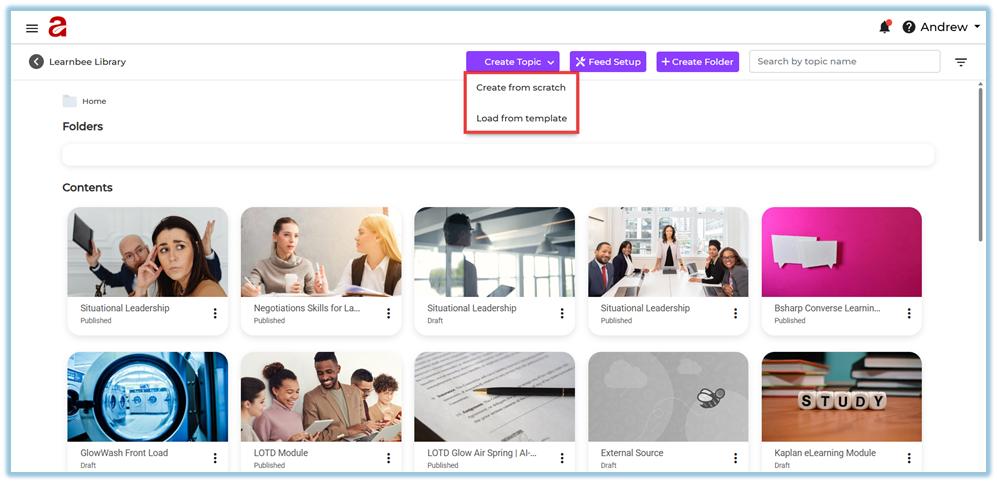
3. Click **Create Topic**.
You will see **two options**:
1. **Create from scratch**
2. **Load from template**
4. Choose one of the following based on your requirement:
- **Create from scratch**
Use this option to create a completely new topic from the beginning.
This is the most commonly used option for Learning of the Day.
- **Load from template**
Use this option if a reusable topic template already exists in another account.
The template can be loaded and reused instead of creating content again.
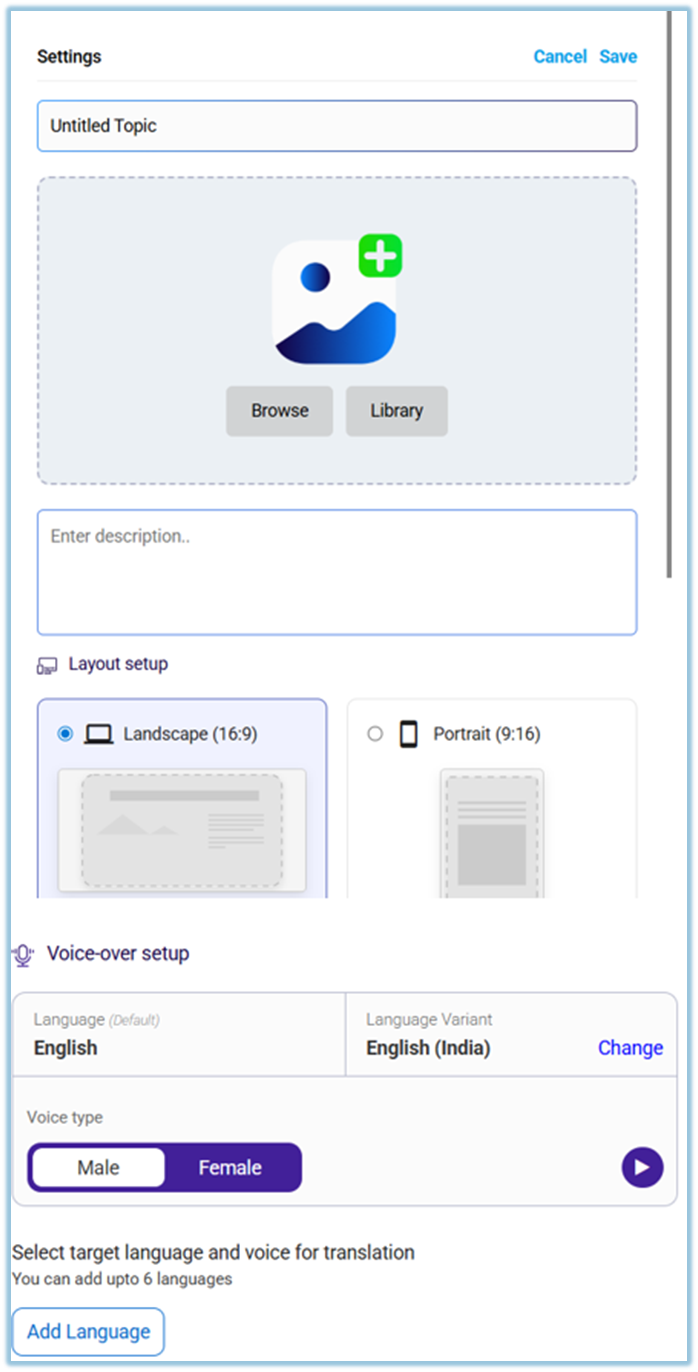
5. **Create from scratch – Topic Settings** After selecting Create from scratch, the Topic Settings page opens. This page is used to define the basic details of the topic before adding learning cards or quizzes.
6. On the settings page:
- Enter the **topic name**
- Add a **topic image** (from library or browse)
- Add a **description** if required
- Select the **layout** (Landscape or Portrait)
7. Configure **Voice-over settings**:
- Select voice type (Male or Female)
- Choose the base language
- Add additional languages if required (up to 6 per card)
8. Click **Save** to proceed.
##### Step 2: Add Learning Content (Cards, Flashcards, Quiz)
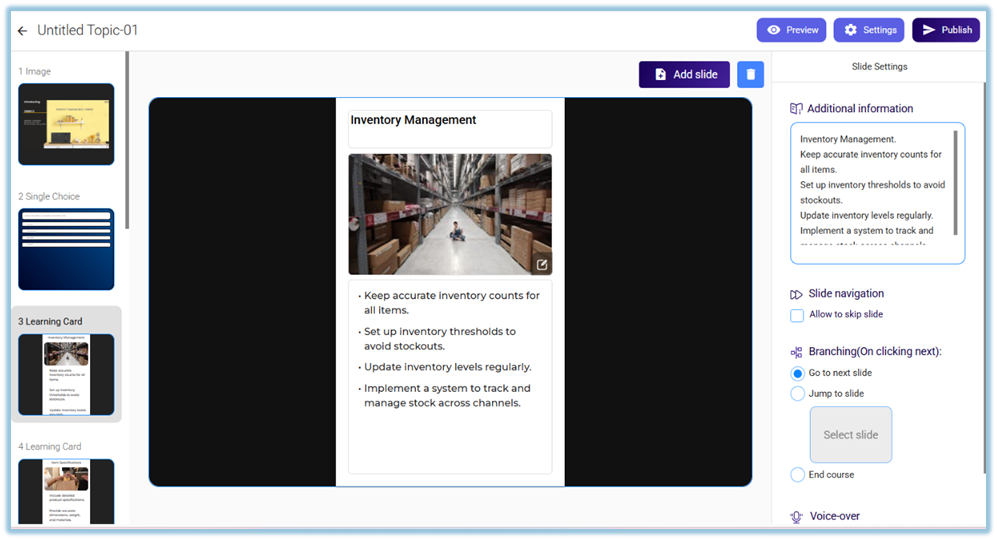
1. **Click Add slide**
From the topic editor screen, click **Add slide** to view all available content options.
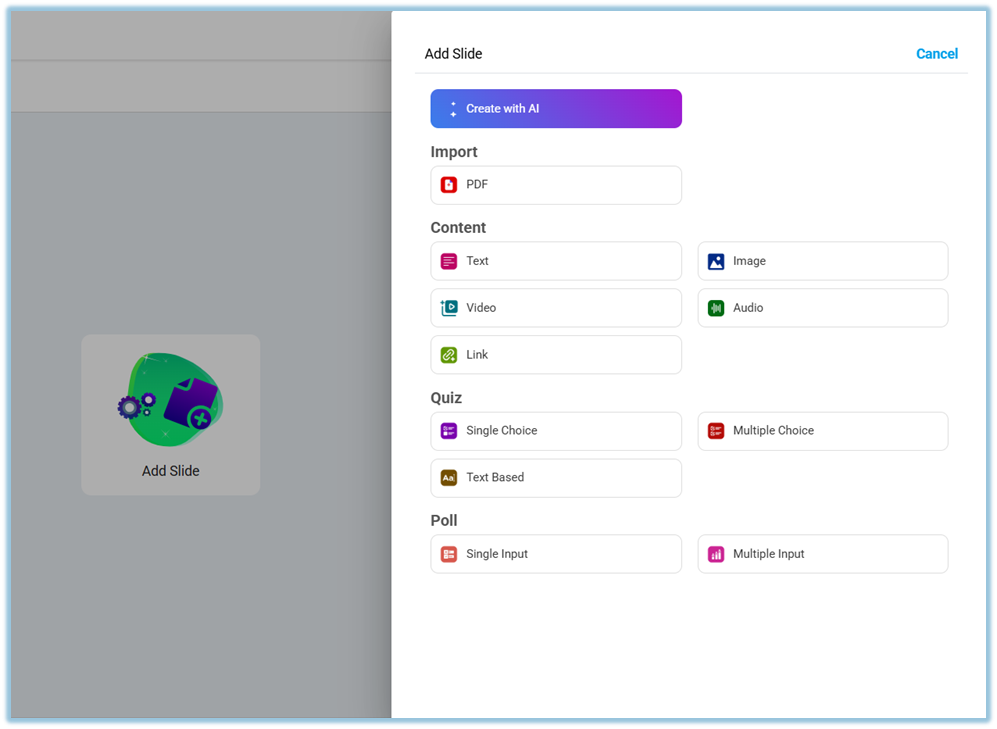
2. **Add content using any of the following options:**
- **Create with AI**
- **PDF import** (up to 30 slides)
- **Text**
- **Image**
- **Video**
- **Audio**
- **Link**
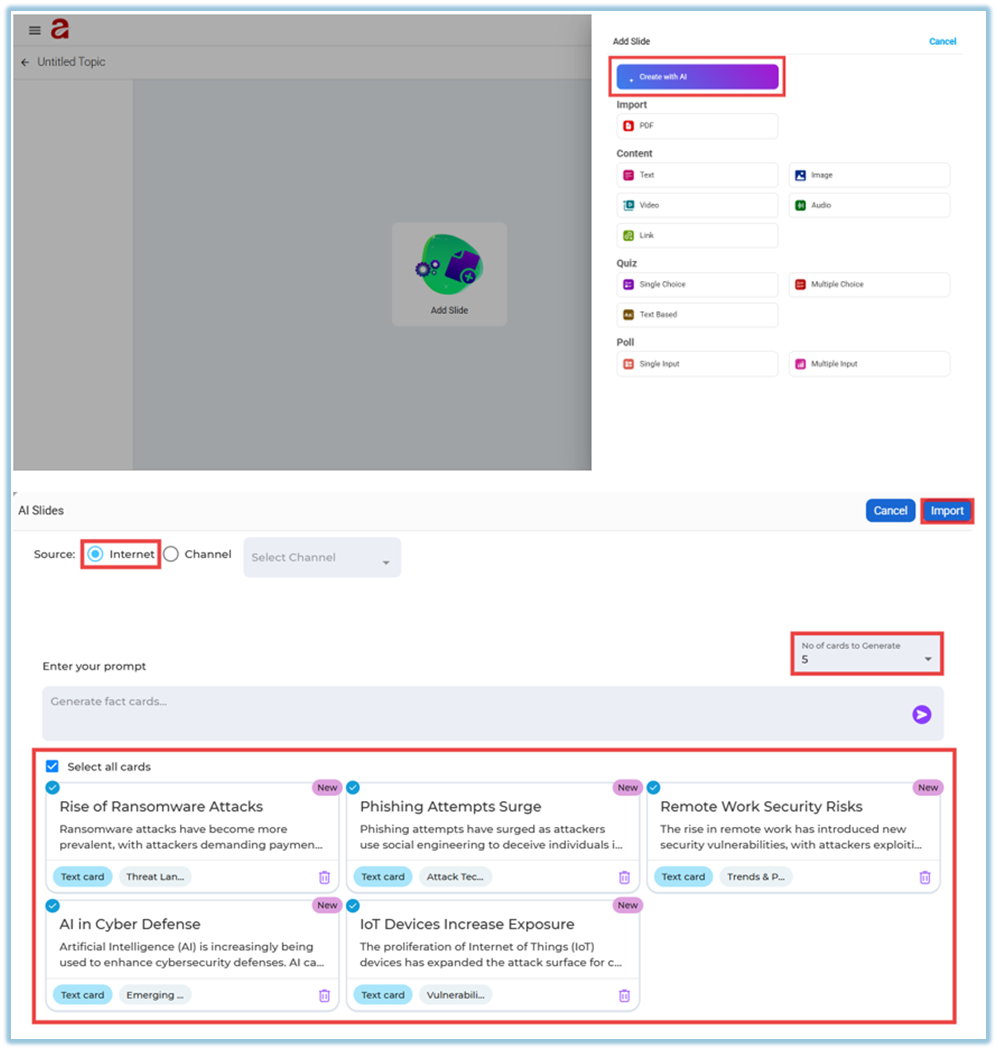
3. **To generate learning cards using AI:**
- Click **Create with AI**
- Choose **Internet** or **Channel** as the source
- Enter a prompt describing the topic
- Select the number of cards to generate (up to 5)
- Click **Generate**, review the cards, and then click **Import
**
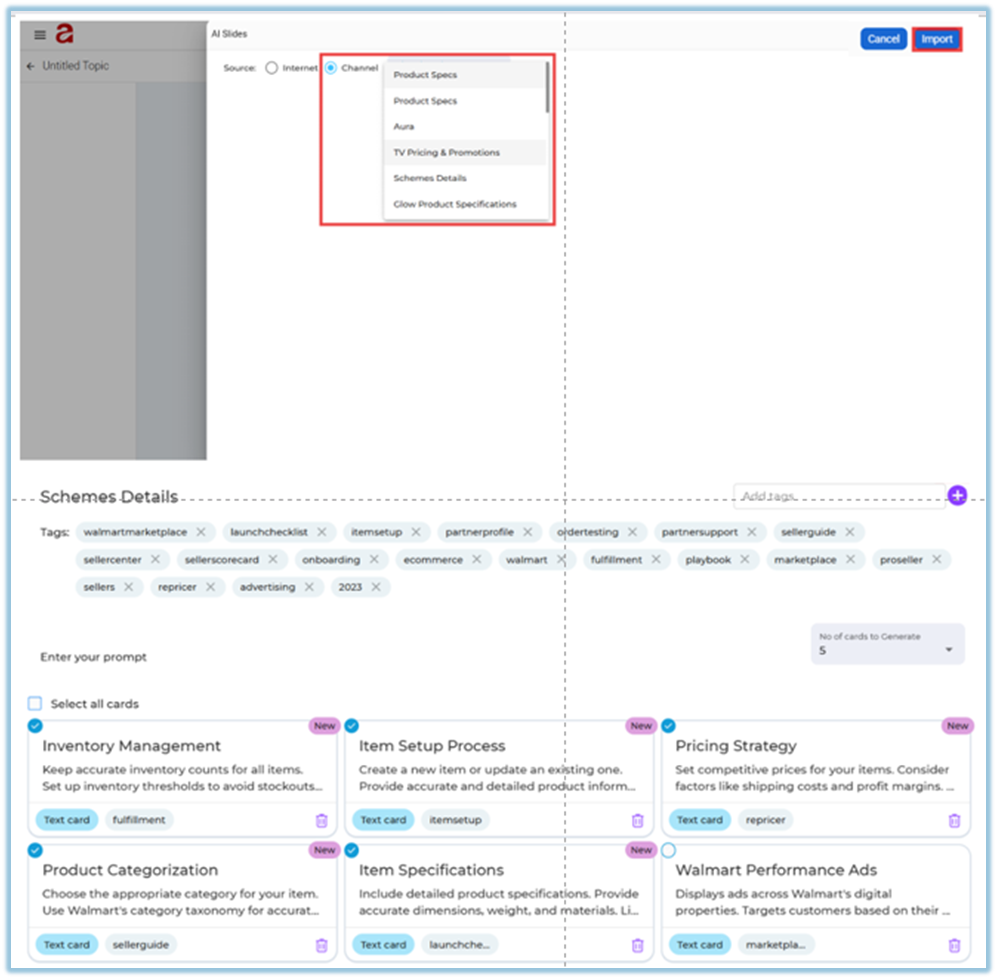
4. **To generate learning cards from Channels:**
- Select **Channel** as the source
- Choose an existing **Instant Answers channel**
- **the system automatically gives the tags based on the selected document**
- Select relevant **tags** from the document
- Choose the number of cards to generate
- Click **Generate** and then **Import
**
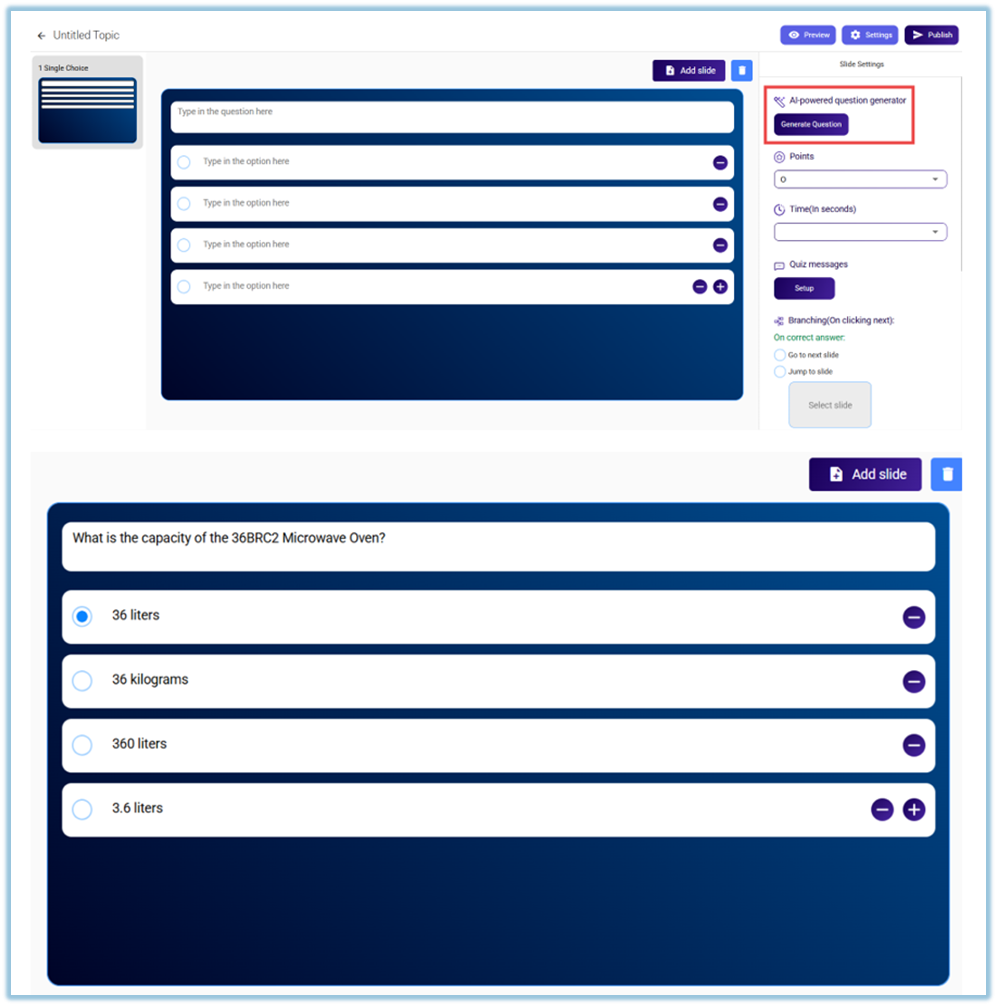
5. **Add Quiz slides after learning cards:**
- Click **Add slide → Quiz**
- Choose the quiz type:
- **Single Choice**
- **Multiple Choice**
- **Text Based**
- Add questions manually, or
- Click **Generate Question** to create questions using AI
6. **Add Poll slides to collect learner input:**
- Click **Add slide → Poll**
- Choose the poll type:
- **Single Input** – Learners can submit one response
- **Multiple Input** – Learners can submit more than one response
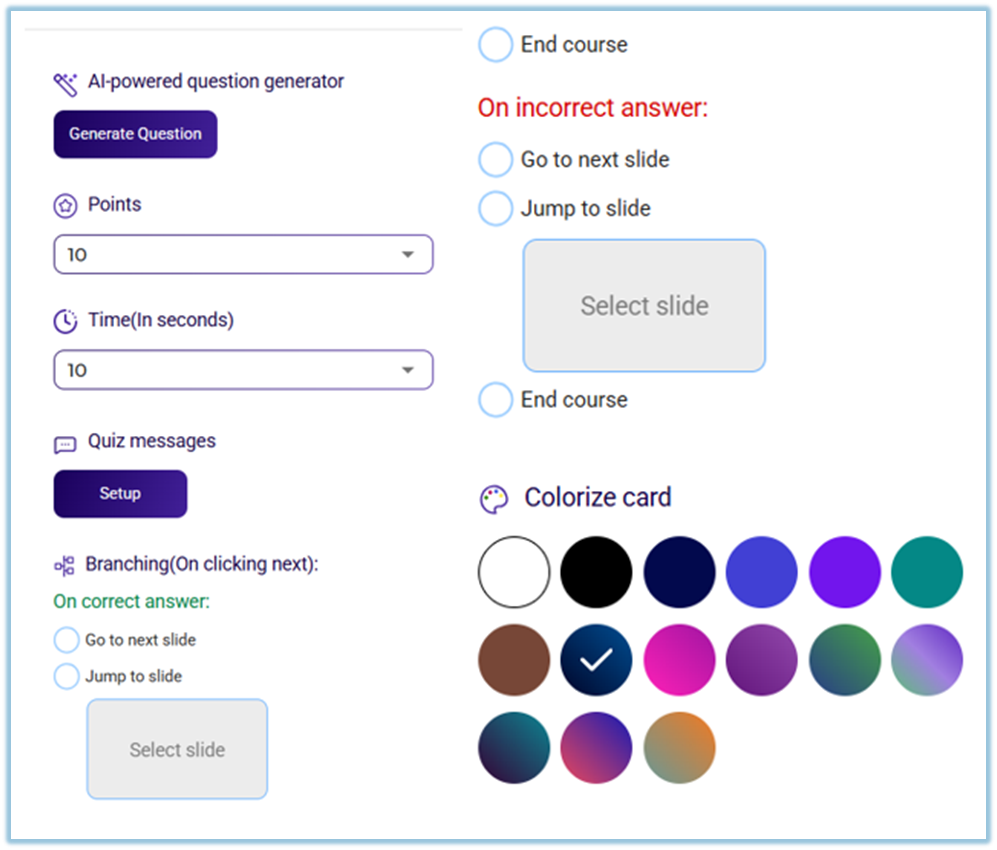
7. **Configure quiz settings:**
- Set **Points** for correct answers
- Set **Time (in seconds)** for each question
- Configure **Quiz Messages** (default or custom)
- Set **Branching rules**:
- On correct answer → Go to next slide / Jump to slide / End course
- On incorrect answer → Go to next slide / Jump to slide / End course
- Optional: **Colorize the card** for better visual distinction
8. **Review and publish:**
- Click **Preview** to check the learning flow
- Make any required edits
- Click **Publish** to make the topic available in the Learnbee Library

##### Step 3: Set Up Learning of the Day Feed
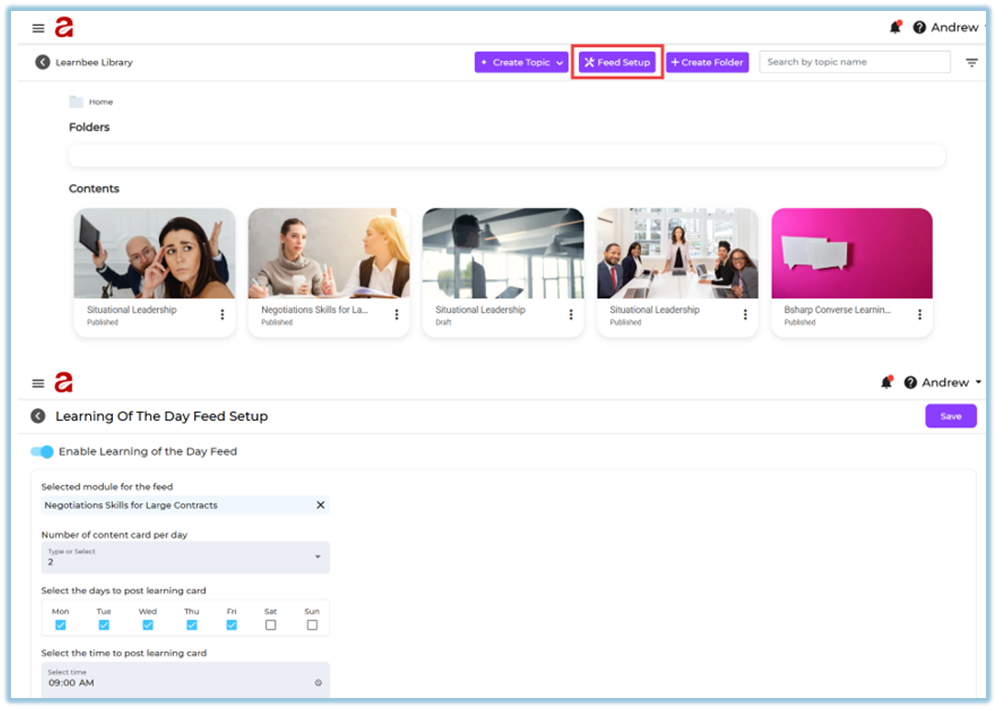
1. Go to **Learnbee Library**.
2. Click **Feed Setup**.
3. Enable **Enable Learning of the Day Feed**.
4. Select the **module (topic)** you created.
5. Select **Number of content card per day**.
6. Select the **days** to post learning cards.
7. Select the **time** to post learning cards.
8. Click **Save**.
### **5. User View**
Learners see a **Learning of the Day** card on the **Home page**.
**Streak count** shows consecutive days of completion.

**Day-wise tracker indicators:**
- **Grey** – No learning card is published for that day
- **❌ Red cross** – Learning was scheduled but not completed (missed)
- **✔ Green check** – Learning completed successfully
- **Purple circle** – Learning scheduled for upcoming days
### **6. Best Practices**
- Use **2–3 cards per day** for better completion.
- Ensure the topic has enough learning cards.
- Schedule learning during regular working hours.
### **7. Related Links**
- Learning Cards overview:
[https://bsharpcorp.com/learning-cards-engage-learn-retain-old/](https://bsharpcorp.com/learning-cards-engage-learn-retain-old/)
### **8. Version Notes**
Last Updated: 17 Dec 2025