# Other Features
# Levels
### **1. Overview**
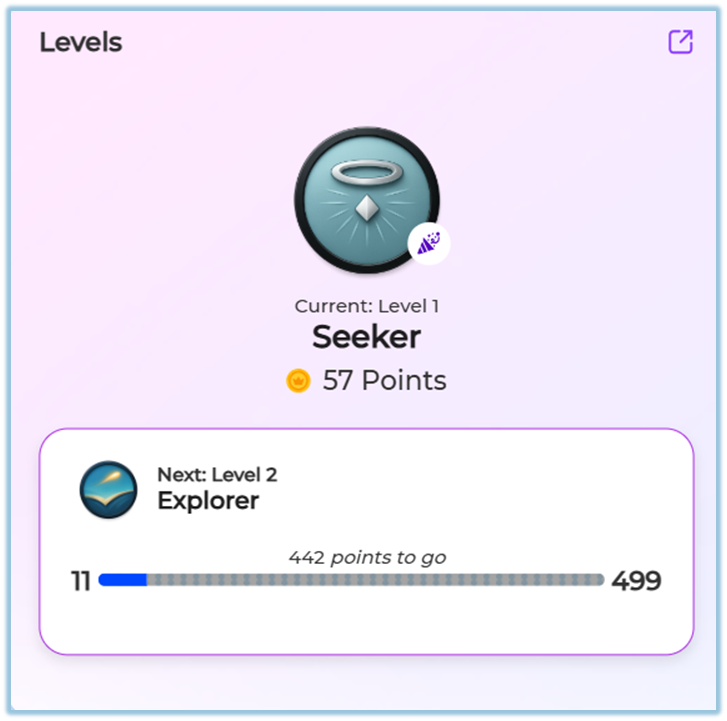
Levels represent a learner’s progress on the platform. As learners earn points by completing learning activities, they automatically move from one level to the next (for example, Level 1 to Level 2). Levels help learners understand how far they have progressed in their learning journey.
### **2. When to Use**
Levels are useful when you want to:
- Visually show learner progress on the platform
- Motivate learners to complete more modules and pathways
- Track learning progress in a simple, easy-to-understand way
Levels work automatically in the background once they are configured.
### **3. Concepts**
##### Levels
Levels indicate the learner’s current stage based on points earned. Each level represents a milestone in the learning journey.
##### Points-Based Progression
Learners earn **points** when they complete modules and Learning of the Day (LOTD).
All earned points are combined to calculate the learner’s total points.
Levels are determined by the total points earned.
When the learner reaches the required number of points, the system automatically moves the learner to the next level.
No manual action is required from the learner.
##### Automatic Level Upgrade
Once the required points are reached, the system automatically upgrades the learner to the next level. No manual action is required.
##### Customizable Levels
Although new levels cannot be added, the existing level structure and point criteria can be customized by the admin.
### **4. Setup Guide: Manage Levels**
Follow these steps to view and manage Levels on the platform:
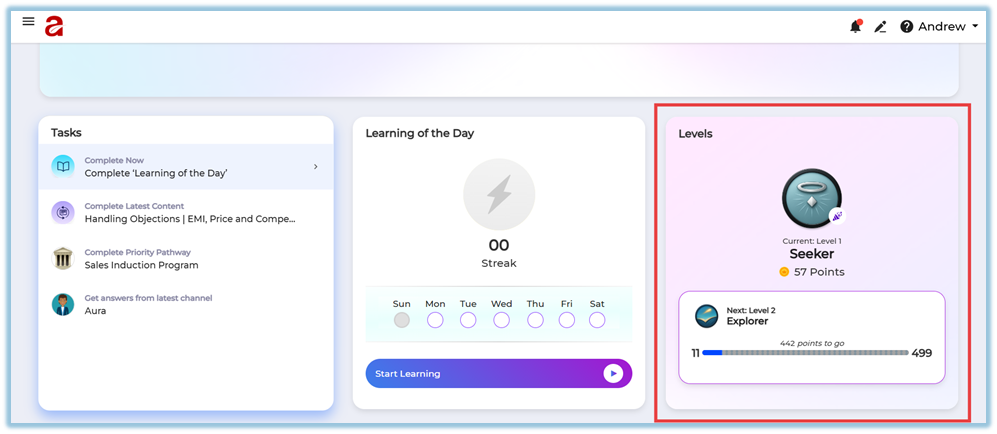
1. **Open the Levels page from Home**
On the Home page, locate the **Levels** section and click on it to navigate to the main Levels page.
[https://converse.bsharpcorp.com/celebrate/user\_levels](https://converse.bsharpcorp.com/celebrate/user_levels)
2. **Access Edit Levels**
On the Levels page, click **Edit Levels** (visible at the top corner of the page).
[https://converse.bsharpcorp.com/celebrate/edit\_levels](https://converse.bsharpcorp.com/celebrate/edit_levels)
3. **Customize Levels**
In the Edit Levels screen, you can:
- Update the **level name**
- Modify the **minimum and maximum point range**
- Edit the **level description
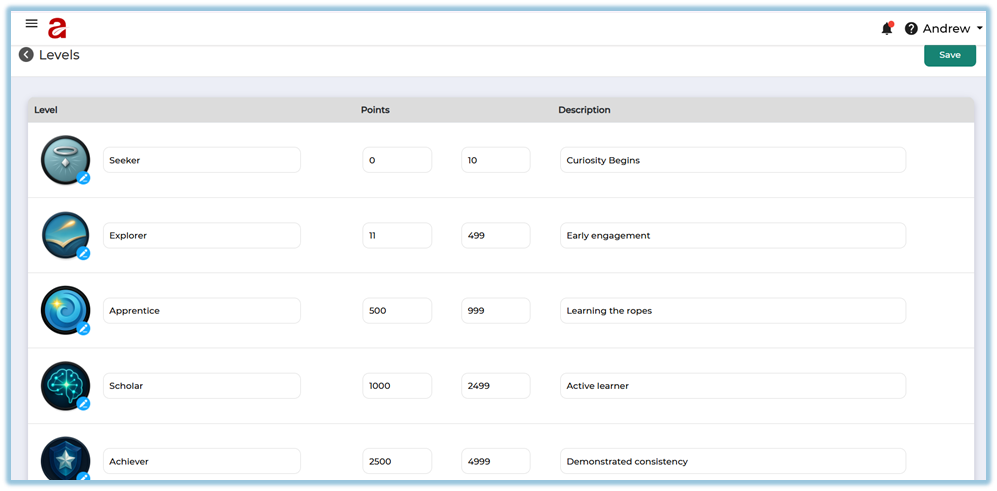**
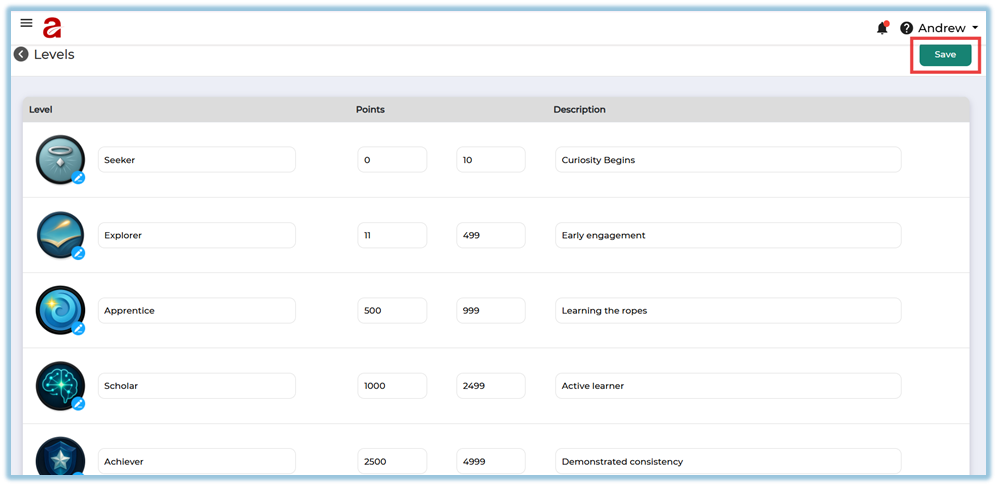
4. **Save the changes**
After making the required updates, click **Save**.
5. **Apply to learners**
Once saved, the updated level rules are automatically applied to all learners based on their total points.
### **5. User View**
- Learners can see their current level on the Home page.
- As learners earn more points, their level updates automatically.
- Learners do not need to take any action to move between levels.
### **6. Reporting**
- Level information is used only for progress visibility.
- Levels do not impact reports, certifications, or access permissions.
- Admins can view learner levels as part of overall learner progress.
### **7. Best Practices**
- Set clear and achievable point ranges for each level.
- Ensure points are awarded consistently across modules.
- Use levels as a motivational indicator rather than an access control.
### **8. Troubleshooting & FAQs**
**Q: Why is a learner’s level not updating?**
Ensure the learner has earned the required points and completed the content successfully.
**Q: Can learners manually change their level?**
No. Levels are updated automatically by the system.
**Q: Can admins add new levels?**
No. Levels cannot be added, but existing levels can be customized.
### **9. Version Notes**
Last Updated: 15 Dec 2025
# Daily Actions
### **1. Overview**
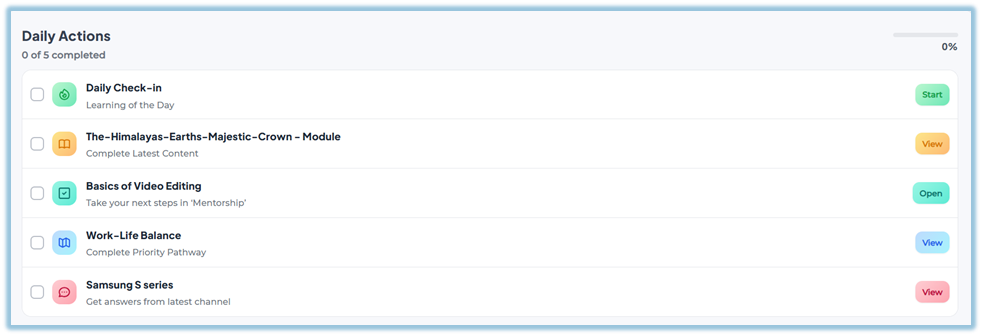
The **Daily Actions** feature helps learners understand what they need to complete next on the platform. It provides a clear list of pending learning actions, making it easy for learners to stay focused and complete required learning on time.
This feature improves learner engagement by guiding them step by step on what to complete next, without confusion.
### **2. When to Use**
Use the Daily Actions feature when learners:
- Want to know what learning items are pending
- Need guidance on what to complete next
- Have multiple assigned items across different features
This feature is especially useful for keeping learners on track without manual follow‑ups.
### **3. Concepts**
- **Daily Actions Widget**: A section visible on the Home page that lists pending learning items.
- **Automated Listing**: Daily Actions are generated automatically by the system.
- **Incomplete Items**: Only learning items that are not completed appear in Tasks.
- **Redirect Action**: Clicking an action takes the learner directly to the relevant page.
The Tasks widget checks incomplete items across these platform features:
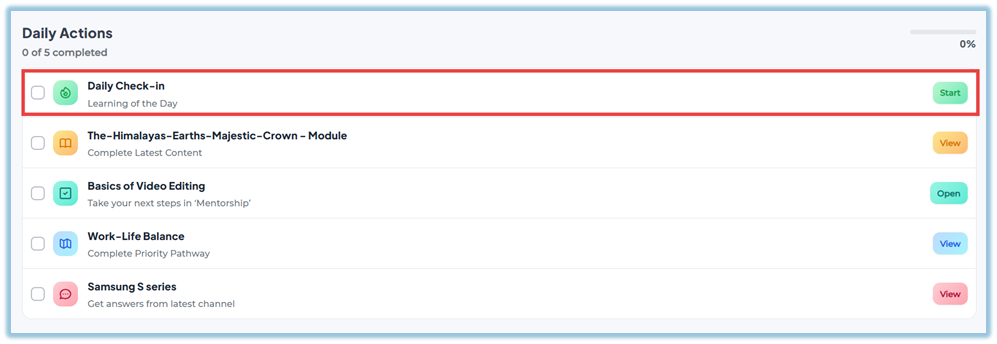
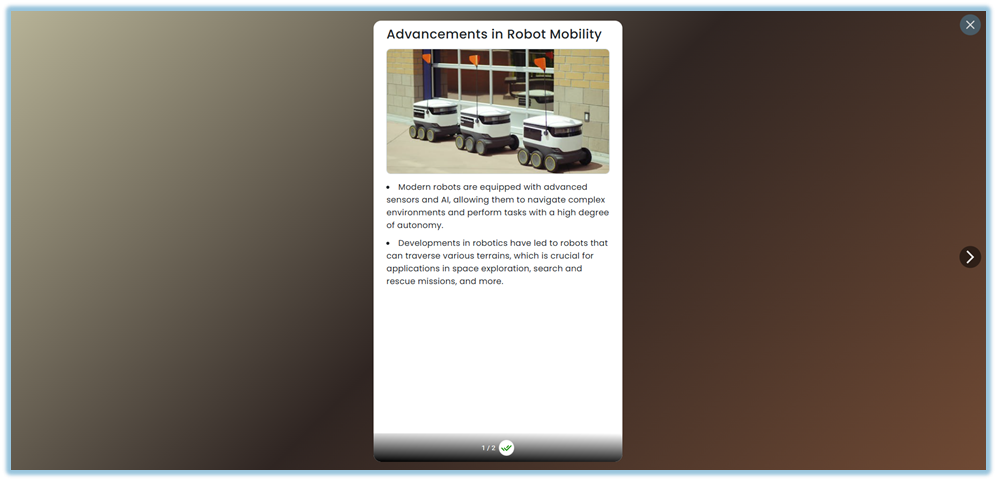
- Learning of the Day (LOTD)
- Modules / Training content
- Coaching
- Learning Pathways
- Instant Answers
### **4. Setup Guide**
No setup is required for the Daily Actions feature.
- Daily Actions are system‑generated.
- Admins do not need to create or assign actions manually.
- Learners automatically see Daily Actions based on their assigned and incomplete learning items.
### **5. User View**
- The Daily Actions widget appears on the **Home page**.
- Learners can scroll down slightly to view the Daily Actions section.

- Each action clearly shows what needs to be completed.
- Selecting an action redirects the learner to the exact learning item (module, pathway, coaching, LOTD, or instant answer).
### **6. Reporting**
- Daily Actions do not have a separate report.
- Completion is tracked within the respective feature (module, learning pathway, coaching, LOTD, or instant answers).
### **7. Best Practices**
- Learners should regularly check the Daily Actions section to stay updated.
- Completing Daily Actions helps ensure no assigned learning is missed.
- Use Daily Actions as a daily checklist for learning progress.
### **8. Troubleshooting & FAQs**
**Q: Can admins manually add or remove Daily Actions?**
No. Daily Actions are fully automated and system‑driven.
**Q: Why am I seeing many Daily Actions?**
Because there are multiple assigned learning items that are not yet completed.
**Q: Will completed items still appear in Daily Actions?**
No. Once an item is completed, it is automatically removed from the Daily Actions list.
**Q: What happens when I click a Daily Actions?**
You will be redirected to the corresponding learning item.
### **9. Version Notes**
Last Updated: 21 Apr 2026
# Mentor
### **1. Overview**
Mentoring in Bsharp Converse allows users to create, assign, and track mentoring tasks to help individuals or teams learn new skills or improve existing ones. Mentors can assign tasks, monitor progress, add feedback, and manage mentoring sessions using categories, skills, sub-skills, due dates, and AI Copilot support.
### **2. When to Use**
- When you want to guide team members in learning a new skill or improving an existing skill.
- When mentors need to assign structured tasks with timelines and tracking.
- When managers or trainers want visibility into mentoring progress and outcomes.
- When mentoring sessions need to be reused using templates.
### **3. Concepts**
- **Mentor** – The user who creates and assigns mentoring tasks.
- **Assignee** – The user who receives and completes the mentoring task.
- **Observer** – A user added to monitor the mentoring task without performing it.
- **Tasks** – Action items created as part of a mentoring session.
- **Sub Tasks** – Smaller steps added under a task.
- **Categories** – High-level classification of the mentoring topic.
- **Skills and Sub-Skills** – Skill mapping used to track learning focus.
- **Session Status** – The current state of a mentoring task (Unread, In Progress, Completed, Dropped, Overdue).
- **Templates** – Saved mentoring sessions that can be reused.
### **4. Set Up Guide**
##### Navigation
1. Click the **menu bar** on the left side.
2. Select **Mentor** from the menu.
[https://converse.bsharpcorp.com/celebrate/feedbacks/list](https://converse.bsharpcorp.com/celebrate/feedbacks/list)
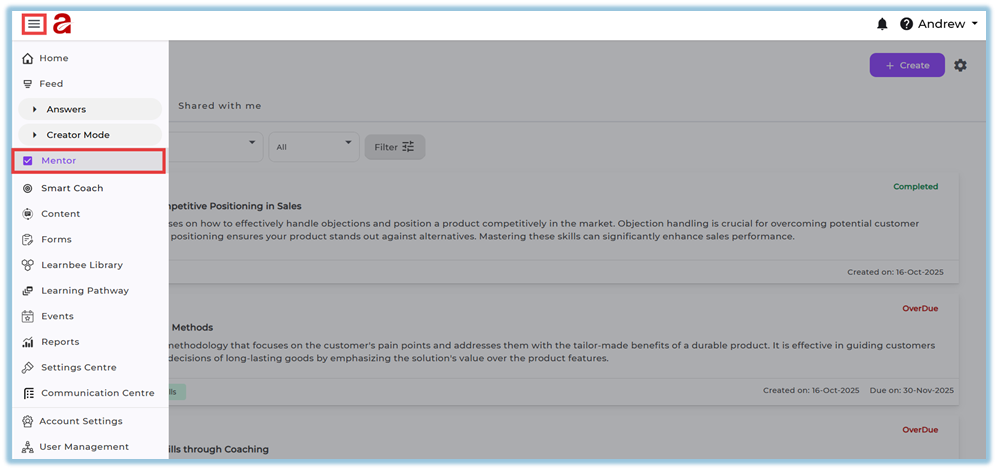
3. The Mentor page opens with three tabs:
- **Received** – Displays mentoring tasks assigned to you for completion.
- **Sent** – Displays mentoring tasks you have assigned to others.
- **Shared with me** – Displays mentoring tasks where you are added as an observer for visibility.

##### Create Categories, Skills, and Sub-Skills (Optional Setup)
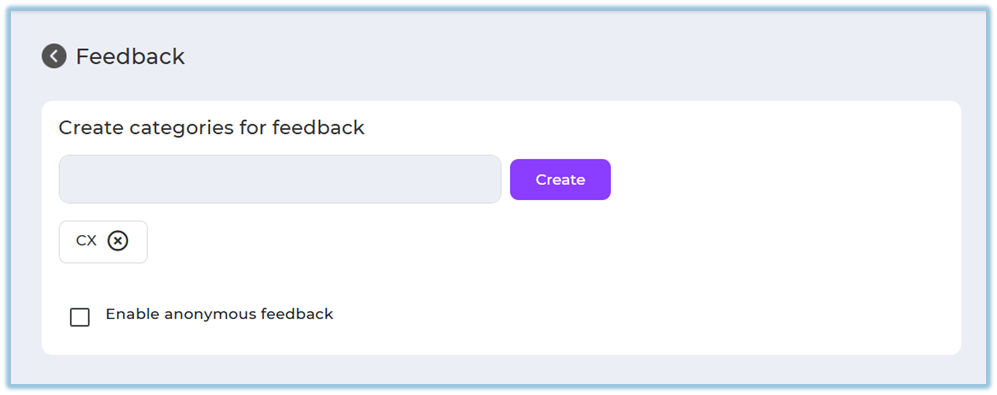
4. Click the **settings icon** on the top-right of the Mentor page.
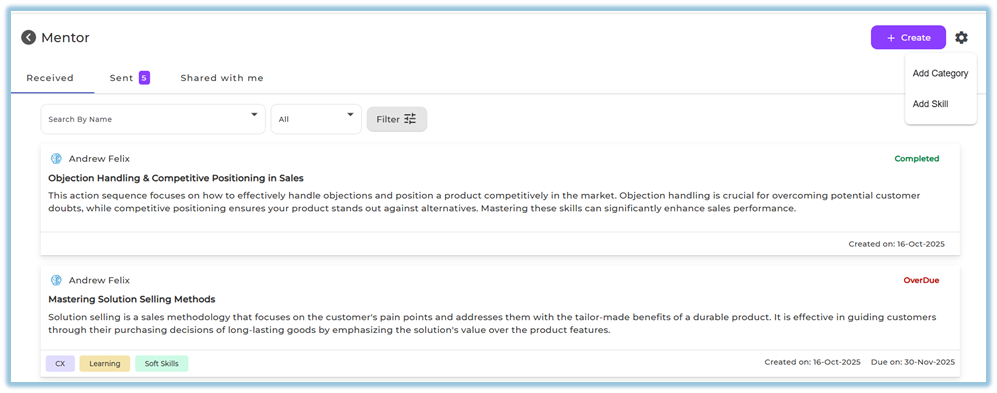
5. Click **Add Category** to create mentoring categories.
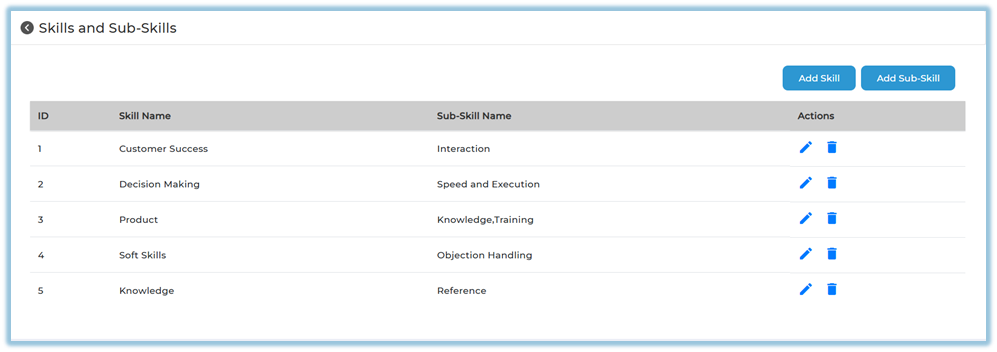
6. Click **Add Skill** to create skills.
7. Add **Sub-Skills** under the selected skill as required.
##### Create a Mentoring Session
8. Click **+ Create** on the Mentor page.
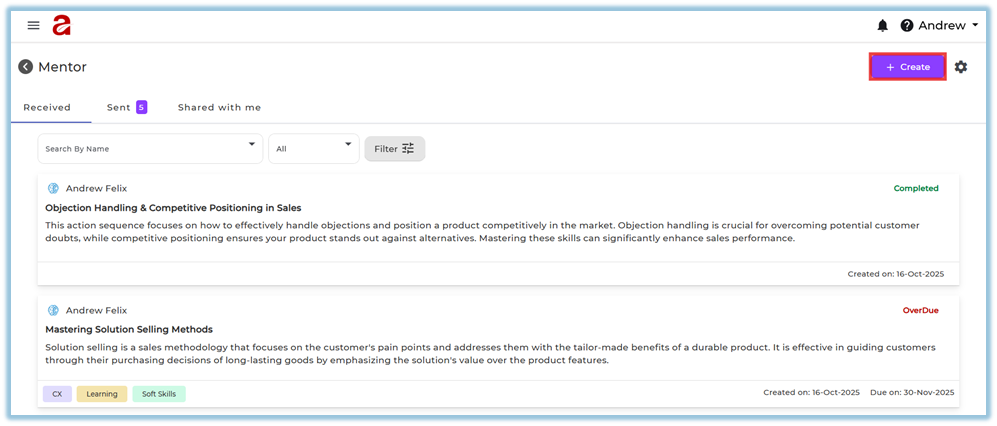
9. The **Create Mentorship** page opens.
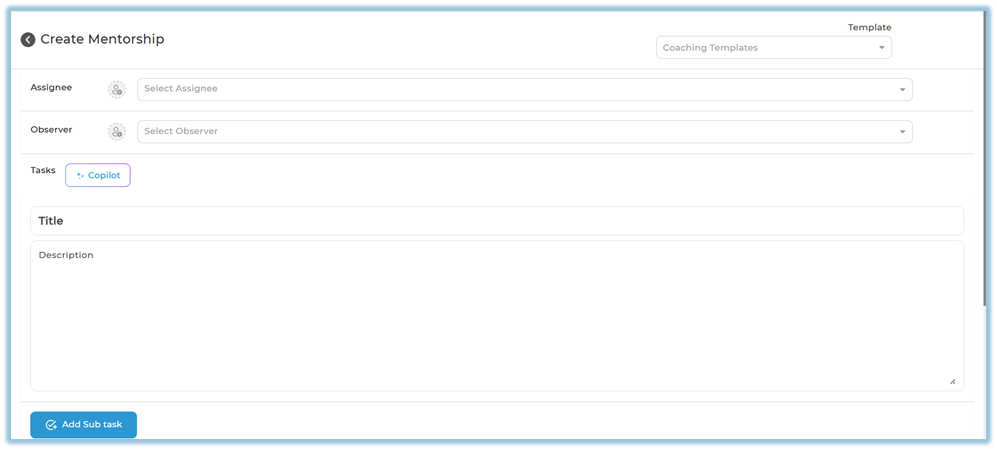
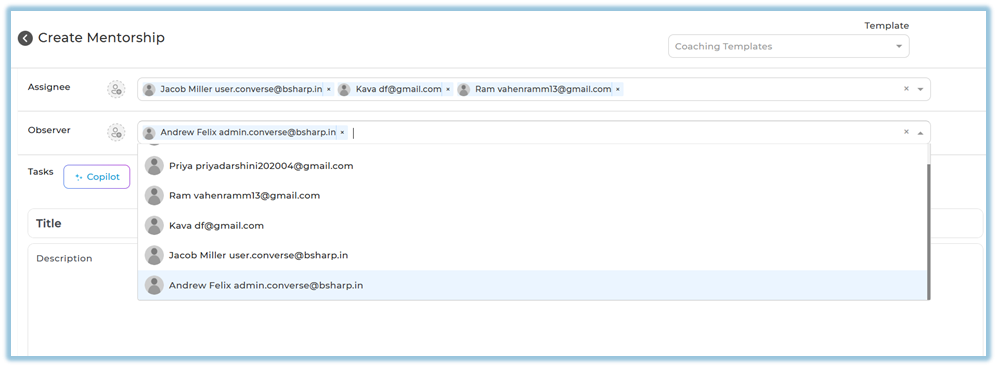
##### Assign Users
10. Select **Assignee** to choose one or more users who will receive the task.
11. Select **Observer** to add users who should monitor the task.
##### Add Tasks
12. Enter the **Title** and **Description** manually
**or**
13. Click **Copilot** under **Tasks**.
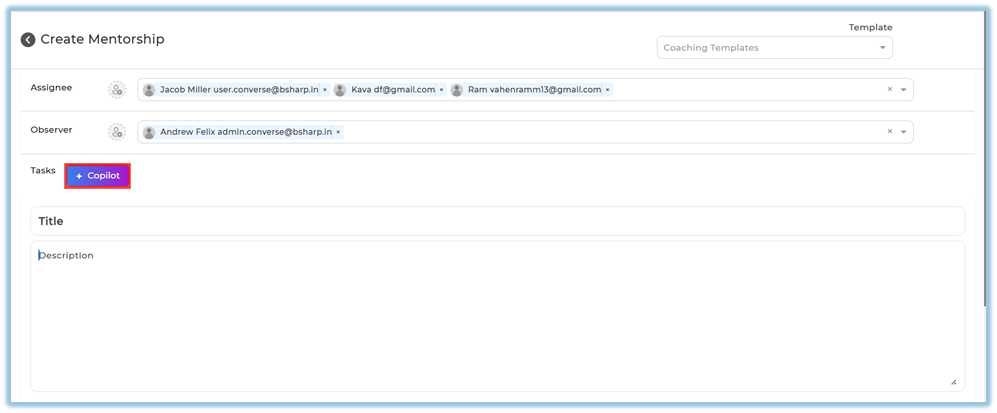
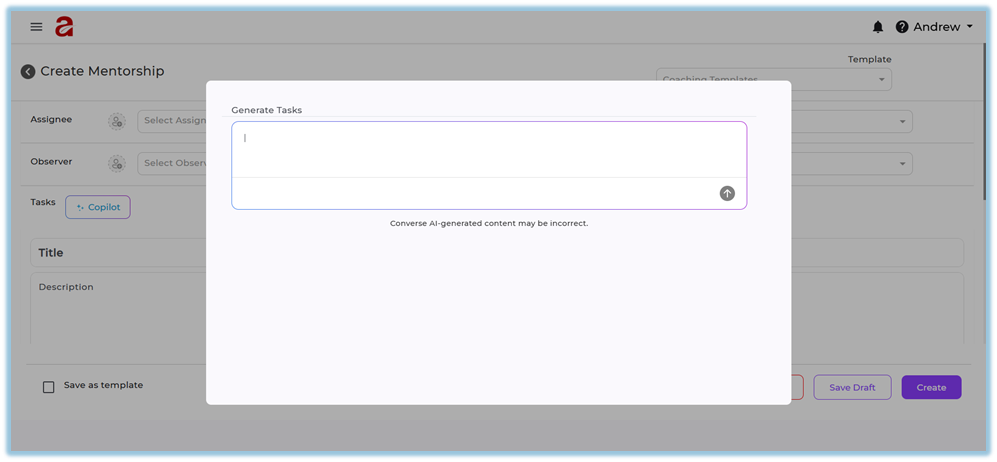
14. Enter a topic (for example: *I want to learn about Canva*).
15. Click the **arrow icon** to generate tasks.
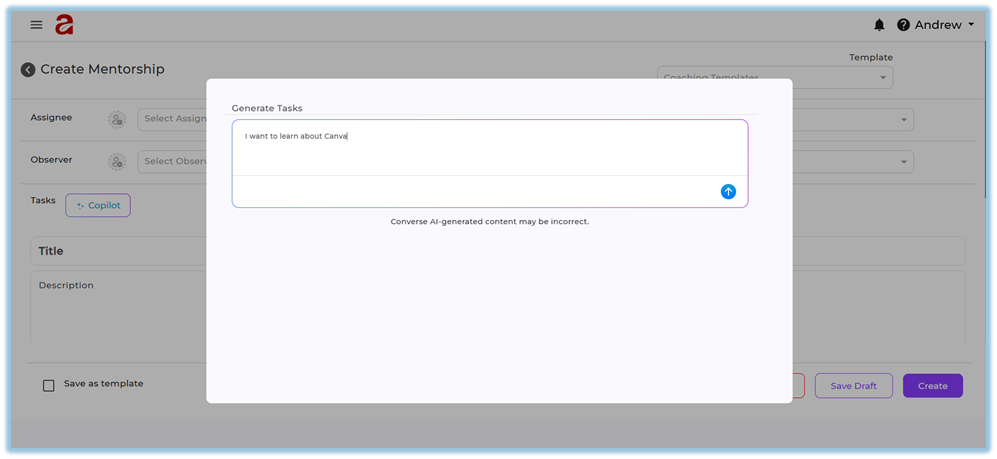
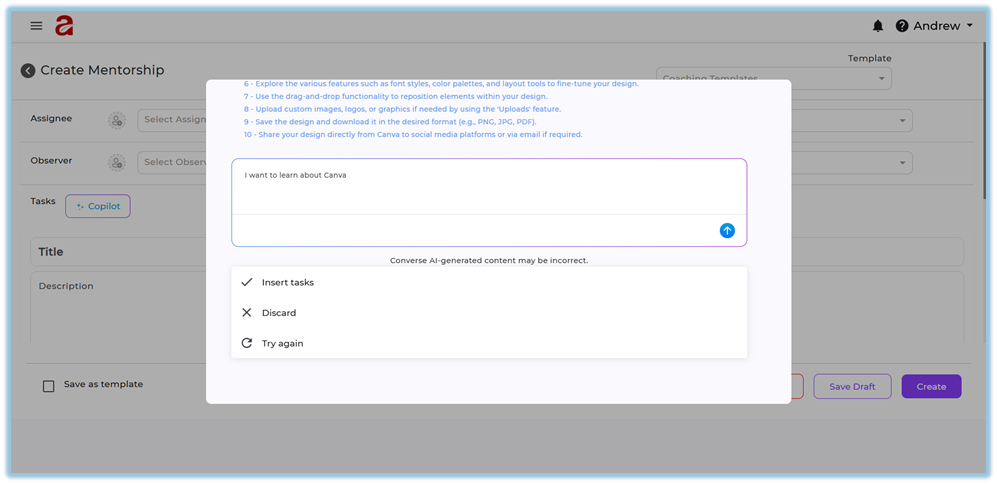
16. After tasks are generated, choose one of the following options:
a. **Insert tasks** – Adds the generated tasks to the mentorship.
b. **Discard** – Removes the generated tasks.
c. **Try again** – Regenerates tasks for the same topic.
##### Manage Tasks
17. Edit generated tasks if required.
18. Add tasks manually if needed.
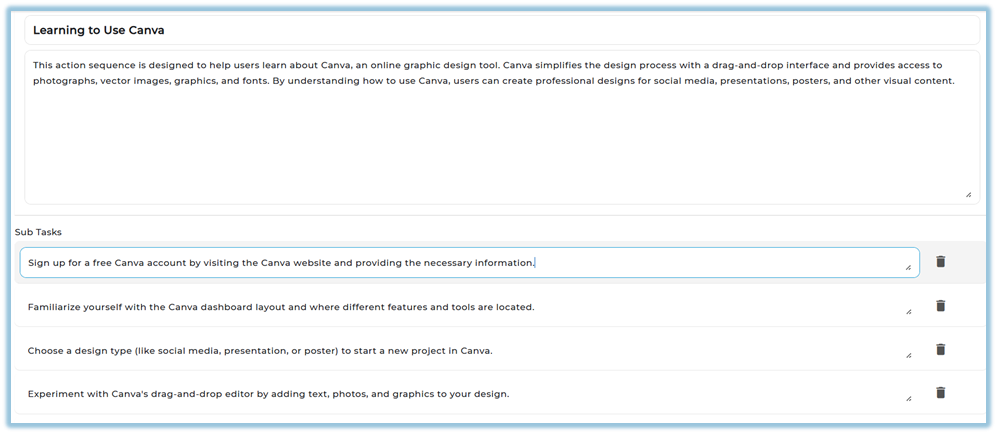
19. Add **Sub Tasks** using **Add Sub task**.
20. Delete tasks or sub-tasks if required.

##### Add Classification and Due Date
21. Select **Category**.
22. Select **Skill** and **Sub Skill**.
23. Select **Company Value**.
24. Set the **Due Date**.

##### Save or Create
25. Choose one of the following options:
- **Cancel** – Discards the session.
- **Save Draft** – Saves the session to complete later.
- **Create** – Creates and assigns the mentoring task.
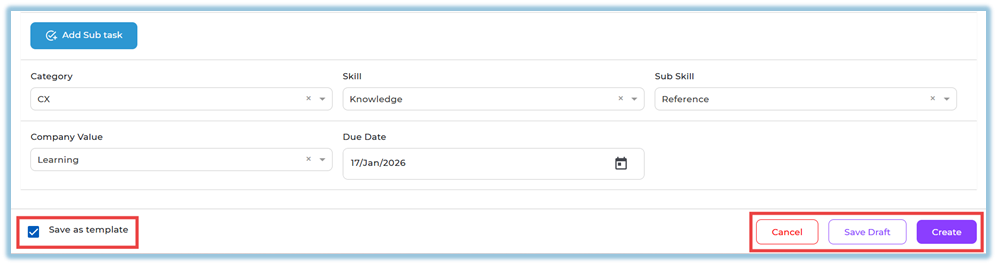
26. Enable **Save as template** if the session should be reused.
### **5. User View**
- Assigned users see the mentoring task under the **Received** tab.
- Mentors see created tasks under the **Sent** tab.
- Observers see tasks under **Shared with me**.
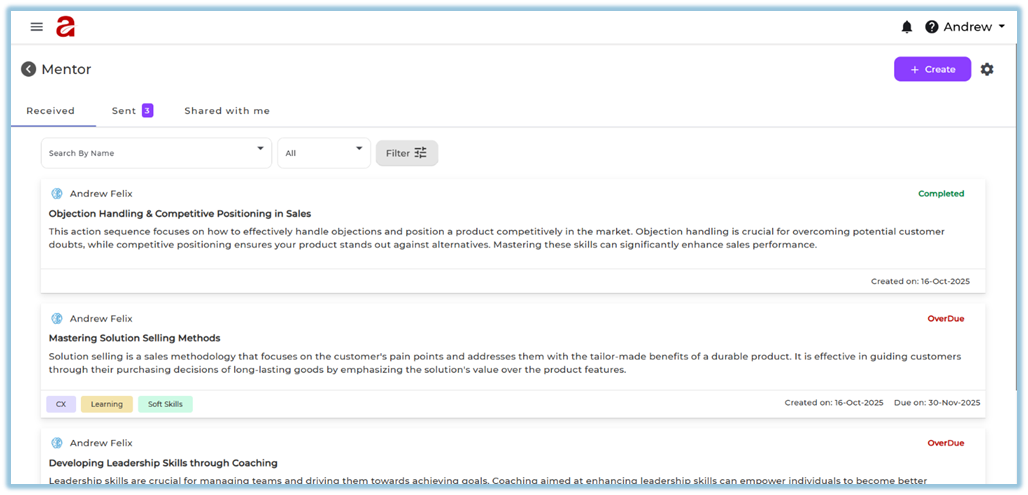
- Task cards display title, description, tags, created date, due date, and status.
### **6. Reporting**
Mentoring progress is visible directly within the Mentor module using session status and filters. Mentors can track task states such as **Unread**, **In Progress**, **Completed**, **Dropped**, and **Overdue** from the Sent tab.
### **7. Best Practices**
- Use clear titles and descriptions for mentoring tasks.
- Assign realistic due dates.
- Use templates for repeated mentoring scenarios.
- Map tasks to skills and sub-skills for better tracking.
- Review overdue and dropped sessions regularly.
### **8. Related Links / FAQs**
**Q: What happens when a task is marked as Skill Acquired?**
A: The mentoring session is considered completed.
**Q: What does Dropped mean?**
A: The mentor has ended the mentoring session.
### **9. Version Notes**
Last Updated: 16 Jan 2026
# Smart Coach
### **1. Overview**
Smart Coach is an AI-enabled learning feature that allows admins to create guided, scenario-based learning experiences using uploaded documents, evaluation rubrics, and AI-driven interactions.
It enables learners to practice through Knowledge Cards, Quiz Cards, and Role Plays, helping them build skills through both knowledge and real-world application.
### **2. When to Use**
- When admins want to create guided, AI-driven learning experiences for teams
- When learners need scenario-based practice instead of static content
- When managers and mentors need visibility into learning progress and quality
- When AI-based evaluation is required for knowledge and scenario responses
### **3. Concepts**
- **Smart Coach** – AI-driven learning module created by admins
- **Knowledge Base** – Uploaded document used by AI for learning
- **Evaluation Rubrics** – Criteria used to evaluate responses
- **Knowledge Cards** – Informational learning content
- **Quiz Cards** – Questions to assess understanding
- **Role Plays** – Scenario-based activities for practical application
- **Completion Criteria** – Defines required completion conditions
- **Answer Mode** – Defines response type (Text, Audio, Video)
- **Progress Tracking Message** – Shows real-time learner progress
- **Reattempt / Regenerate** – Allows retry or new role play generation
- **Company Tab** – Admin view of all Smart Coaches
- **Team Tab** – View for managers, trainers, and mentors
### **4. Set Up Guide**
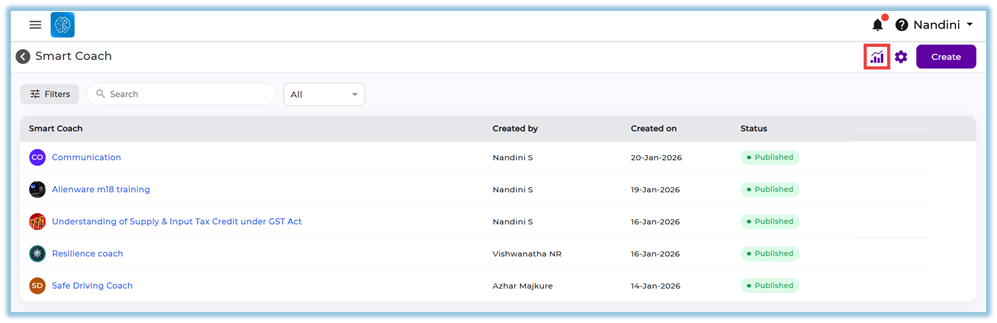
##### Access Smart Coach
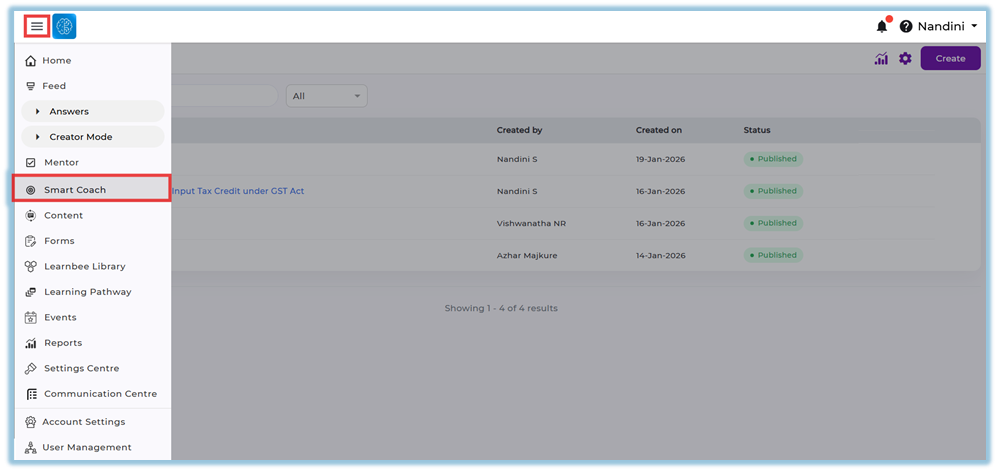
1. Click the **left-side menu bar**.
2. Select **Smart Coach** to open the Smart Coach page.
##### Create a Smart Coach (Admin Only)
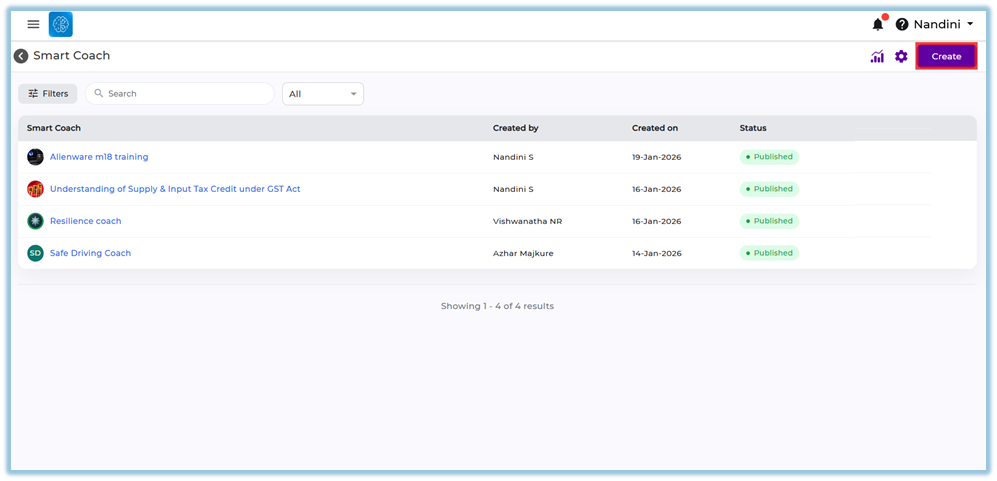
3. Click **Create** on the top-right corner.
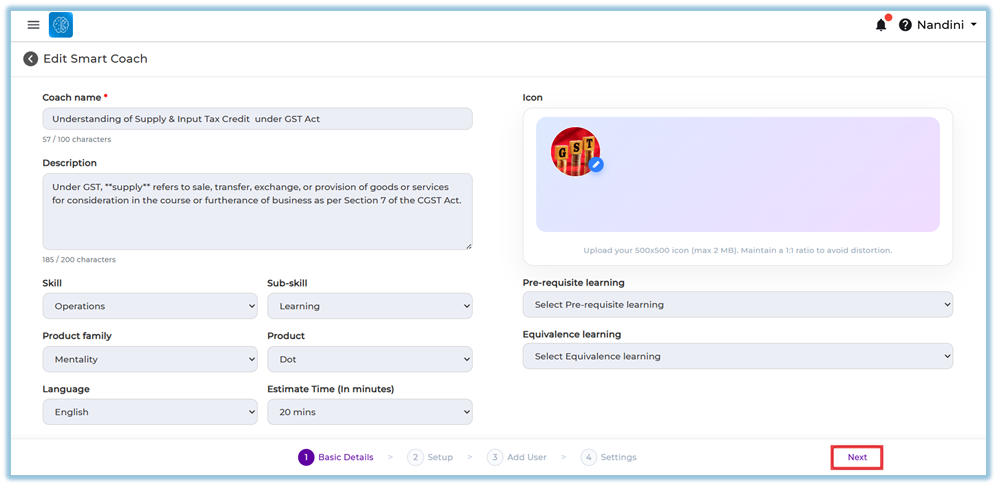
4. Enter the **Coach Name** (mandatory).
5. Enter the **Description** (optional).
6. Select **Skill**, **Sub-skill**, **Product Family**, **Product**, **Language**, and **Estimated Time**.
7. Add **Prerequisite Learning** or **Equivalence Learning** if required.
8. Click **Edit** under the icon section to select or upload an avatar.
9. Click **Next** to proceed to setup.
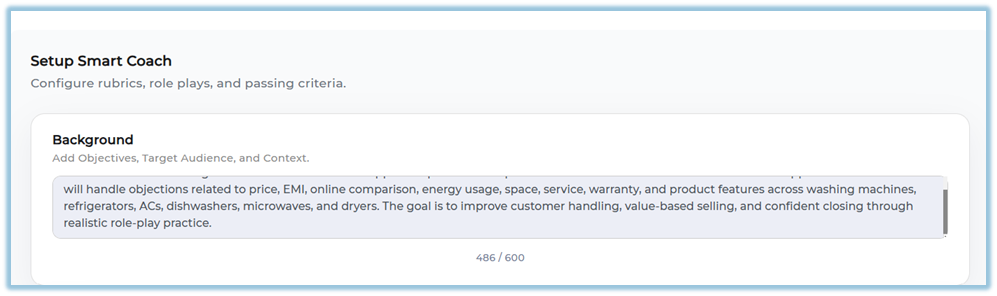
##### Setup Smart Coach
10. Enter **Background**
- Add objectives, target audience, and context for the Smart Coach
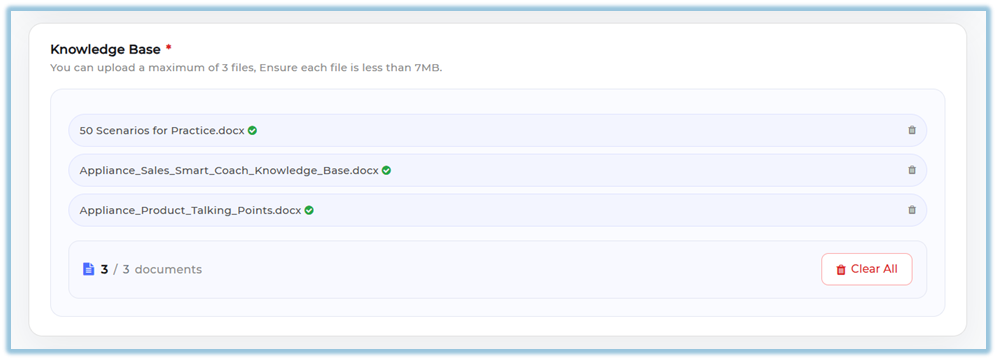
11. Upload **Knowledge Base documents
- You can upload **up to 3 files**
- Ensure each file is within the allowed size limit
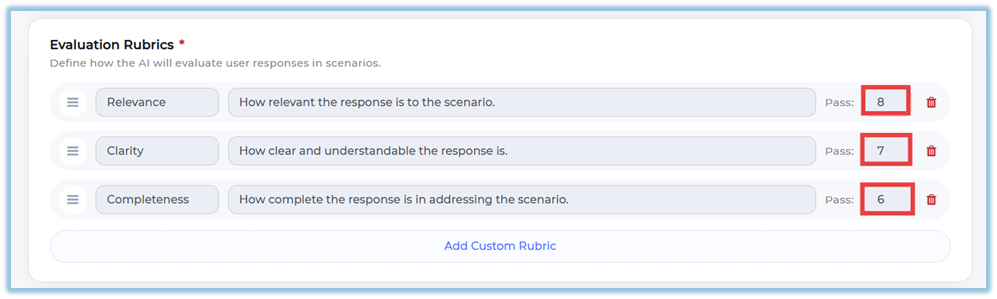
12. Review and configure **Evaluation Rubrics
- Default rubrics include:
- Relevance
- Clarity
- Completeness
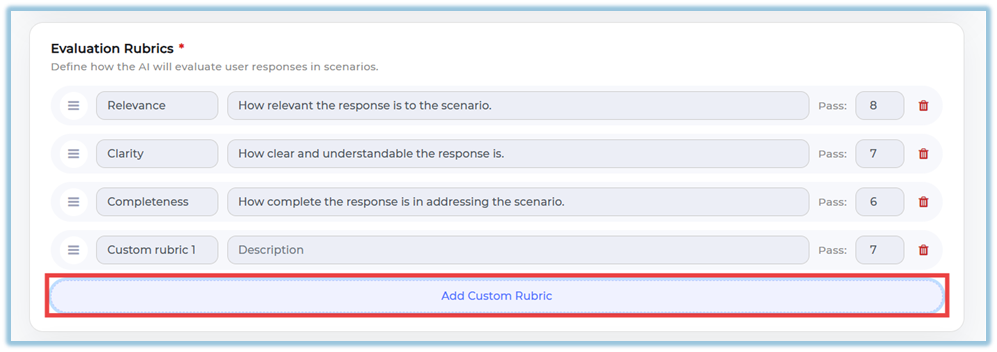
- Add custom rubrics if required
13. Click **Add Custom Rubric** (optional)
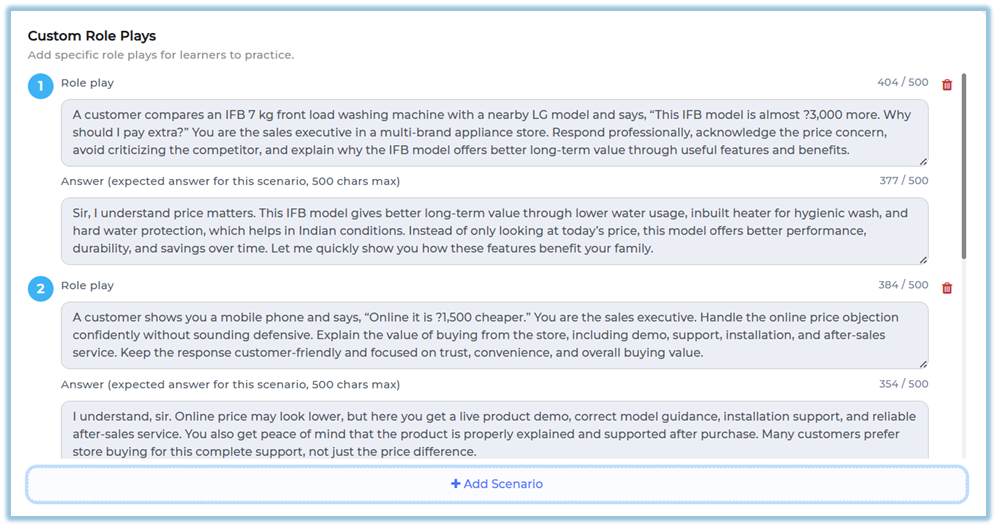
14. Add **Custom Role Plays**
- Click to add role plays for learner practice
- Enter:
- Scenario (role play situation)
- Expected answer (optional reference)
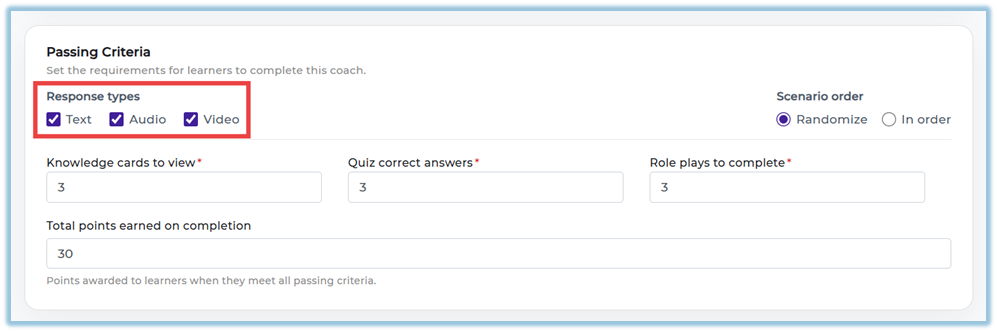
##### Passing Criteria Setup
15. Define completion requirements:
- **Knowledge cards to view**
- **Quiz correct answers**
- **Role plays to complete**
16. Select **Response Types (Answer Mode)**:
- Text
- Audio
- Video
(Select one or multiple options)
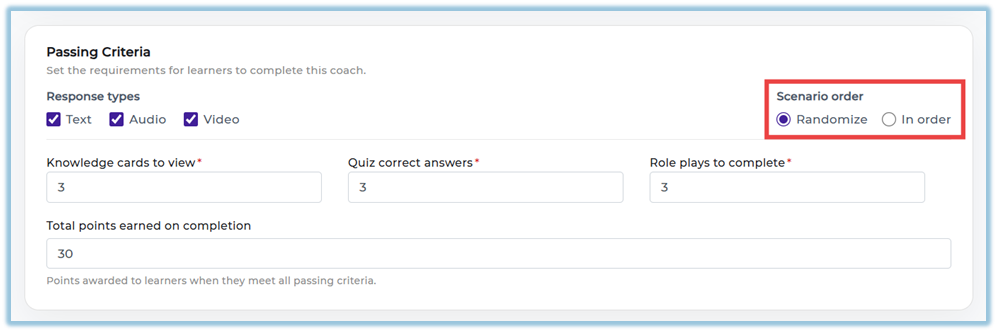
17. Select **Scenario Order**:
- Randomize
- In order
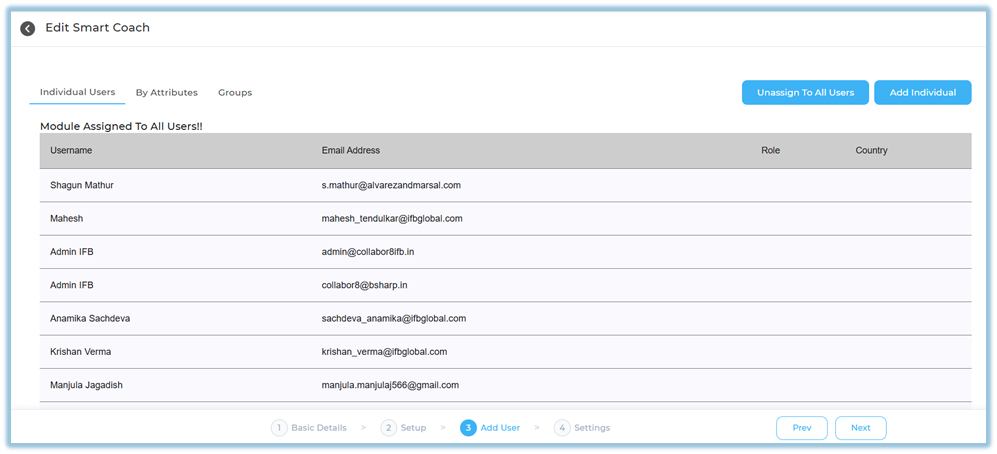
##### Add Users
19. Choose one of the following:
- **Assign to all users**
- **Add individual users**
- **Add users by attributes**
- **Add users by Flex**
20. Click **Save** and then **Next**.
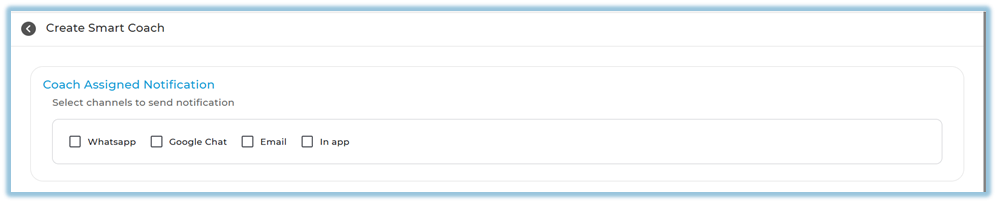
##### Settings and Publish
21. Select notification channels: **WhatsApp, Google Chat, Email, In-app**.
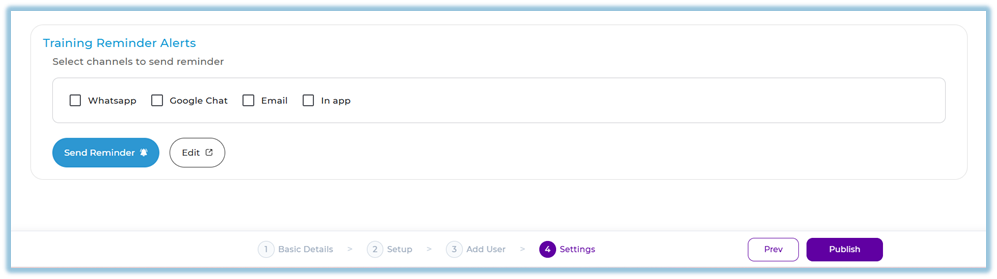
22. Configure **Training Reminder Alerts** for incomplete users.
23. Edit reminder message if required.
24. Click **Publish** to make the Smart Coach live.
##### Filters
Filters help admins quickly find and manage Smart Coach content based on specific criteria.
- **Product Family / Product** – Filter Smart Coach content based on the associated product family or product.
- **Module Type** – Narrow results by the type of learning module configured.
- **Module Importance** – Filter coaches based on importance levels such as High, Medium, or Low.
- **Skill / Sub-skill** – View Smart Coaches mapped to specific skills or sub-skills.
- **Language** – Filter Smart Coaches created in a selected language.
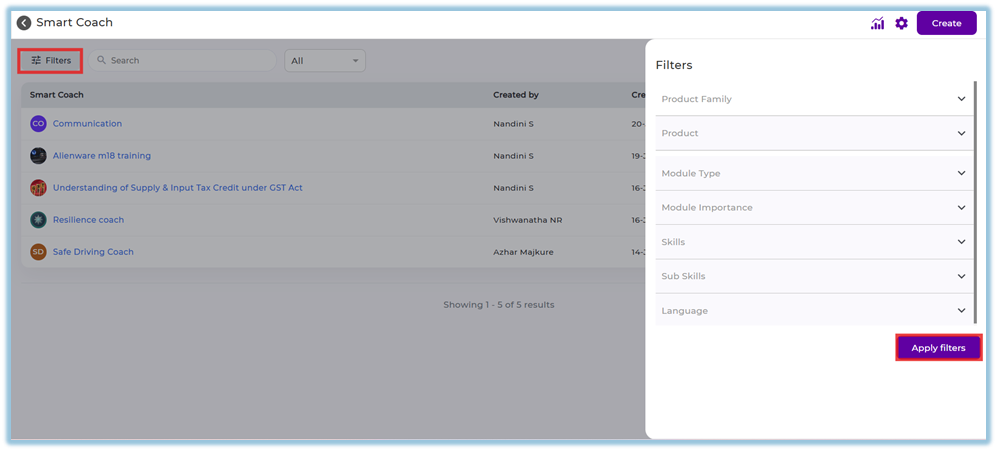
- **Published Status** – View Smart Coaches based on their status, such as Published or Draft.
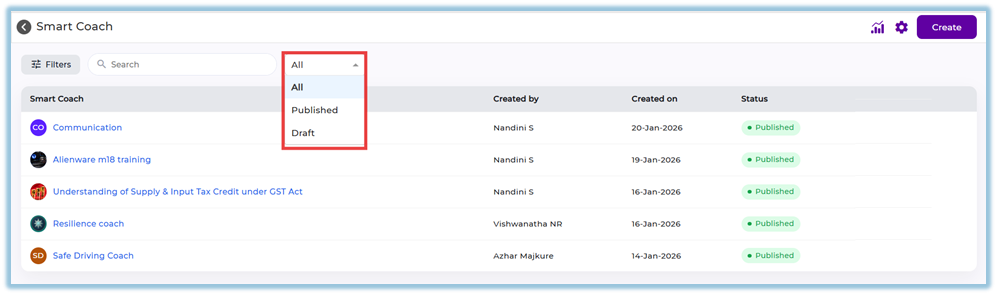
- **Search** – Quickly locate a Smart Coach by entering keywords in the search bar.

### **5. User View**
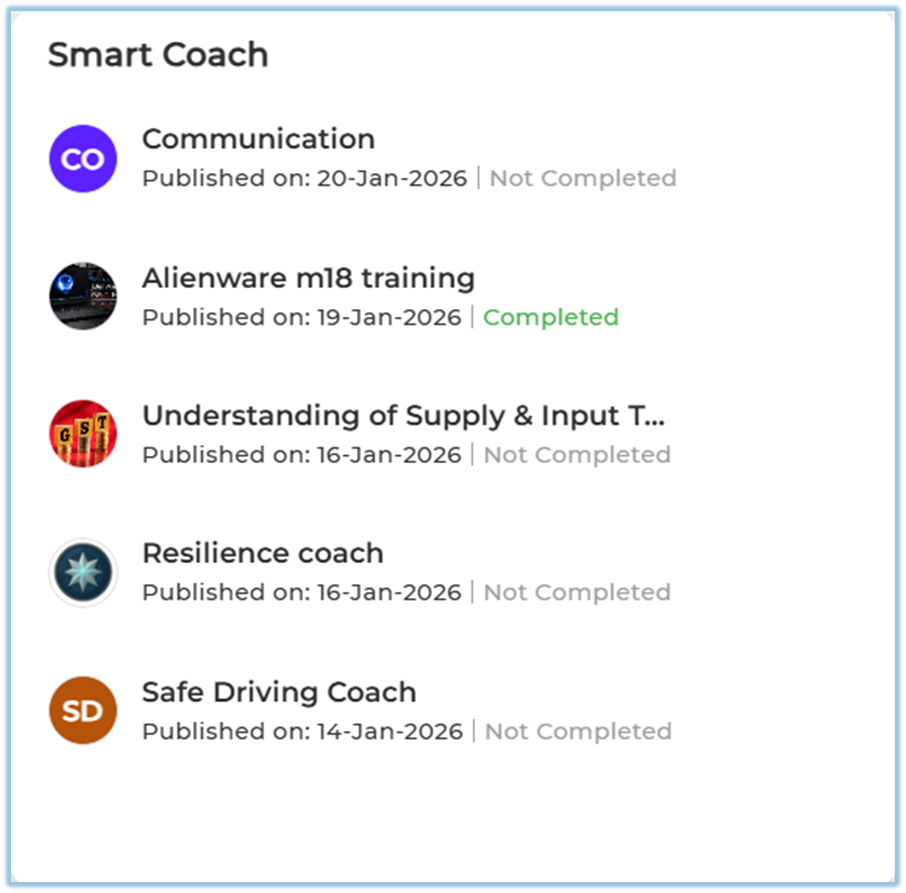
Smart Coaches appear in a dedicated **Smart Coach section on the homepage**.
Newly published coaches appear at the top, and users can open a coach to complete Knowledge Cards, quizzes, and role-play-based learning.
### **6. Reporting**
- **Smart Coach reports** are available from the **Reports** option inside Smart Coach.
- Reports include **Single Module Completion Report** with completion percentage, ratings, and delivery score.
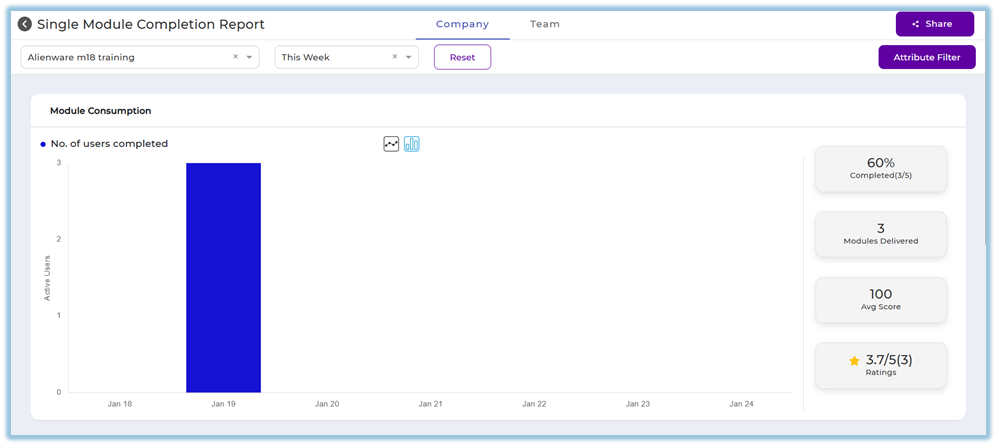
- **Company Tab** shows full organization data for admins.
- **Team Tab** shows mapped user data for managers, trainers, and mentors.
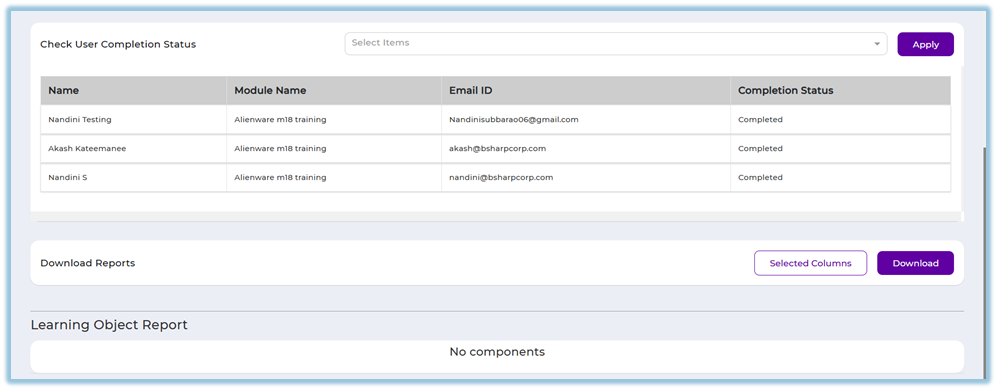
- User completion status and document consumption details can be downloaded.
### **7. Best Practices**
- Upload clear and structured documents for accurate AI responses
- Define rubrics carefully to ensure consistent evaluation
- Use scenarios to encourage applied learning
- Enable reminders to improve learner completion
### **8. Related Links / FAQs**
**Q: Who can create a Smart Coach?**
Only admins can create Smart Coaches.
**Q: Who can view the Team tab?**
Managers, trainers, and mentors with access permissions.
**Q: Can more than one document be uploaded?**
No. Only one document can be uploaded per Smart Coach.
### **9. Version Notes**
Last Updated: 10 Apr 2026
# Custom Widget
### **1. Overview**
Custom Widget allows admins to add additional widgets on the Home Page.
It helps highlight important information, links, or content for users.
### **2. When to Use**
Use this feature when:
- You want to display important announcements or content
- You need to highlight external links or campaigns
- You want to personalize the Home Page experience
### **3. Concepts**
- **Custom Widget** – A configurable card displayed on the Home Page
- **Widget Type** – Layout of the widget (Compact / Full Width)
- **Redirect Link** – URL where users are redirected on click
- **User Assignment** – Controls which users can see the widget
- **Live Preview** – Real-time preview of widget design
### **4. Set Up Guide**Access Widget Setup
1. Go to **Home Page**
2. Click **Edit (✏️ icon)
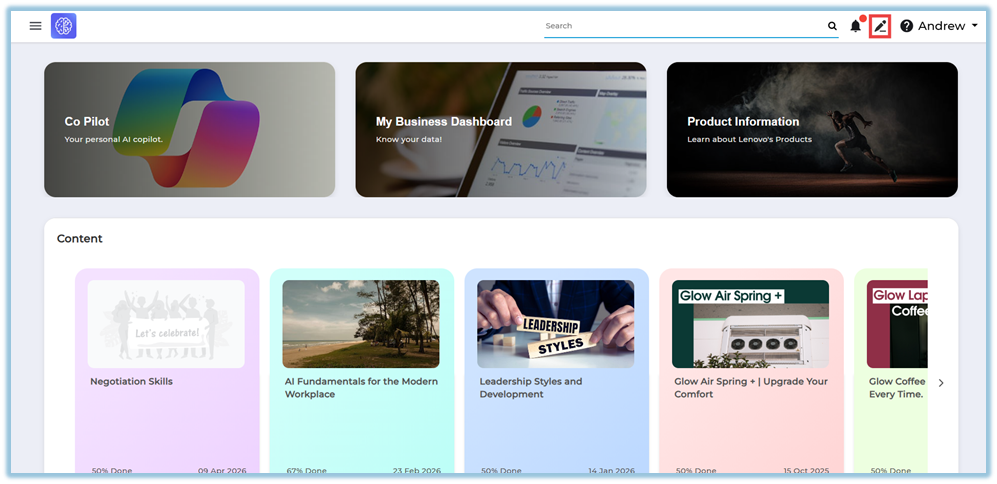**
3. Click **+ Add Widget
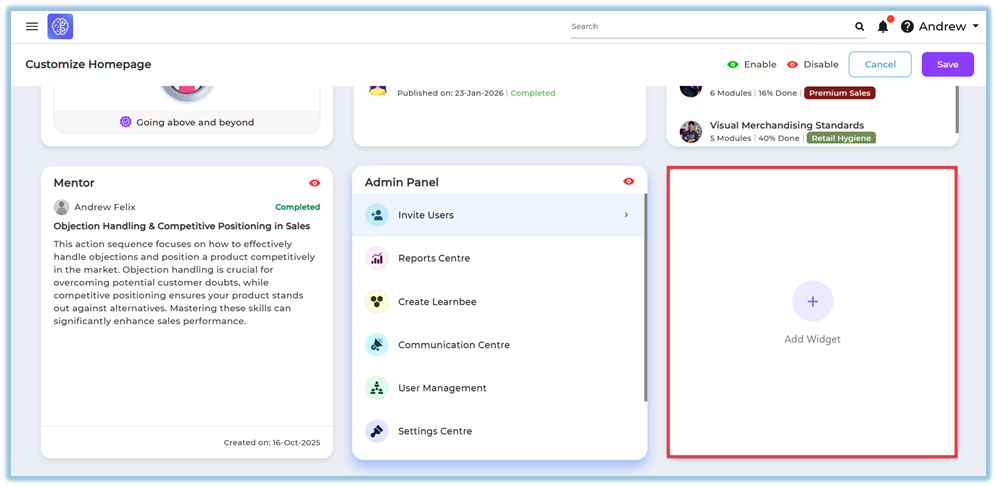**
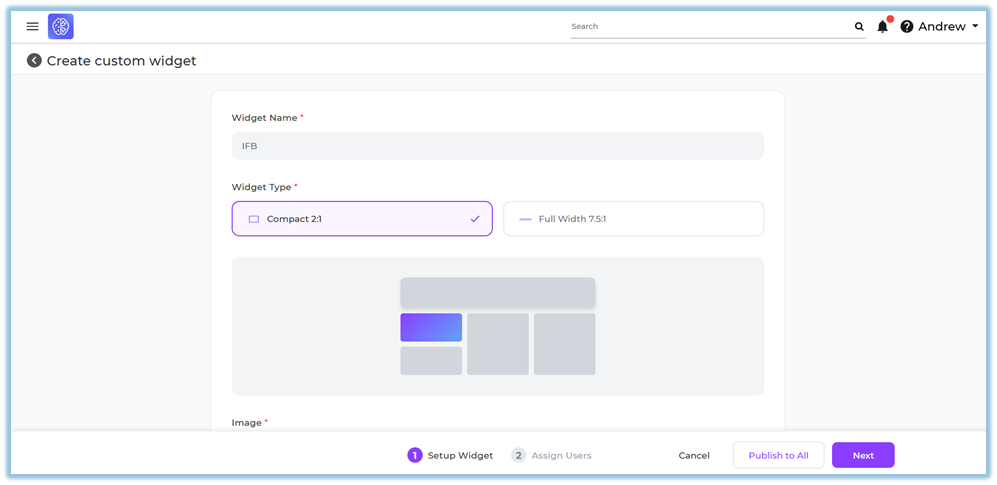
##### Step 1: Setup Widget
Fill the required details:
- **Widget Name**
- **Widget Type**
- Compact (2:1)
- Full Width (7.5:1)
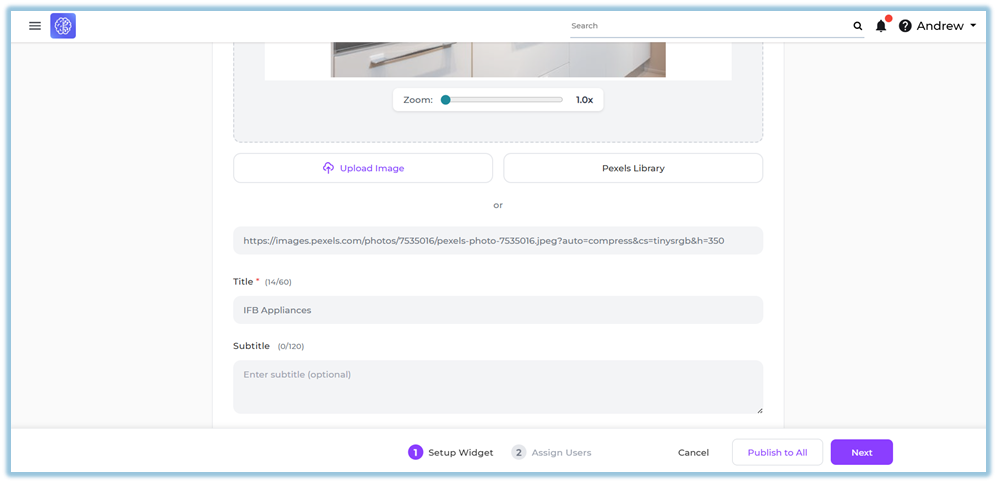
- **Image Upload Options**
- Upload from system
- Select from Pixel Library
- Add Image URL
- **Content Details**
- Title
- Subtitle
- **Redirect Link**
- External link (URL)
- Internal link
- **Display Option**
- App / Web / Both
- **Live Preview**
- View image, title, and subtitle before publishing
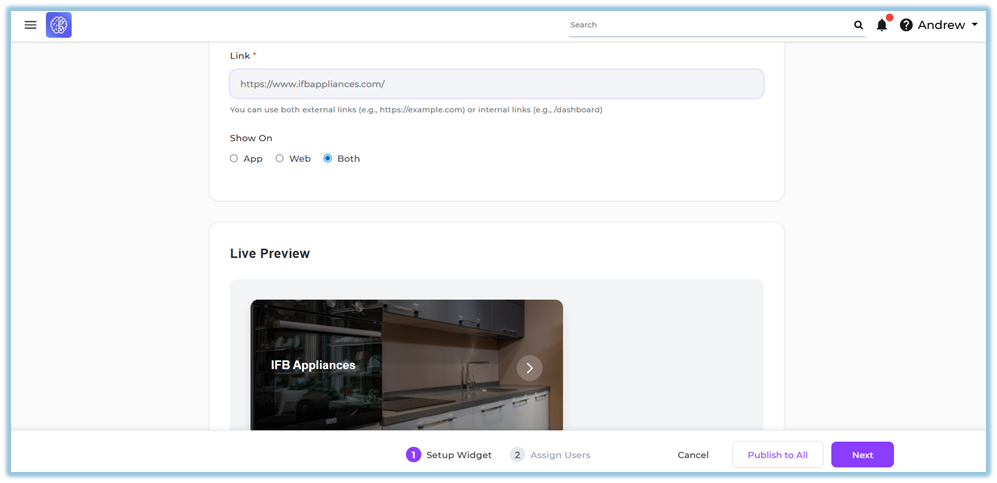
Click **Next**
##### Step 2: Assign Users
Assign widget visibility:
- **Individual Users**
- **By Attribute**
- **Groups**
- **Assign to All Users
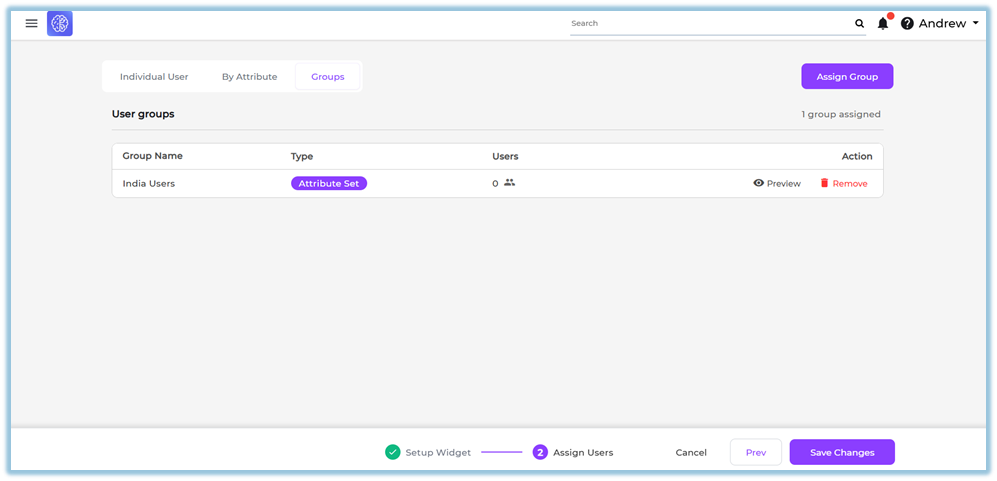**
Click **Save / Publish**
### **5. User View**
- Widget appears on **Home Page**
- Displays:
- Image
- Title
- Subtitle
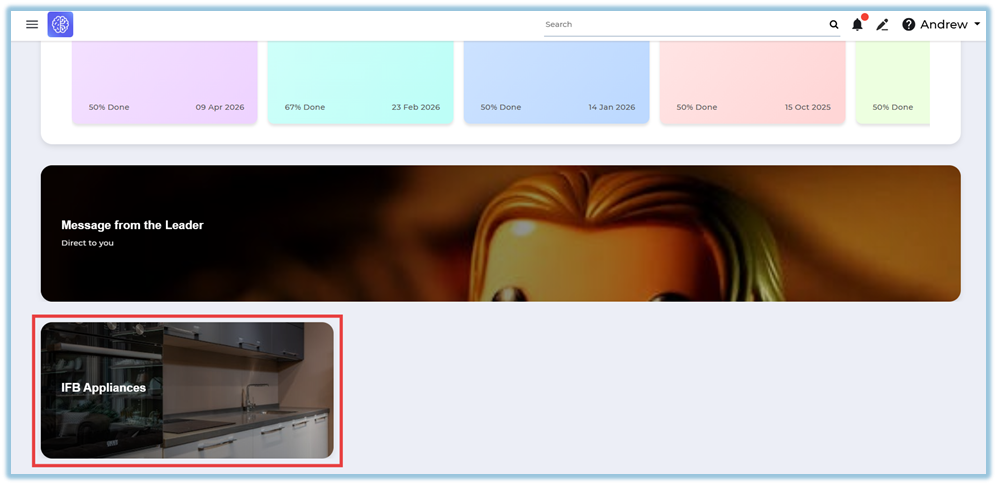
- On click → redirects to configured link

### **6. Reporting**
- No direct reporting available for widgets
- Used mainly for visibility and navigation
### **7. Best Practices**
- Use clear and high-quality images
- Keep title and subtitle short
- Use valid redirect links
- Assign widgets to relevant users/groups
- Preview before publishing
### **8. Version Notes**
Last Updated: 16 Apr 2026