# Custom Widget
### **1. Overview**
Custom Widget allows admins to add additional widgets on the Home Page.
It helps highlight important information, links, or content for users.
### **2. When to Use**
Use this feature when:
- You want to display important announcements or content
- You need to highlight external links or campaigns
- You want to personalize the Home Page experience
### **3. Concepts**
- **Custom Widget** – A configurable card displayed on the Home Page
- **Widget Type** – Layout of the widget (Compact / Full Width)
- **Redirect Link** – URL where users are redirected on click
- **User Assignment** – Controls which users can see the widget
- **Live Preview** – Real-time preview of widget design
### **4. Set Up Guide**
Access Widget Setup
1. Go to **Home Page**
2. Click **Edit (✏️ icon)
**
3. Click **+ Add Widget
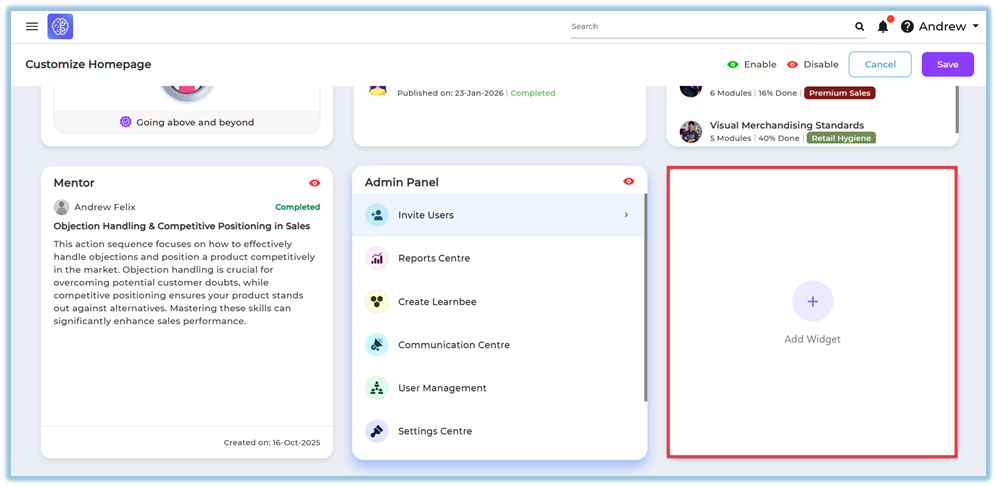**
##### Step 1: Setup Widget
Fill the required details:
- **Widget Name**
- **Widget Type**
- Compact (2:1)
- Full Width (7.5:1)
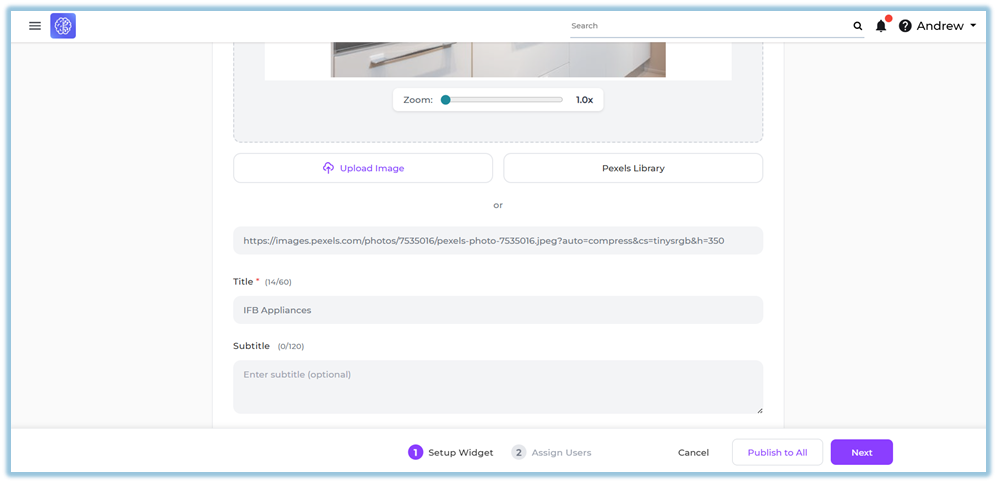
- **Image Upload Options**
- Upload from system
- Select from Pixel Library
- Add Image URL
- **Content Details**
- Title
- Subtitle
- **Redirect Link**
- External link (URL)
- Internal link
- **Display Option**
- App / Web / Both
- **Live Preview**
- View image, title, and subtitle before publishing
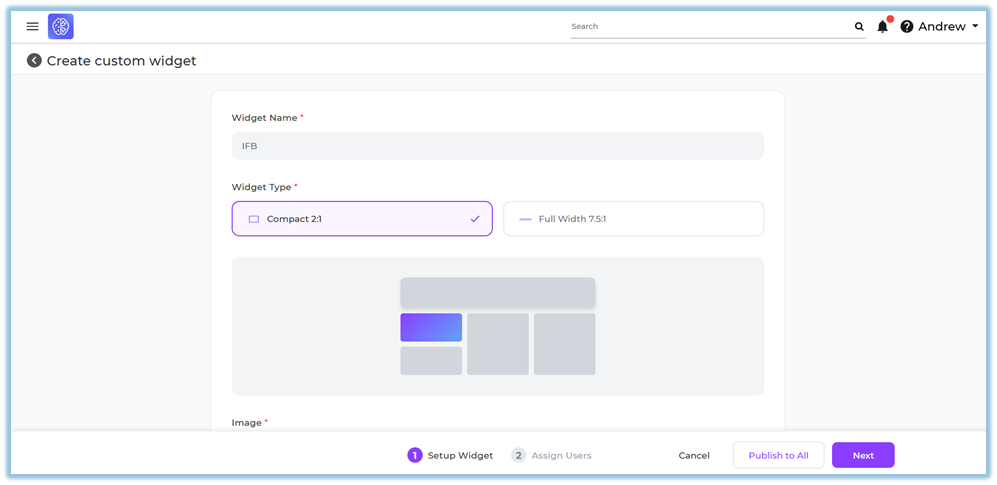
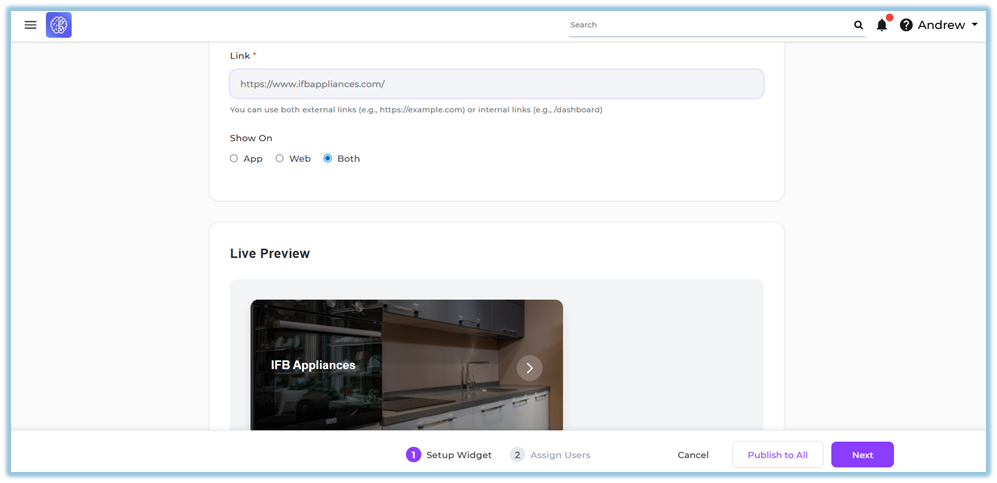
Click **Next**
##### Step 2: Assign Users
Assign widget visibility:
- **Individual Users**
- **By Attribute**
- **Groups**
- **Assign to All Users
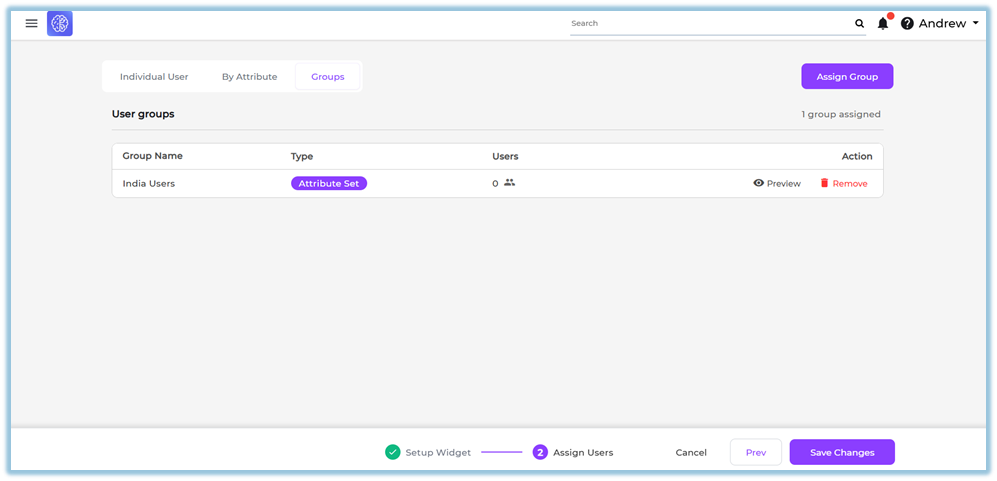**
Click **Save / Publish**
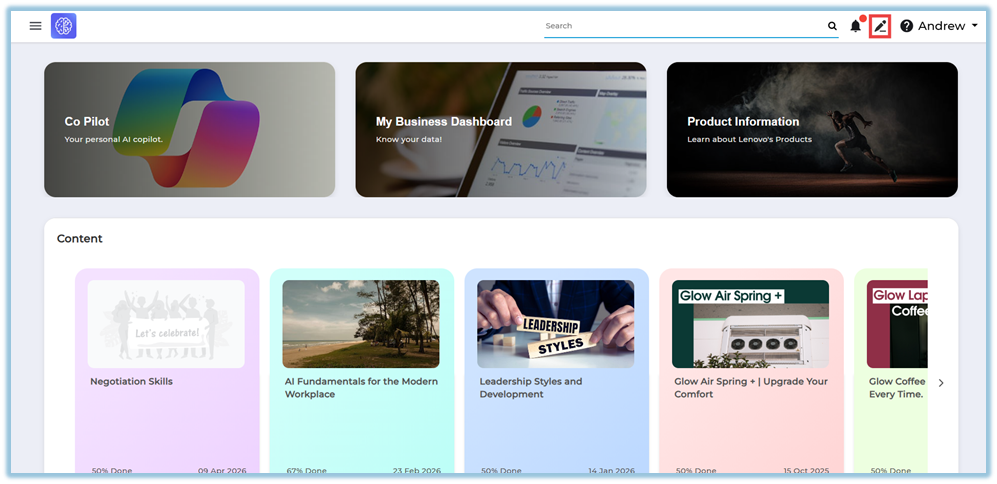
### **5. User View**
- Widget appears on **Home Page**
- Displays:
- Image
- Title
- Subtitle
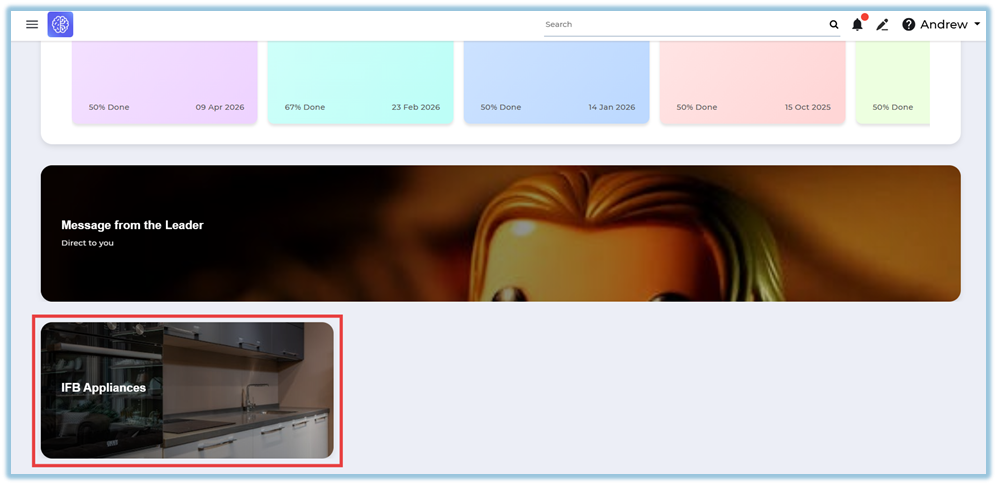
- On click → redirects to configured link

### **6. Reporting**
- No direct reporting available for widgets
- Used mainly for visibility and navigation
### **7. Best Practices**
- Use clear and high-quality images
- Keep title and subtitle short
- Use valid redirect links
- Assign widgets to relevant users/groups
- Preview before publishing
### **8. Version Notes**
Last Updated: 16 Apr 2026