# Settings Centre
# Company Setup
### **1. Overview**
**Company Setup** in the Settings Centre is where admins configure essential company-level settings that control how Converse behaves across the platform. This includes setting up company information, managing automated engagement posts, configuring Instant Answers channels, controlling homepage banners, and defining learning priorities used in learning pathways. These settings act as the foundation for branding, engagement automation, and learning structure in Converse.
### **2. When to Use**
Use Company Setup when you need to:
- Configure basic company details and branding
- Set default timings for automated Feed posts
- Manage Instant Answers channels
- Add or manage homepage banners
- Define learning priorities for Learning Pathways
### **3. Concepts**
- **Company Info**: Basic organization details and branding settings
- **Automated Posts Timing**: Controls when system-generated posts are published
- **Answers Manager**: Manages Instant Answers channels and knowledge base
- **Banner Setup**: Controls images shown on the home page
- **Company Priority**: Defines priority tags used in Learning Pathways
### **4. Setup Guide**
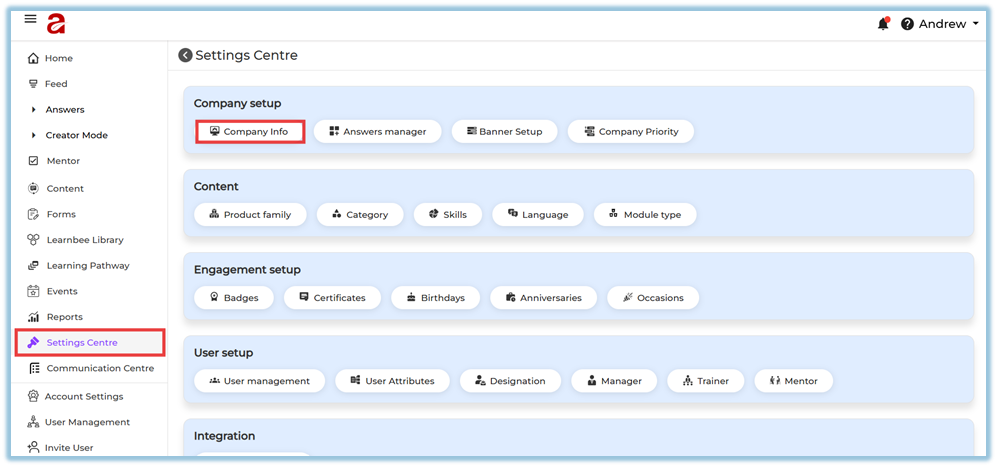
#### A. Company Info
**Path:** Settings Centre → Company Setup → Company Info
[https://converse.bsharpcorp.com/celebrate/company\_setup](https://converse.bsharpcorp.com/celebrate/company_setup)
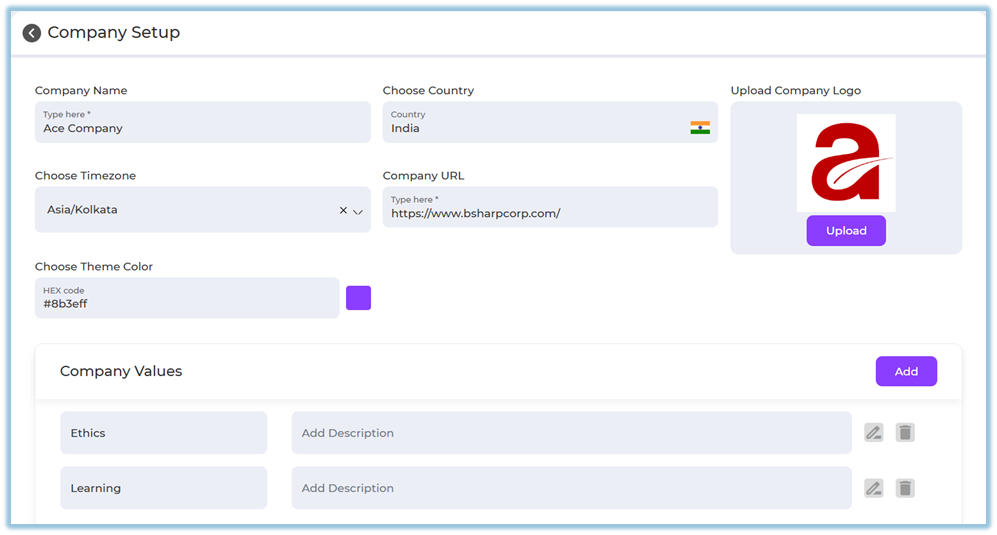
Configure the following details:
- **Company Name**
- **Country**
- **Time Zone**
- **Company URL**
- **Company Logo** (upload from your system)
- **Theme Color** (HEX code)
**Company Values**
- Click **Add** to add a company value
- Enter value name and description
- Use **Edit** or **Delete** icons to manage values
##### Automated Posts Timing
This controls when system-generated posts (birthdays, anniversaries, occasions, daily thoughts) are published.
**Options available:**
- **Single time for all automated posts**
- Set one time (default: 9:00 AM)
- **Individual timing for each post type**
- Birthday Post
- Anniversary Post
- Occasions Post
- Daily Thoughts Post
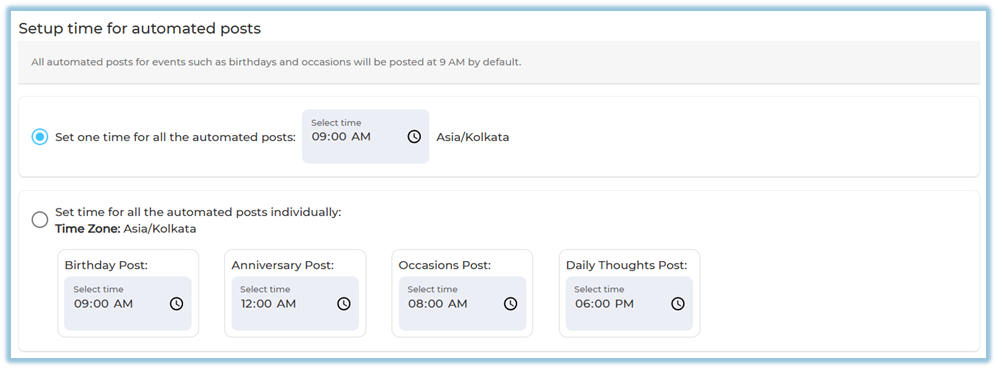
You can update the time anytime by clicking the clock icon.
##### Thought for the Day Setup
- Enable **Thought for the Day**
- Messages are posted automatically **only when no birthdays or anniversaries exist for the day**
- Once enabled, you can view and edit the content

#### B. Answers Manager
**Path:** Settings Centre → Company Setup → Answers Manager
[https://converse.bsharpcorp.com/celebrate/section-list](https://converse.bsharpcorp.com/celebrate/section-list)
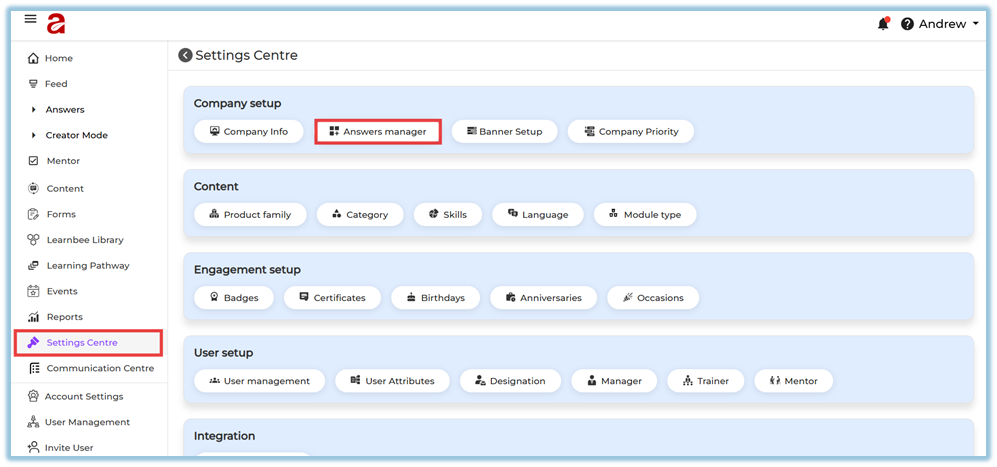
This opens the **Channels** page where you can:
- View all Instant Answer channels
- See channel details such as:
- Channel ID
- Channel name
- Weightage
- Created date
- Number of documents
- Published audience
- **Publish / Unpublish** channels
- **Edit**, **Delete**, or **Add documents**
- **Go to Chat** directly from the channel
- **Create a new channel**
****
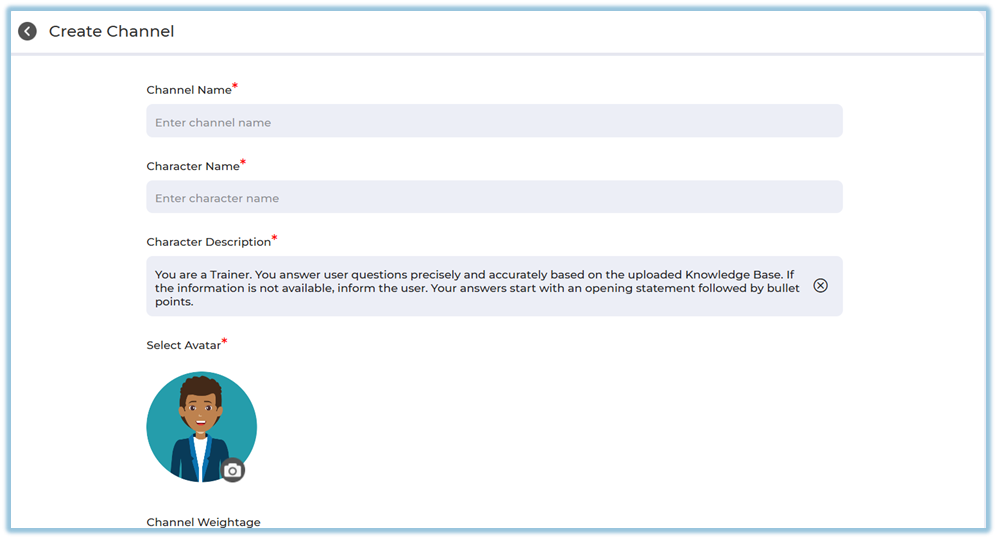
**Create Channel** [https://help.bsharpcorp.com/books/instant-answers/page/how-to-set-up-instant-answers#bkmrk-4.-setup-guide](https://help.bsharpcorp.com/books/instant-answers/page/how-to-set-up-instant-answers#bkmrk-4.-setup-guide)
- Enter channel name
- Add character name and description
- Select avatar
- Set channel weightage
- Save to create the channel
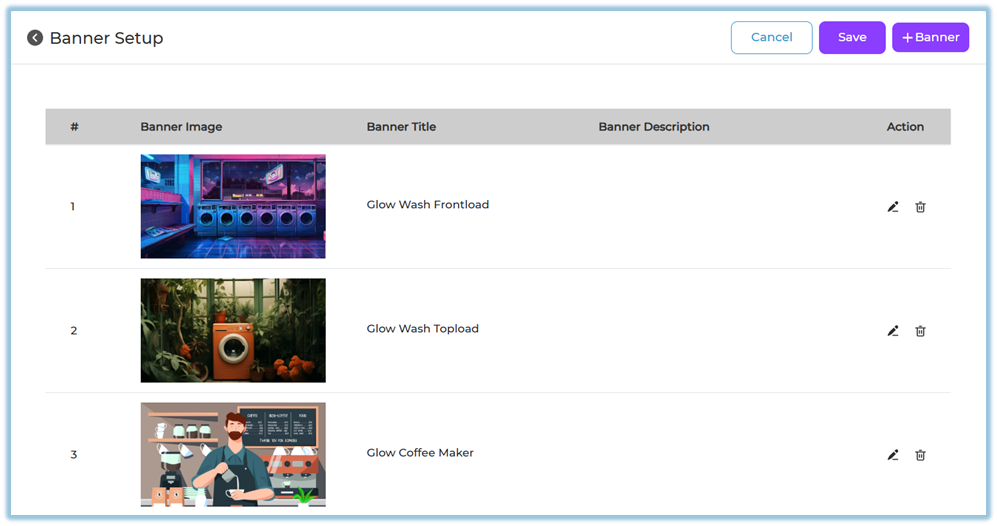
#### C. Banner Setup
**Path:** Settings Centre → Company Setup → Banner Setup
[https://converse.bsharpcorp.com/celebrate/banner-setup](https://converse.bsharpcorp.com/celebrate/banner-setup)

Used to manage banners shown on the home page.
**You can:**
- View existing banners
- Edit banner details
- Delete banners
- Add new banners
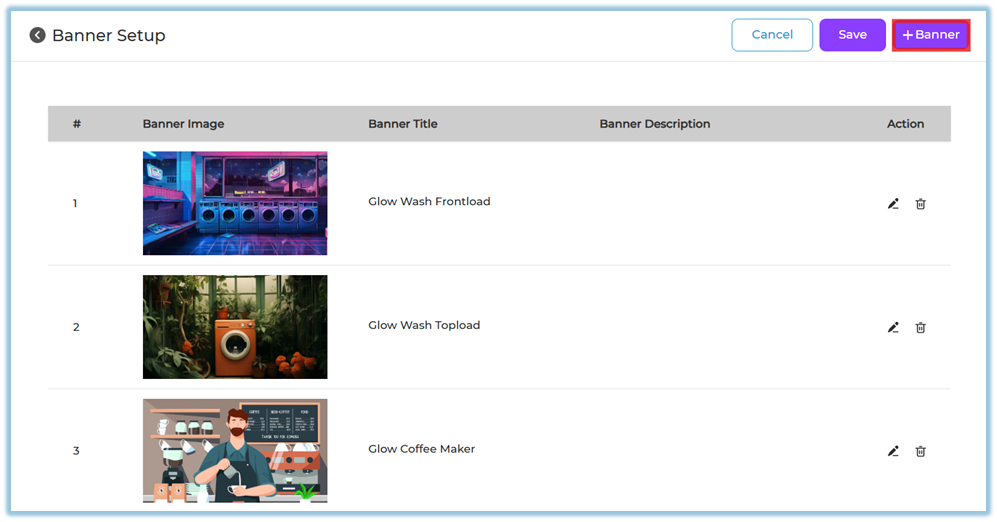
**Add Banner**
- Click **+ Banner**
****
- Upload image (from system, Pixel library, or upload library)
- Add banner title
- Add banner description
- (Optional) Add redirect link
- Click **Done**
**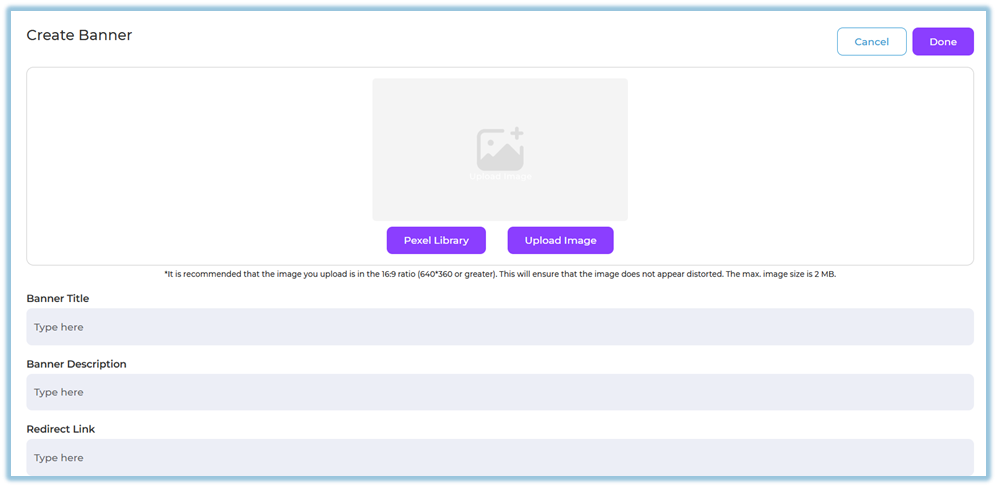**
**Recommended** image ratio: 16:9 for best display (minimum 640×360, max size 2 MB).
#### D. Company Priority
**Path:** Settings Centre → Company Setup → Company Priority
[https://converse.bsharpcorp.com/celebrate/learning-pathway/priority-setup](https://converse.bsharpcorp.com/celebrate/learning-pathway/priority-setup)
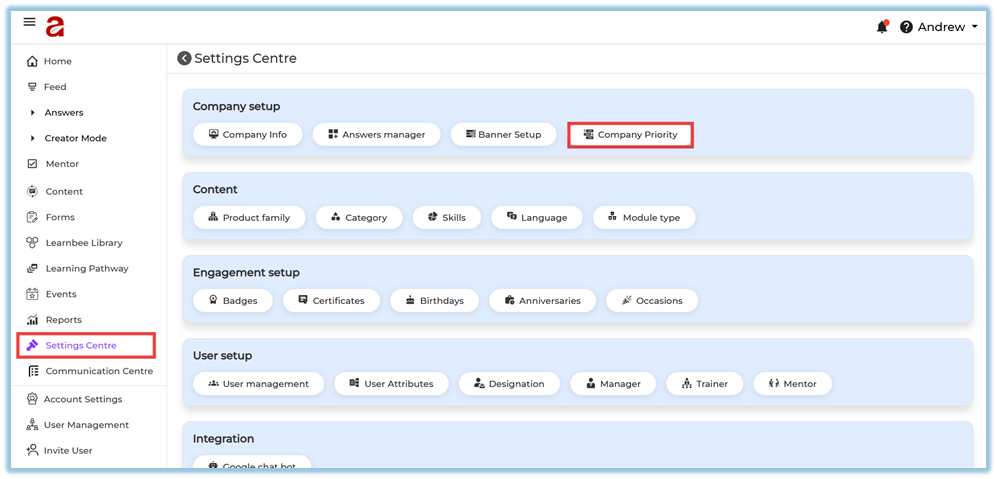
Company priorities are used while creating **Learning Pathways**.
**Actions available:**
- Add new priority
- Organize priorities under:
- Top priorities
- Other priorities
- Reorder priorities
- Delete priorities if needed
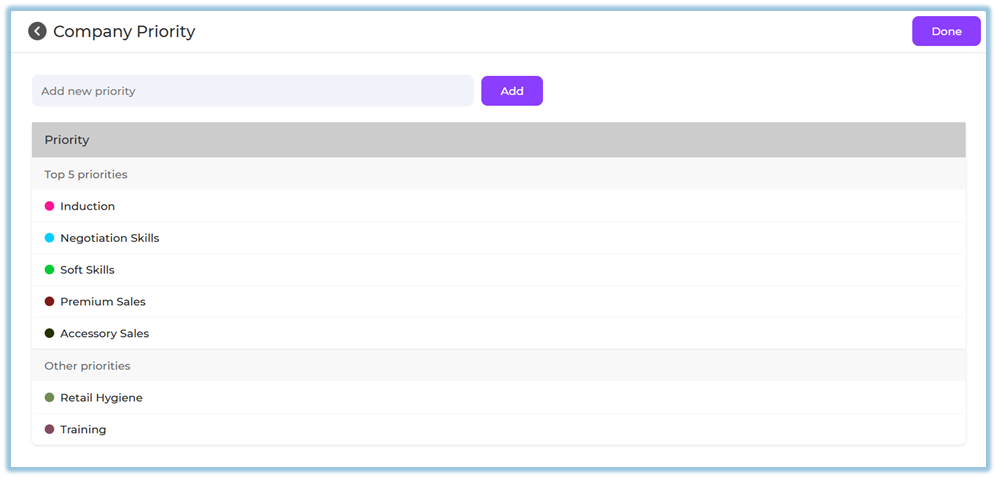
These priorities become selectable options inside Learning Pathway configuration.
### **5. User View**
Company Setup is an **admin-only configuration**.
End users experience the impact indirectly through:
- Branded interface
- Timely automated posts
- Homepage banners
- Structured learning paths
- Accurate Instant Answers
### **6. Reporting**
Company Setup does not have direct reports.
However, its configurations affect reporting in:
- Feed activity (automated posts)
- Learning Pathway usage
- Instant Answers consumption
### **7. Best Practices**
- Complete Company Info before onboarding users
- Verify time zone before enabling automated posts
- Use clear and consistent company values
- Limit homepage banners to avoid clutter
- Maintain meaningful and limited priorities for learning paths
### **8. Related Links / FAQs**
- Settings Centre
[https://converse.bsharpcorp.com/celebrate/settings\_center](https://converse.bsharpcorp.com/celebrate/settings_center)
- Instant Answers
[https://converse.bsharpcorp.com/celebrate/section-list](https://converse.bsharpcorp.com/celebrate/section-list)
- Learning Pathway
[https://converse.bsharpcorp.com/celebrate/learning-pathway/list](https://converse.bsharpcorp.com/celebrate/learning-pathway/list)
- Banner Setup
[https://converse.bsharpcorp.com/celebrate/banner-setup](https://converse.bsharpcorp.com/celebrate/banner-setup)
### **9. Version Notes**
Last Updated: 29 Dec 2025
# Content
### **1. Overview**
The **Content** section in the Settings Centre allows admins to configure all the background options required while creating learning modules. These settings define how content is categorized, organized, and displayed to users. Proper configuration here ensures a smooth and structured content creation experience.
### **2. When to Use**
Use this section when you want to:
- Set up product structures before creating modules
- Define categories for feedback and content grouping
- Create skills and sub-skills for learning alignment
- Add supported languages for content delivery
- Define module types such as video, PDF, or learning modules
**Note:** These configurations appear as selectable fields while creating a module.
### **3. Concepts**
- **Product Family**: A high-level grouping of related products
- **Product**: Individual items under a product family
- **Category**: Used mainly for feedback classification
- **Skill**: A primary competency area
- **Sub-Skill**: A detailed skill under a main skill
- **Language**: Indicates the language of the content
- **Module Type**: Defines the format of the learning content
### **4. Set Up Guide**
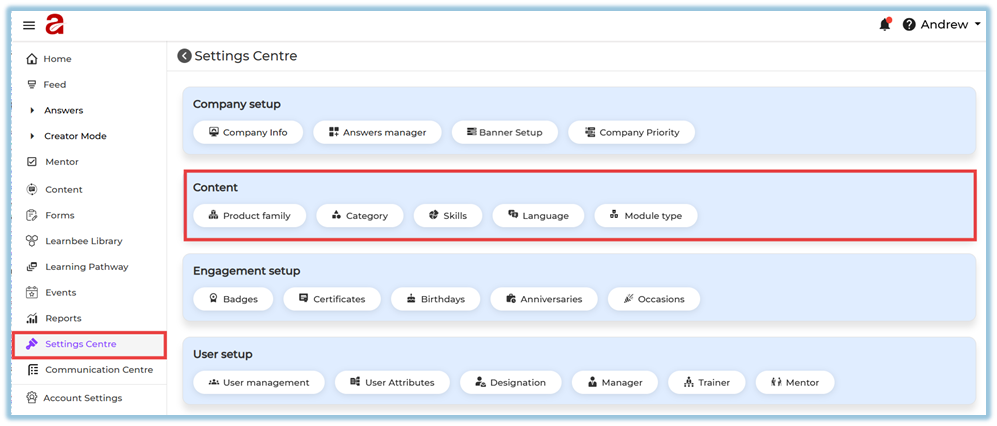
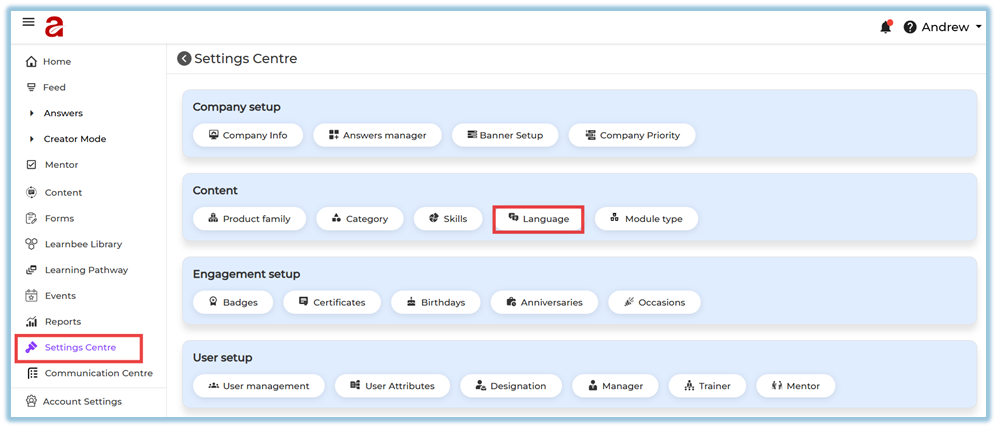
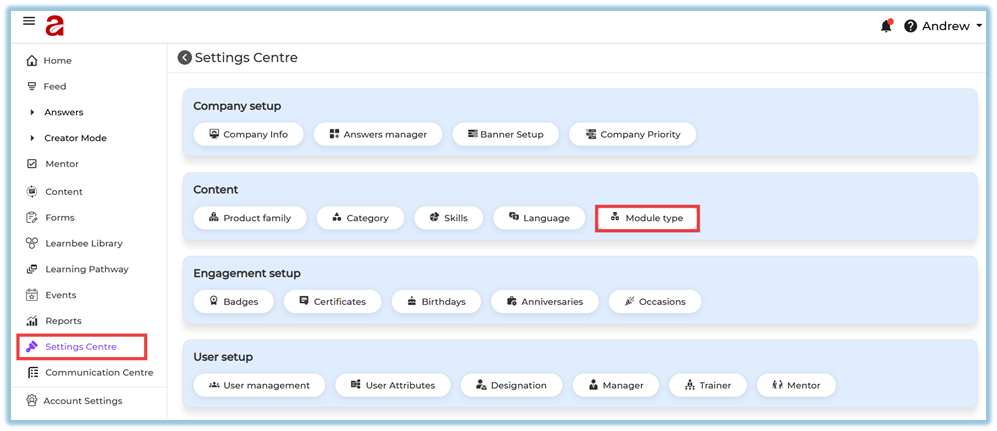
##### Access Content Settings
- Go to **Menu → Settings Centre** [https://converse.bsharpcorp.com/celebrate/settings\_center](https://converse.bsharpcorp.com/celebrate/settings_center)
- Under **Content**, you will see:
- Product Family
- Category
- Skills
- Language
- Module Type
#### A. Product Family
**Path:**
Settings Centre → Content → Product Family
[https://converse.bsharpcorp.com/celebrate/product-configuration](https://converse.bsharpcorp.com/celebrate/product-configuration)

**Purpose:**
Used to group related products under a single family for better content organization.
**Steps:**
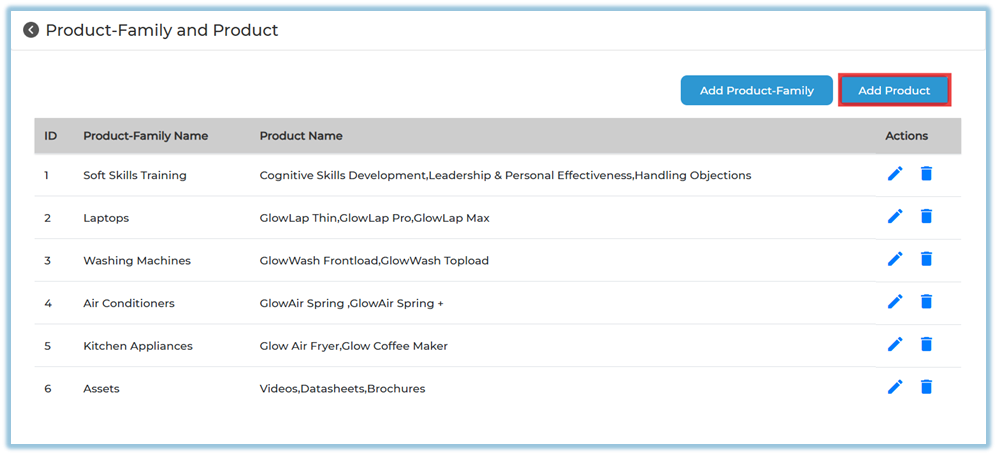
1. Click **Product Family**
2. View all existing product families and products
3. Click **Add Product-Family
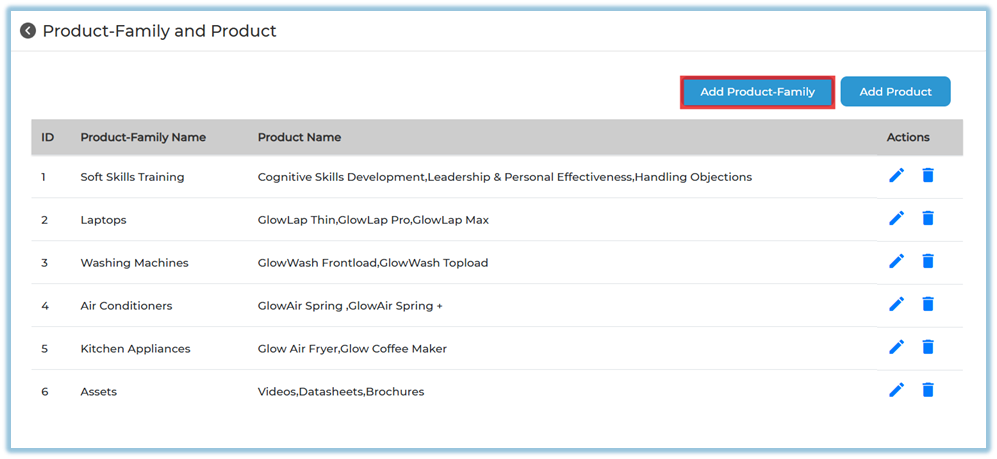**
4. Enter the **Product Family Name**
5. Click **Add Product**
6. Add one or more products using the **+ icon**
7. Click **Confirm
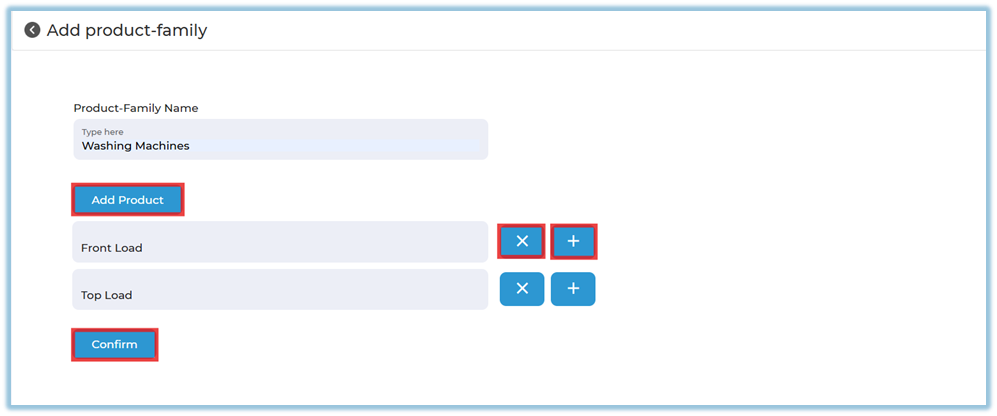**
#### Product
**Path:**
Settings Centre → Content → Product Family → Add Product
**Purpose:**
Used to add products under an already created product family.
**Steps:**
1. Click **Add Product**
2. Select an existing **Product Family 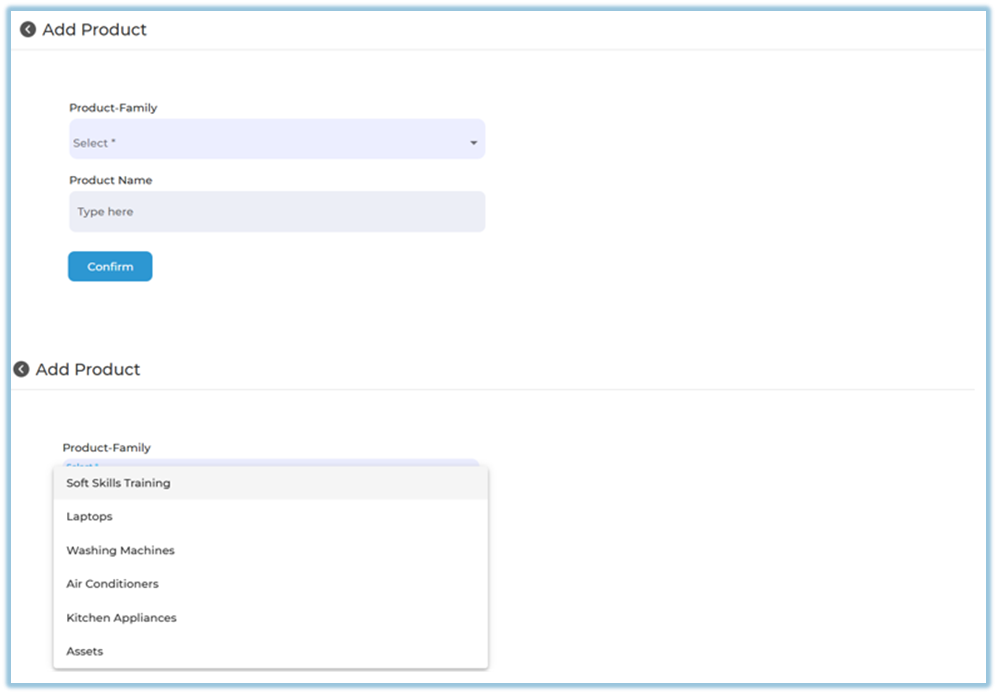**
3. Enter the **Product Name**
4. Click **Confirm
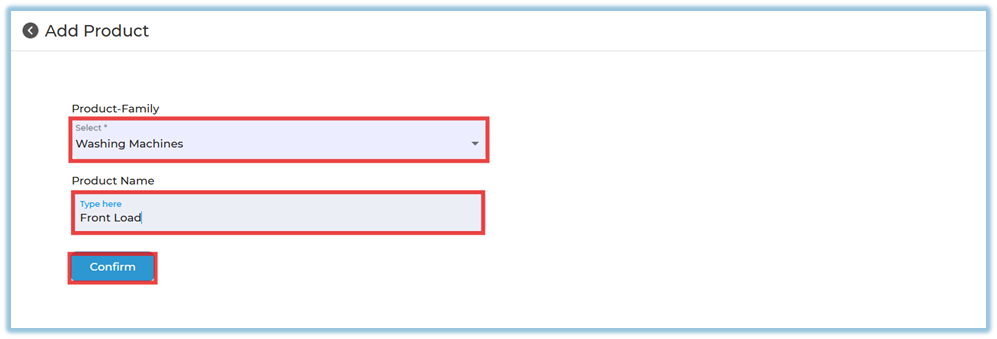**
#### B. Category
**Path:**
Settings Centre → Content → Category
[https://converse.bsharpcorp.com/celebrate/feedback\_setup](https://converse.bsharpcorp.com/celebrate/feedback_setup)
**Purpose:**
Used to create feedback categories for better classification.
**Steps:**
1. Enter the category name
2. Click **Create**
3. To remove a category, click the **× icon**
4. (Optional) Enable **Anonymous Feedback
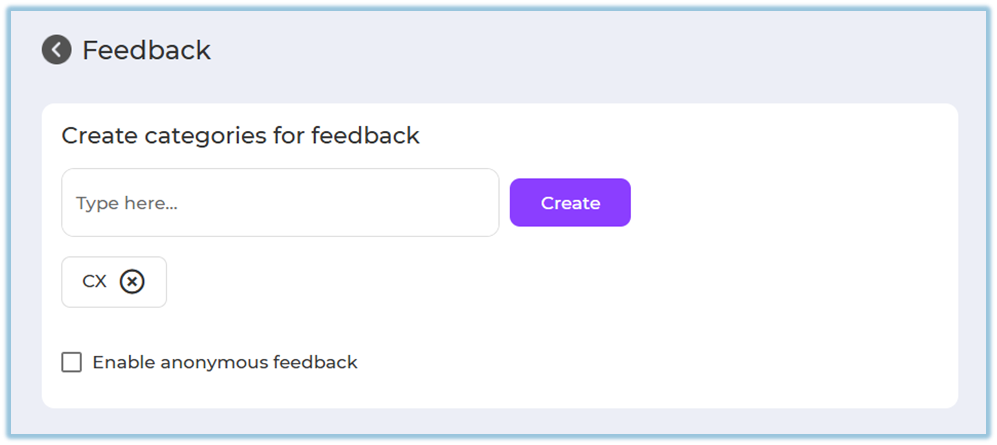**
#### C. Skills
**Path:**
Settings Centre → Content → Skills
[https://converse.bsharpcorp.com/celebrate/skill-configuration/0](https://converse.bsharpcorp.com/celebrate/skill-configuration/0)
**Purpose:**
Used to define skill areas and map sub-skills for learning modules.
**Add Skill:**
1. Click **Add Skill
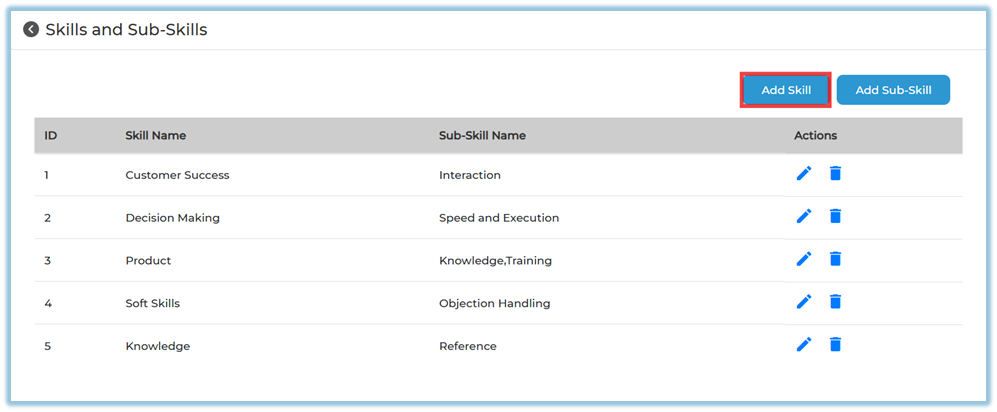**
2. Enter the **Skill Name**
3. Click **Add Subskill**
4. Add sub-skills using the **+ icon**
5. Click **Confirm
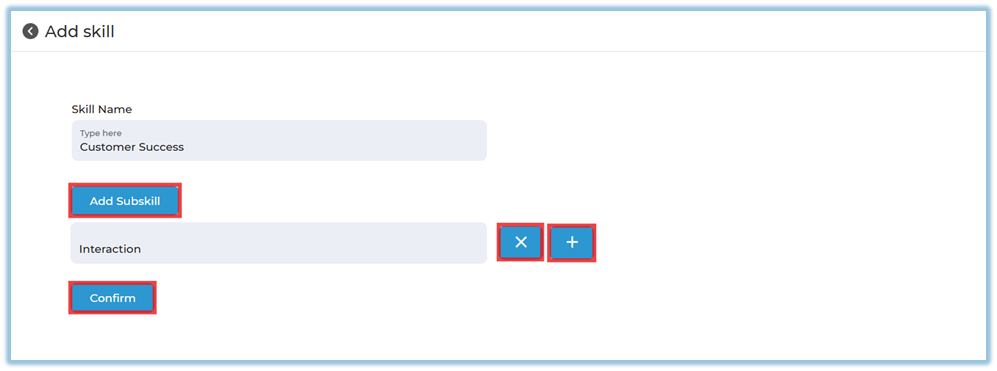**
**Add Sub-Skill:**
1. Click **Add Sub-Skill**
2. Select an existing skill
3. Enter the sub-skill name
4. Click **Confirm
**
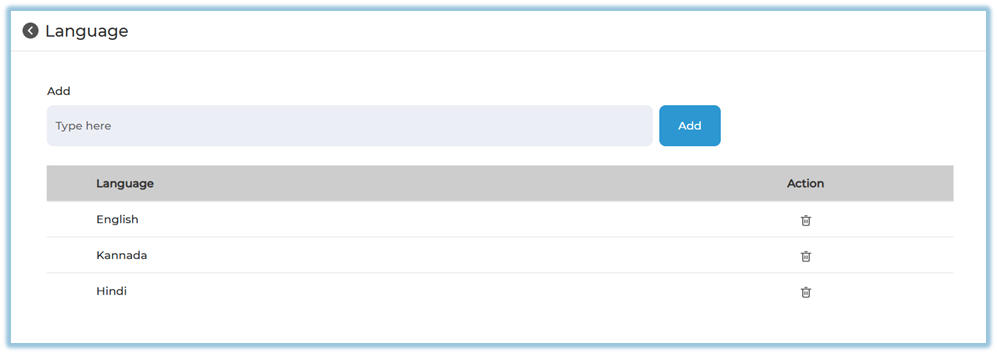
#### D. Language
**Path:**
Settings Centre → Content → Language
[https://converse.bsharpcorp.com/celebrate/language](https://converse.bsharpcorp.com/celebrate/language)
**Purpose:**
Defines the language in which learning content is created and delivered.
**Steps:**
1. Enter the language name
2. Click **Add**
3. Use the delete icon to remove a language
4. Use reorder option if required
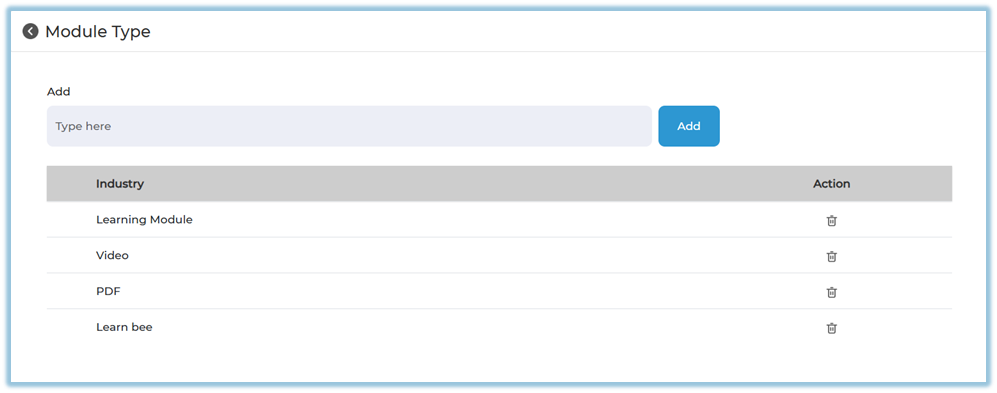
#### E. Module Type
**Path:**
Settings Centre → Content → Module Type
[https://converse.bsharpcorp.com/celebrate/module-type](https://converse.bsharpcorp.com/celebrate/module-type)
**Purpose:**
Defines the format of the learning content.
**Steps:**
1. Enter the module type (example: Video, PDF, Learnbee)
2. Click **Add**
3. Use delete or reorder options as required
### **5. User View**
These settings are not visible directly to users.
They appear as selectable dropdown options while:
- Creating a module
- Viewing module details
### **6. Reporting**
There are no direct reports for Content settings.
However, they are reflected in:
- Module metadata
- Skill-based and product-based reporting
### **7. Best Practices**
- Complete all content setup before creating modules
- Use consistent naming conventions
- Avoid deleting values already linked to live content
- Use reorder options to keep dropdowns user-friendly
### **8. Related Links / FAQs**
- [Settings Centre – Company Setup](https://help.bsharpcorp.com/books/settings-centre/page/company-setup)
- [How to Create a Module](https://help.bsharpcorp.com/books/content/page/how-do-we-set-up-content)
### **9. Version Notes**
Last Updated: 29 Dec 2025
# Engagement Setup
### **1. Overview**
The **Engagement Setup** section in the Settings Centre allows admins to configure employee engagement features such as rewards, recognitions, and automated celebration posts. These settings help improve user participation, motivation, and platform engagement by enabling timely acknowledgements and milestone-based interactions.
### **2. When to Use**
Use Engagement Setup when you want to:
- Reward users for achievements using badges and certificates
- Automatically celebrate birthdays and work anniversaries
- Configure occasion-based posts and engagement moments
- Standardize engagement activities across the organization
### **3. Concepts**
- **Badges** – Visual rewards given to users for achievements
- **Certificates** – Formal recognitions issued upon completion
- **Birthdays** – Automated birthday celebration posts
- **Anniversaries** – Automated work anniversary posts
- **Occasions** – Custom engagement events or celebrations
### **4. Set Up Guide**
**Path:** Menu → **Settings Centre** → **Engagement Setup
**
Under Engagement Setup, you will see the following options:
- Badges
- Certificates
- Birthdays
- Anniversaries
- Occasions
Each option redirects to its respective configuration page.
##### Configuration Overview
- Click on the required engagement type
- Configure settings as per your organization’s requirement
- Save changes to apply them across the platform
**Note:** Each engagement feature (Badges, Certificates, Birthdays, Anniversaries, and Occasions) has its **own detailed help document**.
You can find and access all related documents in the **Related Links** section of this document.
### **5. User View**
- Users see badges and certificates on their profiles when awarded
- Birthday, anniversary, and occasion posts appear automatically in the feed
- Engagement posts are visible based on admin configurations and user eligibility
### **6. Reporting**
- Badge and certificate awards are trackable through reports
- Engagement activities reflect in user participation and engagement analytics
- Birthday and occasion posts do not have separate reports but impact feed activity
### **7. Best Practices**
- Use badges and certificates consistently to encourage learning completion
- Schedule birthday and anniversary posts at appropriate times
- Limit the number of occasion posts to avoid notification fatigue
- Align engagement activities with company culture and values
### **8. Related Links / FAQs**
Refer to the detailed help documents for each engagement feature:
- [**Badges – Setup & Management**](https://help.bsharpcorp.com/books/feed/page/post#bkmrk-admin-configuration-)
- [**Certificates – Setup & Issuance**](https://help.bsharpcorp.com/books/feed/page/post#bkmrk-admin-configuration--1)
- [**Birthdays – Automated Celebration Setup**](https://help.bsharpcorp.com/books/feed/page/birthday)
- [**Anniversaries – Work Anniversary Setup**](https://help.bsharpcorp.com/books/feed/page/work-anniversary)
- [**Occasions – Custom Engagement Events**](https://help.bsharpcorp.com/books/feed/page/occasions)
These documents provide step-by-step configuration and examples.
### **9. Version Notes**
Last Updated: 29 Dec 2025
# User Setup
### **1. Overview**
User Setup is used to add, manage, and organize users in the platform. It allows administrators to invite users, control access, assign roles, and define reporting relationships such as Manager, Trainer, and Mentor. This ensures structured user data, accurate reporting, and controlled access across the system.
### **2. When to Use**
Use User Setup when you need to:
- Invite new users (single or bulk)
- Track user login and access status
- Block users who have exited the organization
- Assign Managers, Trainers, and Mentors
- Configure user attributes for reports
- Maintain designations and roles consistently
### **3. Concepts**
- **Registered** – User account has been created
- **Logged In** – User has logged into the platform at least once
- **Not Logged In** – User account created but login not completed
- **Blocked** – User access is disabled
- **Pending Requests** – Users waiting for approval
- **Role** – Access level (All, User, Admin, Creator)
- **Attributes** – User details used for filtering and reporting
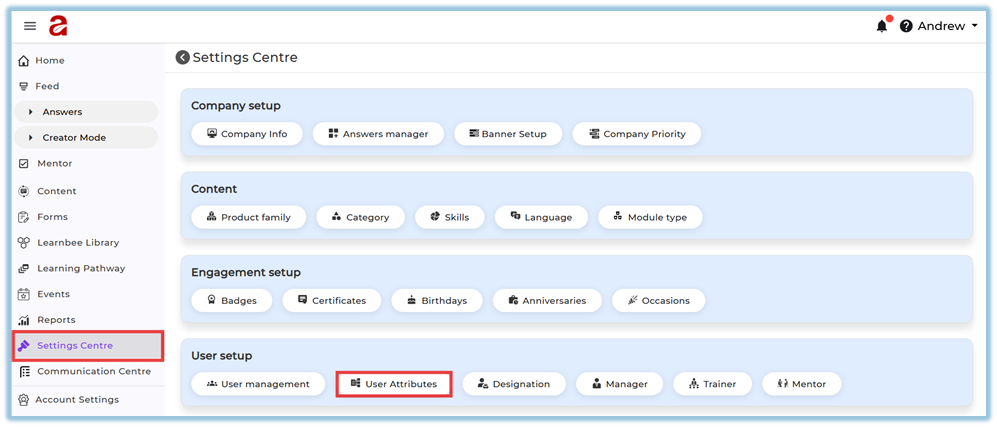
### **4. Set Up Guide**
**Path:** Menu → Settings Centre → User Setup
[https://converse.bsharpcorp.com/celebrate/settings\_center](https://converse.bsharpcorp.com/celebrate/settings_center)
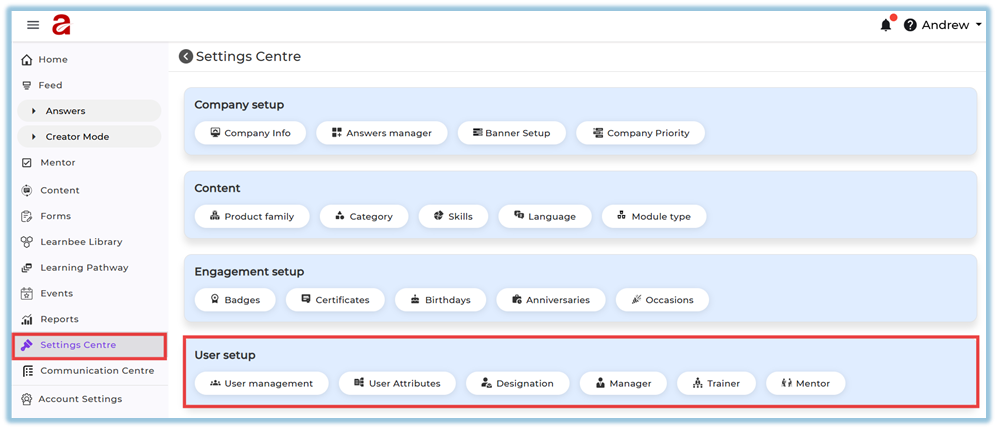Under User Setup, you will see:
- User Management
- User Attributes
- Designation
- Manager
- Trainer
- Mentor
#### **4.1. User Management**
##### View User Status
The User Management page displays users under different tabs:
[https://converse.bsharpcorp.com/celebrate/user\_management](https://converse.bsharpcorp.com/celebrate/user_management)
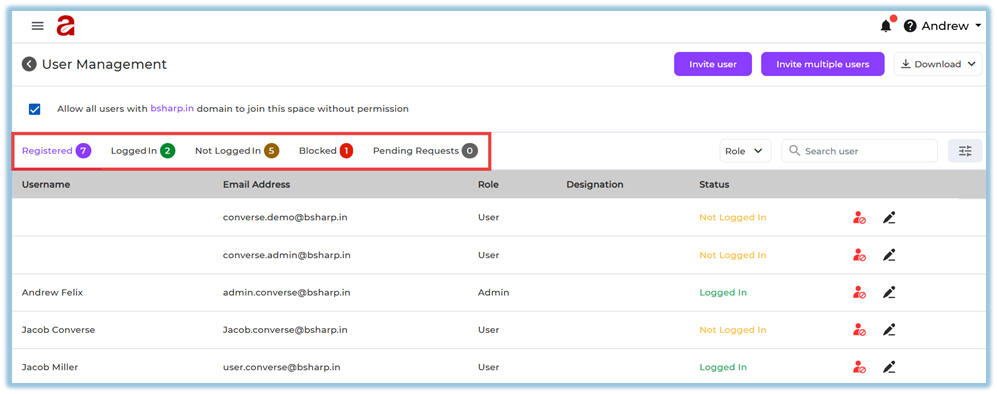
- **Registered**
- **Logged In**
- **Not Logged In**
- **Blocked**
- **Pending Requests**
Each tab shows the count of users in that category.
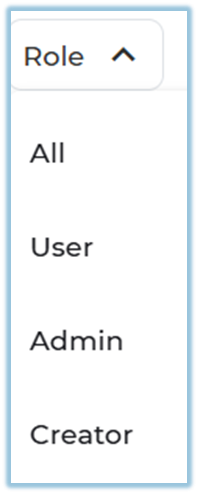
##### Search & Filter Users
You can:
- Search users by name or email

- Filter users by **Role** (All, User, Admin, Creator)
- Use advanced filters to search by:
- First Name
- Last Name
- Email ID
- Mobile Number
- Designation
- Country
- Date of Birth
- Date of Joining
- Manager
- Trainer

##### Invite a Single User
1. Click **Invite User
**
2. Enter user details:
- First Name
- Last Name
- Mobile Number
- Date of Birth
- Email ID
- Hired On date
- Country, State, City
- Designation
- Manager Email Address
- Trainer Email Address (optional)
- Mentor Email Address (optional)
3. Click **Send Invite
**
4. User receives an invitation notification
##### Invite Multiple Users (Bulk Upload)
1. Click **Invite Multiple Users
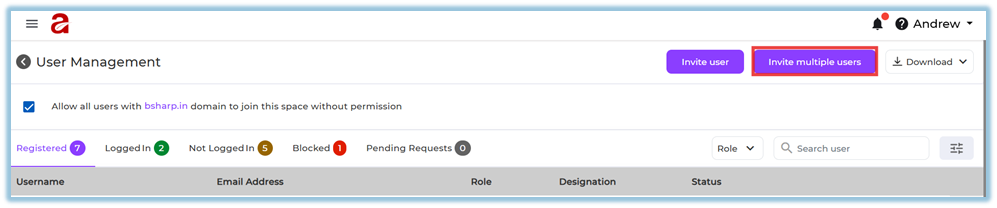**
2. Download the sample format
3. Fill in user details in the file
4. Upload the completed file
5. Click **Submit
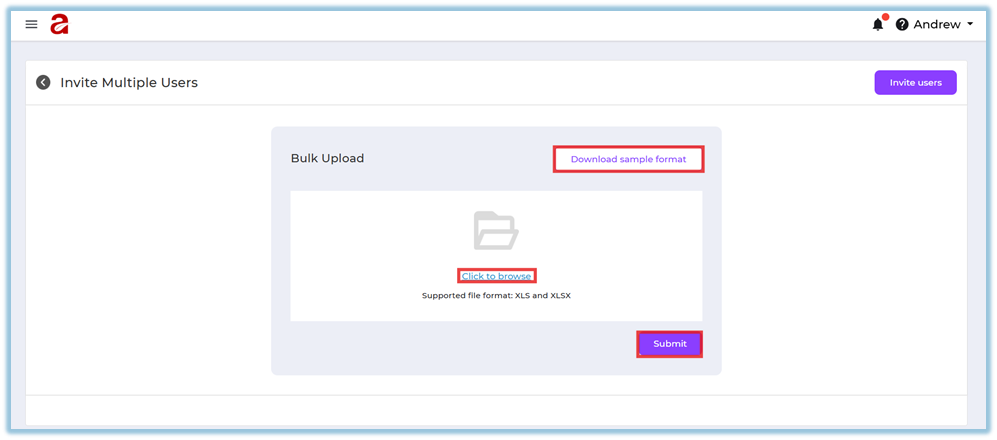**
6. System displays:
- Success message if upload is valid
- Error details if any records fail
7. The error file can be downloaded.
##### Download User Data
Admins can download:
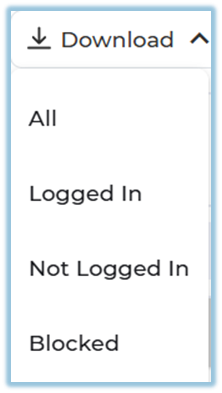
- All users
- Logged-in users
- Not logged-in users
- Blocked users
#### **4.2 User Attributes**
User Attributes control what user information is available for reports.
##### Attribute Visibility
- **Green eye icon** → Attribute included in reports
- **Red eye icon** → Attribute excluded from reports
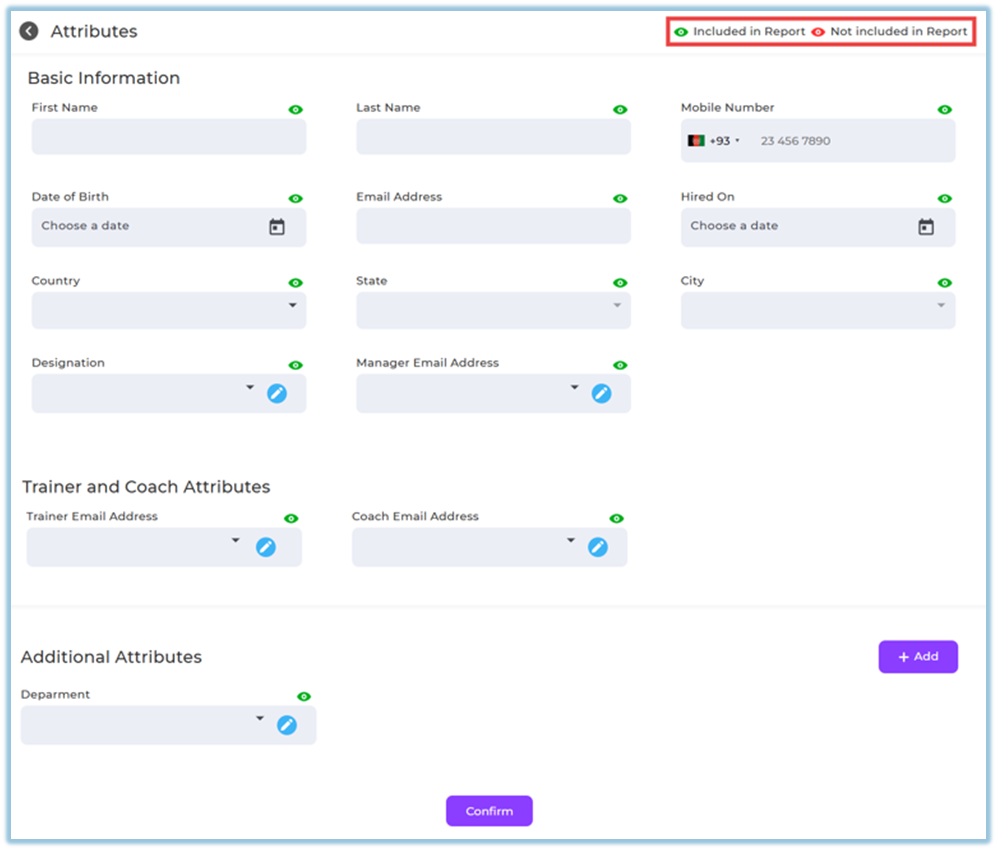
This applies to:
- Basic attributes
- Trainer and Mentor attributes
- Additional attributes
##### Add Additional Attributes
1. Click **Add** under Additional Attributes
2. Enter:
- Attribute Name
- Attribute Type

3. Save and confirm
#### **4.3 Designation**
Designations define user roles shown across the platform.
[https://converse.bsharpcorp.com/celebrate/settings\_center](https://converse.bsharpcorp.com/celebrate/settings_center)
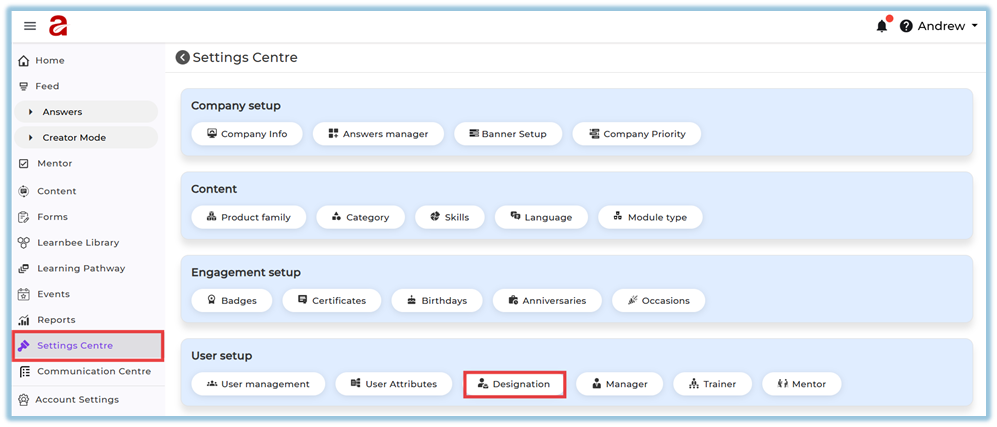
##### Add Designation
1. Enter designation name
2. Click **Add**
****
##### Usage Notes
- Designations appear in user creation dropdowns
- For bulk uploads, designation text must exactly match what is configured
- Designations can be reordered or removed if needed
#### **4.4. Manager Setup**
1. Go to **Settings Centre → User Setup → Manager
**
2. Click **Select Manager**
3. From the dropdown, select a **logged-in user who should act as a Manager**
4. Click **Add **
This action **makes the selected user a Manager** in the system.
#### **4.5. Trainer Setup**
1. Go to **Settings Centre → User Setup → Trainer
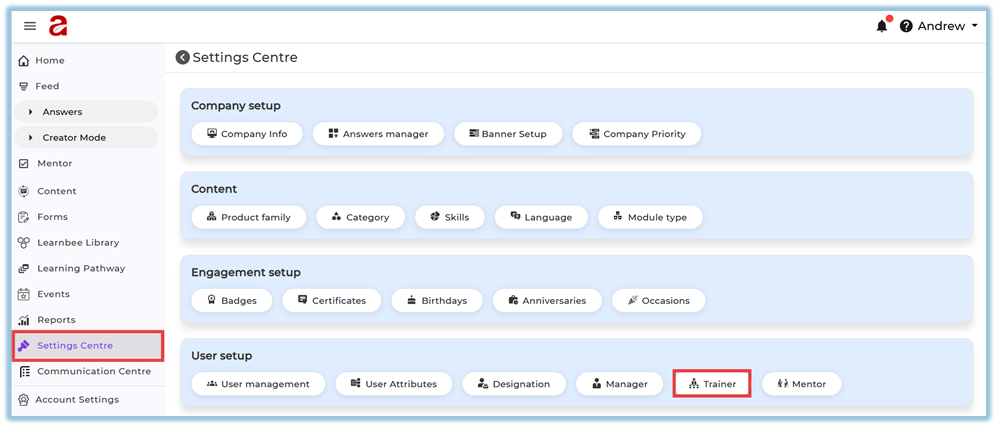**
2. Click **Select Trainer**
3. From the dropdown, select a **logged-in user** who should act as a Trainer
4. Click **Add
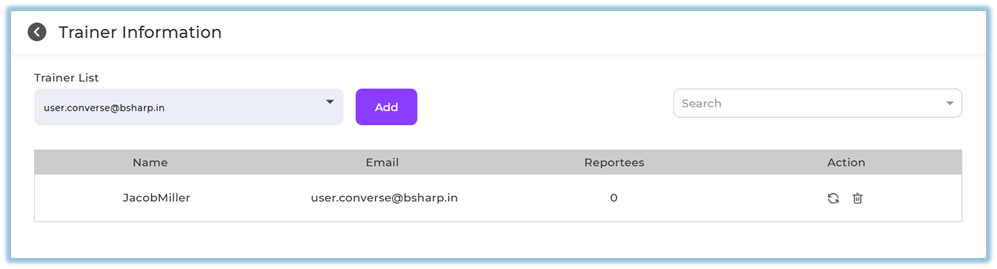**
The selected user is now enabled as a **Trainer**.
#### **4.6. Mentor Setup**
1. Go to **Settings Centre → User Setup → Mentor
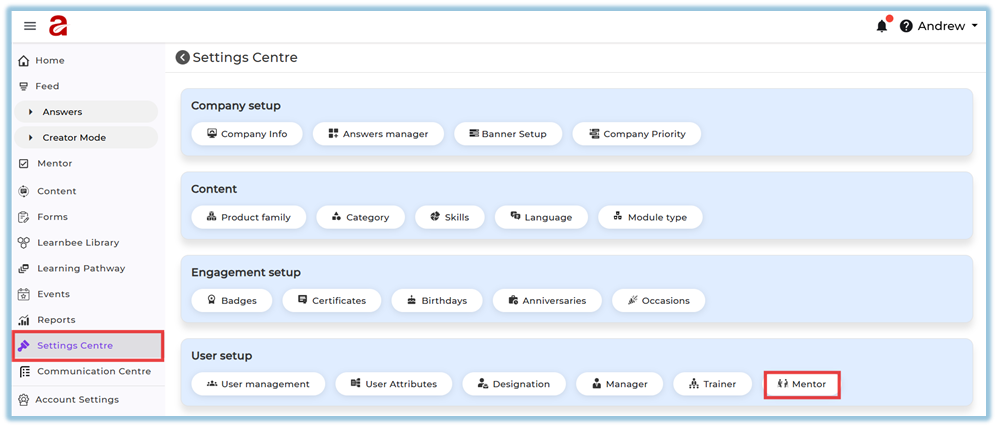**
2. Click **Select Mentor**
3. From the dropdown, select a **logged-in user** who should act as a Mentor
4. Click **Add
**
The selected user is now enabled as a **Mentor**.
#### **How to Assign Manager / Trainer / Mentor to Users**
You can assign roles in **two ways**:
**Option A: While Creating a New User**
1. Go to **User Management → Invite User**
2. Fill in user details
3. Select **Manager / Trainer / Mentor email** as required
4. Click **Send Invite**
**Option B: For Existing Users**
1. Go to **User Management**
2. Open the user profile
3. Select Manager / Trainer / Mentor under the respective fields

4. Click **Save**
### **5. User View**
##### Admin View
Admins can view and manage user details from:
- **User Management → User Profile**
- **Account Settings → Profile**
From here, admins can:
- View full user details
- Edit profile information
- Assign or change Manager / Trainer / Mentor
- Block or unblock users
##### End User View
Users can view their details under **Profile → Account Settings
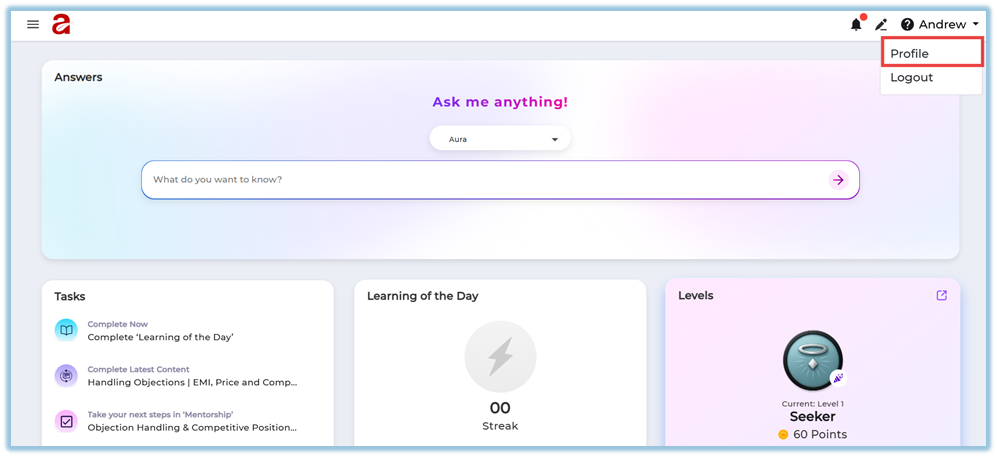**
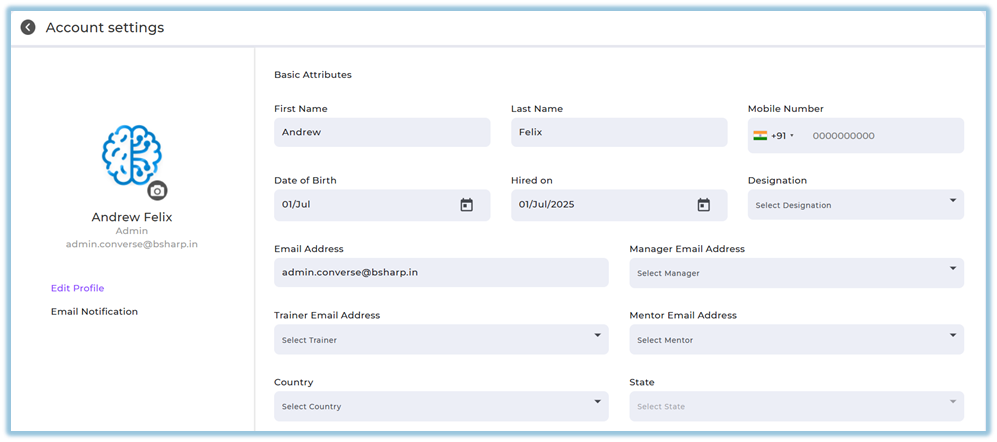
- Basic information
- Designation and role
- Manager, Trainer, Mentor
- Country, state, city
- Additional attributes
### **6. Reporting**
- Only attributes marked with 🟢 (Included in Report) will appear in reports.
- Reporting accuracy depends on proper user setup and assignments.
### **7. Best Practices**
- Keep user attributes clean and consistent
- Block users who have exited the organization
- Ensure designations match during bulk uploads
- Assign managers, trainers, and mentors before launching learning
### **8. Related Links / FAQs**
- [User Management](https://converse.bsharpcorp.com/celebrate/user_management)
- [User Attributes](https://converse.bsharpcorp.com/celebrate/attribute-setup)
- [Designation Setup](https://converse.bsharpcorp.com/celebrate/designation-setup)
- [Manager Setup](https://converse.bsharpcorp.com/celebrate/attribute-setup/1)
- [Trainer Setup](https://converse.bsharpcorp.com/celebrate/attribute-setup/2)
- [Mentor Setup](https://converse.bsharpcorp.com/celebrate/attribute-setup/3)
### **9. Version Notes**
Last Updated: 30 Dec 2025