
Post
1. Overview
The Feed in Bsharp Converse is a central space where users can create and interact with posts. It allows admins and managers to share messages, recognize employees using badges or certificates, conduct polls, and engage users through comments and reactions. The Feed supports day-to-day communication and employee engagement activities such as birthdays, achievements, and work anniversaries.
https://bsharpcorp.com/converse/engagement/
2. When to Use This?
Use Posts when you want to:
3. Concepts
-
Post – A written message shared on the Feed
-
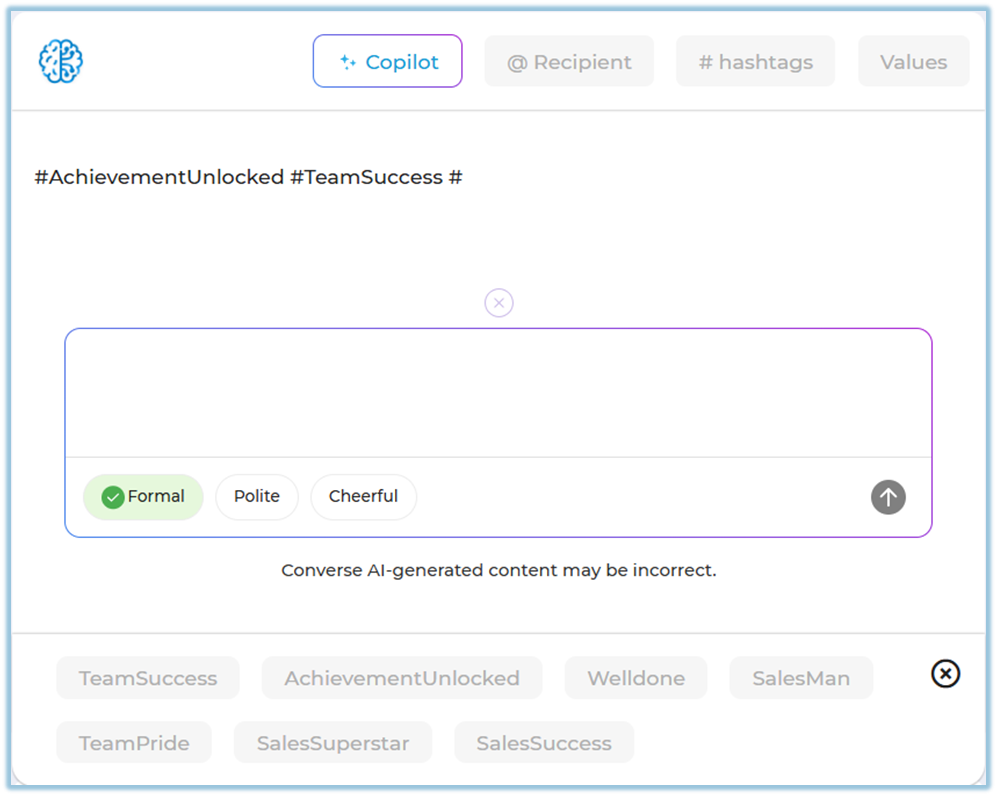
Copilot – Helps reframe messages as Formal, Polite, or Cheerful
-
Recipient (@mention) – Tag one or more users in a post
-
Hashtags (#) – Categorize posts for easy discovery
-
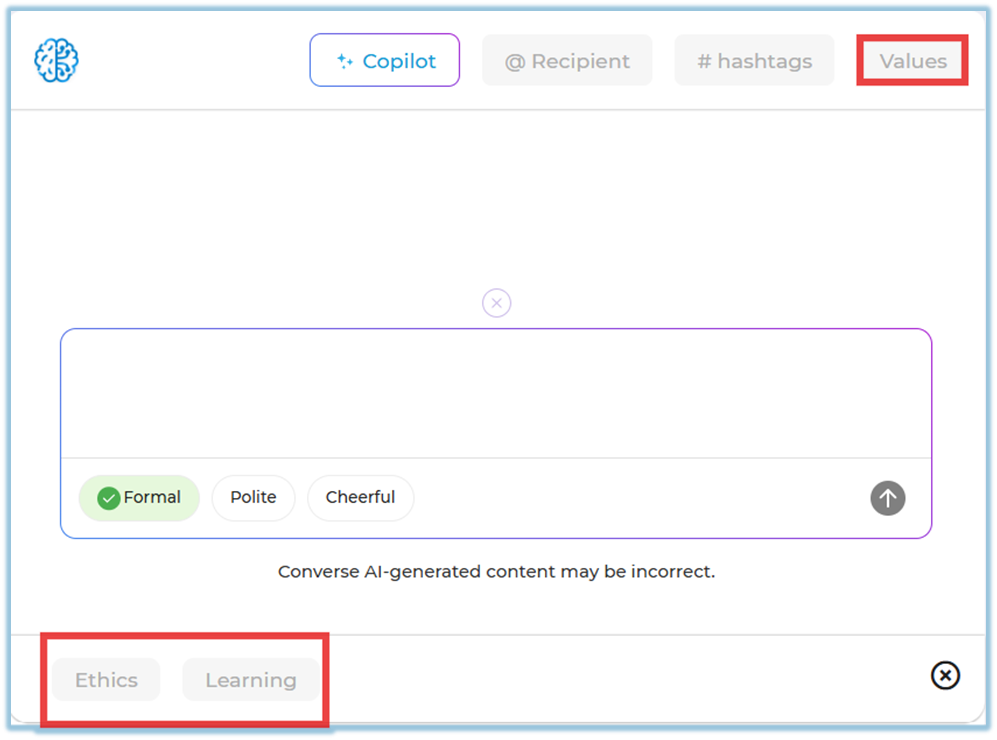
Values – Link the post to company values like Ethics or Learning
-
Badge – Recognition awarded to an employee
-
Certificate – Appreciation certificate shared via post
-
Poll – Question with voting options for employees
-
Feed Filters – Search and filter posts by date, activity, or tags
4. Setup Guide
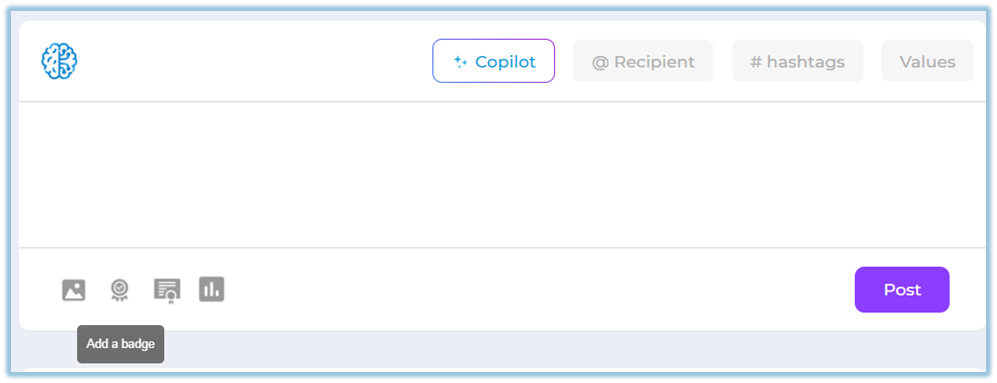
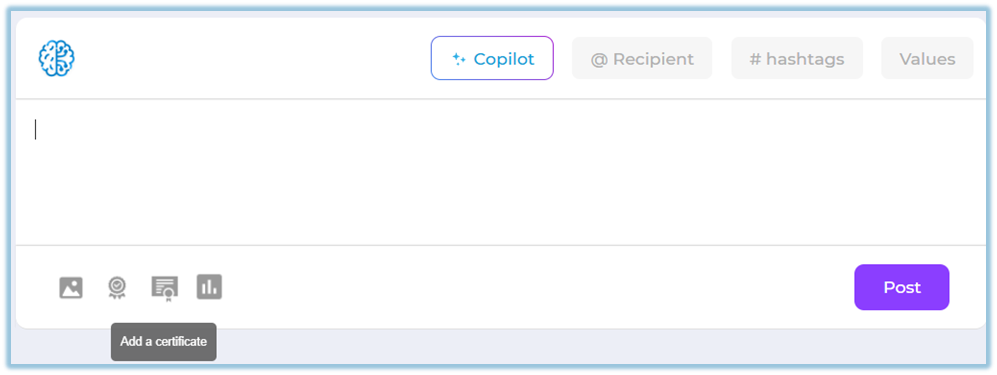
Create a Post
-
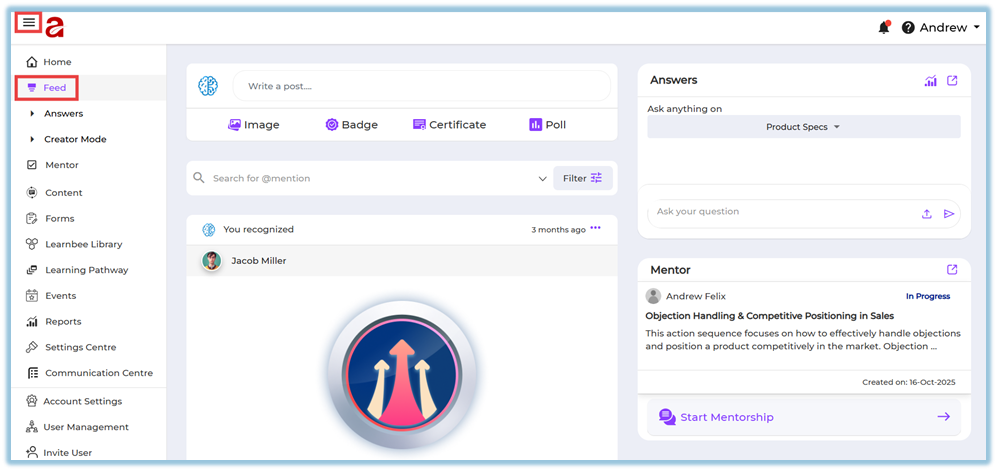
Click the menu bar.
-
Select Feed from the left navigation panel.
-
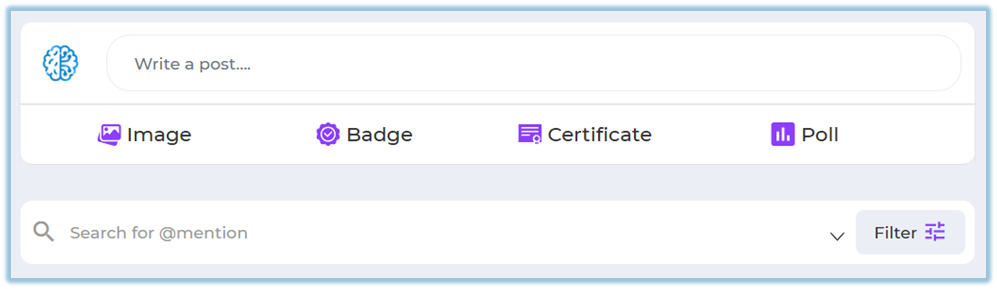
Click inside the Write a post… text box.
-
Enter your message (for example, a congratulatory or informational message).
Use Copilot (Optional)
-
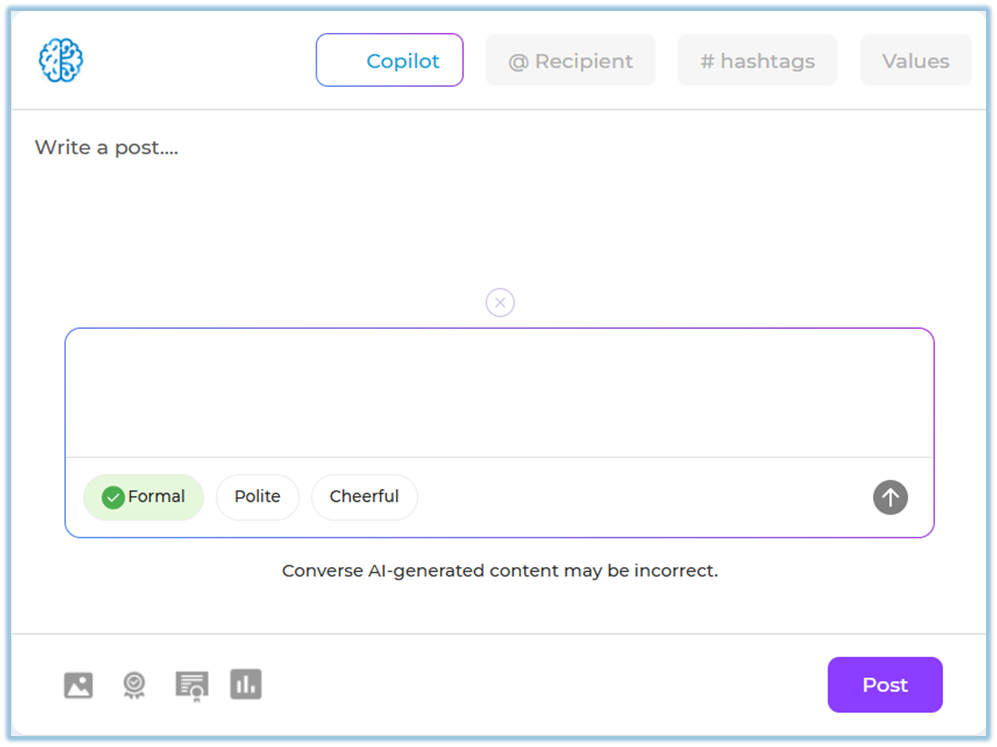
Click Copilot.
-
Choose how you want the message reframed:
-
Formal
-
Polite
-
Cheerful
-
Add Mentions and Metadata (Optional)
-
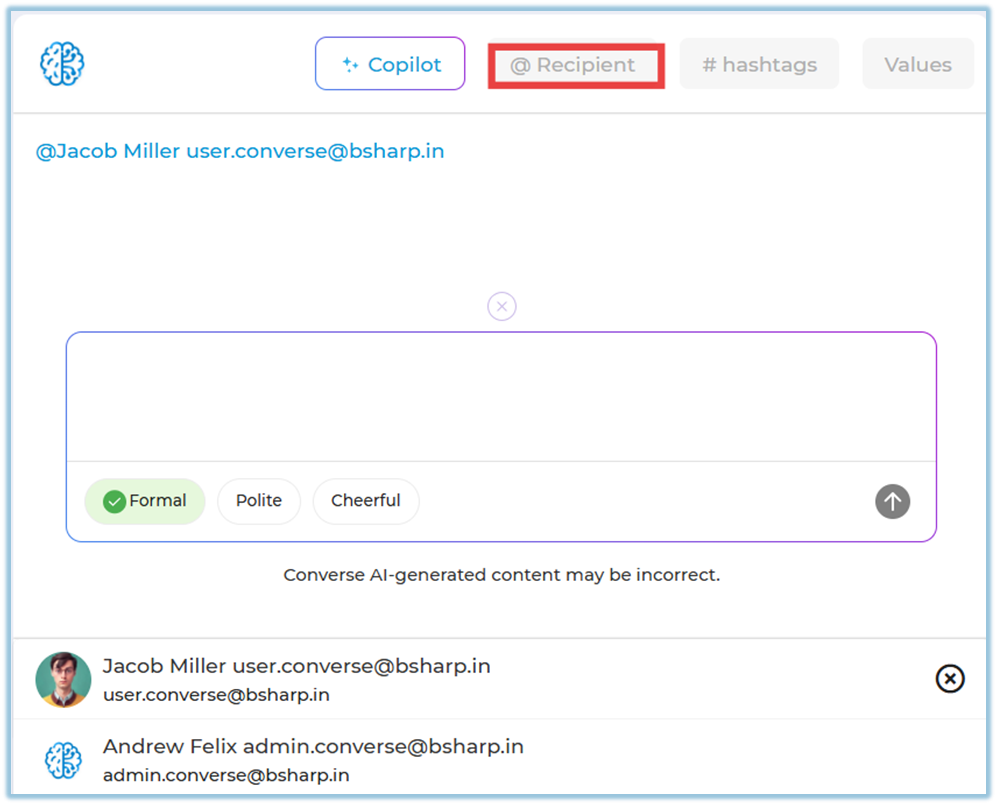
Click @ Recipient to mention one or more users.
-
Add # hashtags to categorize the post.
-
Select Values (for example, Ethics or Learning).
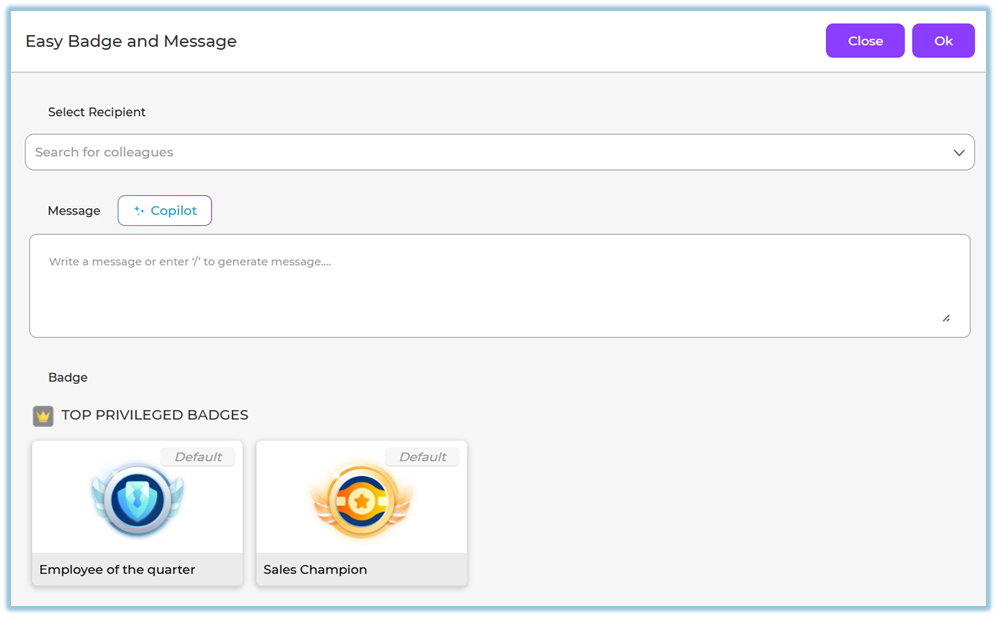
Give a Badge (Two Ways)
Way 1: Using the Badge Button
-
Click Badge below the post text box.
-
Select the recipient.
-
Choose the badge.
-
Enter a message (use Copilot if needed).
-
Click OK, then click Post.
Way 2: From Write a Post
-
Click inside Write a post….
-
Select the Badge option.
-
Complete the badge details and post.
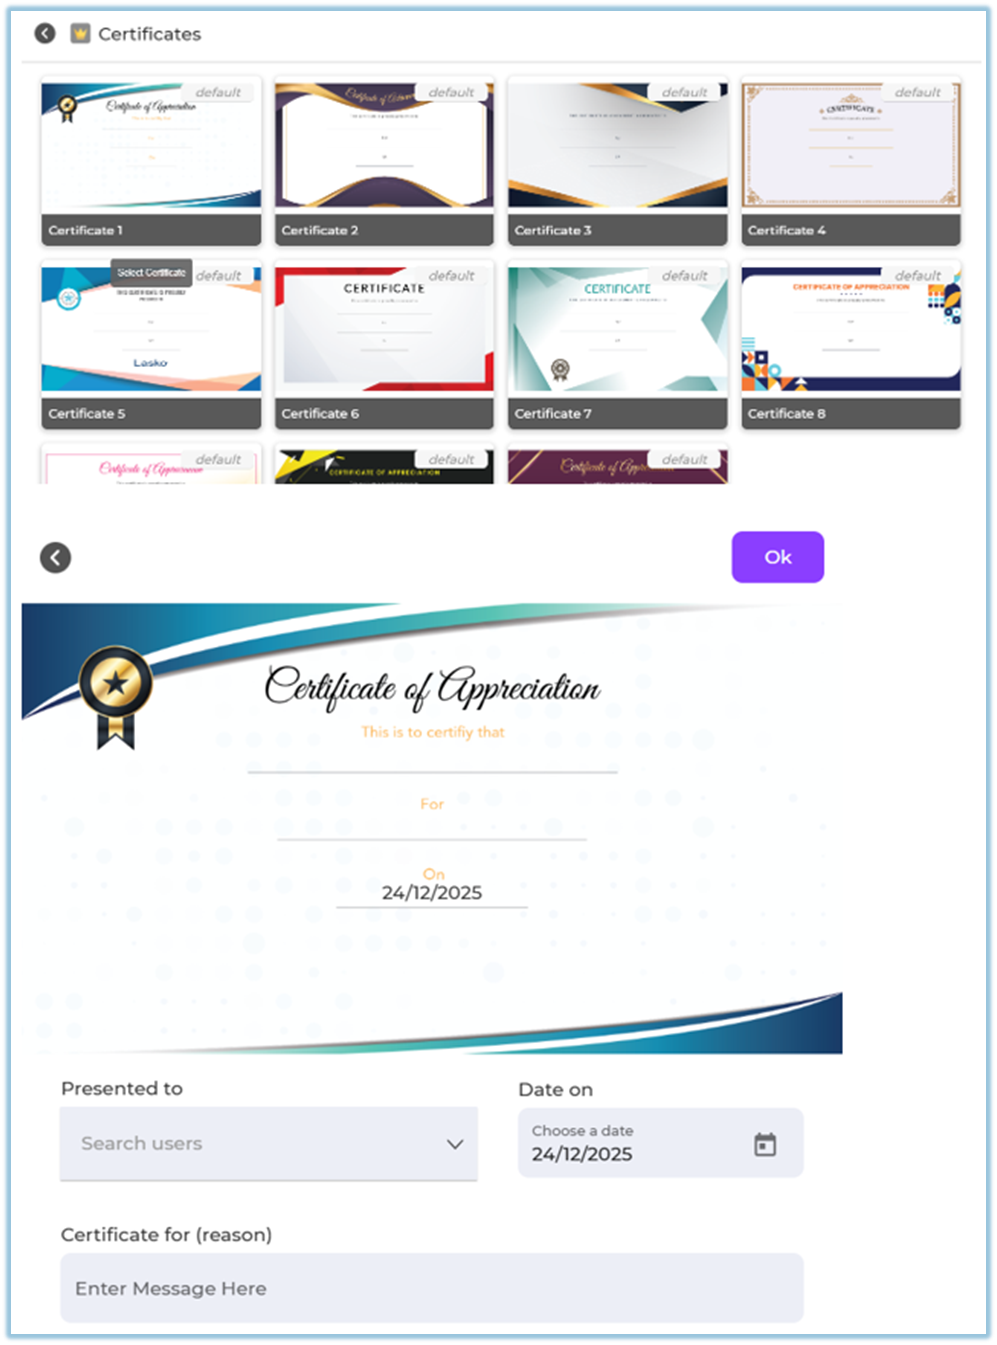
Give a Certificate (Two Ways)
Way 1: Using the Certificate Button
-
Click Certificate below the post text box.
-
Select the recipient.
-
Choose the certificate.
-
Enter the reason or message.
-
Click OK, then click Post.
Way 2: From Write a Post
-
Click inside Write a post….
-
Select Certificate.
-
Fill in certificate details and post.
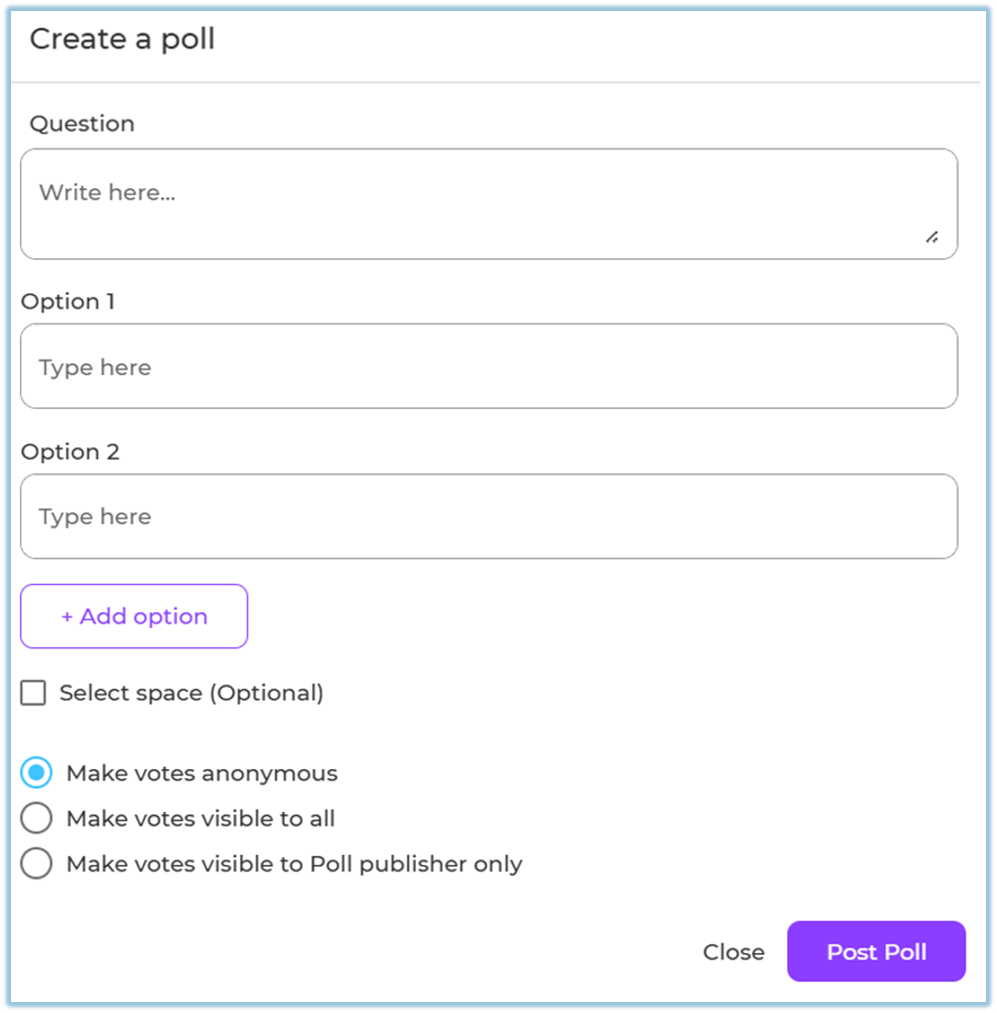
Conduct a Poll (Two Ways)
Way 1: Using the Poll Button
-
Click Poll below the post text box.
-
Enter the poll question.
-
Add options (Option 1, Option 2, etc.).
-
Configure poll settings:
-
Allow multiple options (if required)
-
Make votes anonymous
-
Show votes to everyone or only the publisher
-
-
Click Post Poll.
Way 2: From Write a Post
-
Click inside Write a post….
-
Select Poll.
-
Configure and publish the poll.

Admin Configuration – Badges
This configuration is mandatory for badge usage in Feed
Configure Who Can Give a Badge
-
Go to Settings Centre.
-
Under Engagement setup, click Badges.
-
Choose one option:
-
Anyone can give a badge
-
Nominated user can give badge
-
-
If nominated:
-
Search and select users
-
Click Add
-
-
Permission update confirmation appears.
Manage Badges
-
Click All badges.
-
View badges by category:
-
Privileged
-
Motivation
-
Innovation
-
Appreciation
-
-
Use Search badge by categories if required.
-
Click Upload badge to add new badges.
-
Use Privilege badge setup to restrict access.
Admin Configuration – Certificates
Certificates must be configured before posting
Configure Certificate Access
-
Go to Settings Centre.
-
Under Engagement setup, click Certificates.
-
Open Privilege Certificate Setup.
-
To give access:
-
Search users
-
Click Add
-
-
To remove access:
-
Search users
-
Click Remove
-
Upload a Certificate
-
Click Upload certificate.
-
Enter Certificate Name.
-
Upload the certificate image.
-
Map text placeholders (name, date, etc.).
-
Assign privilege users (optional).
-
Click Save certificate.
5. Reporting
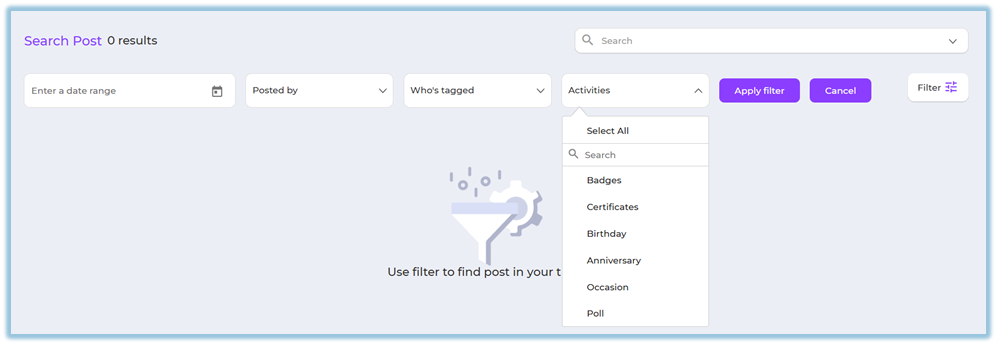
-
Use Search & Filter to track posts.
-
Filters allow admins and users to view posts by:
-
Date range
-
Posted by (You / Others)
-
Who’s tagged
-
Activities:
-
Badge
-
Certificate
-
Birthday
-
Anniversary
-
Occasion
-
Poll
-
-
Company values
-
Hashtags
-
-
Click Apply filter to view matching posts.
6. User View
-
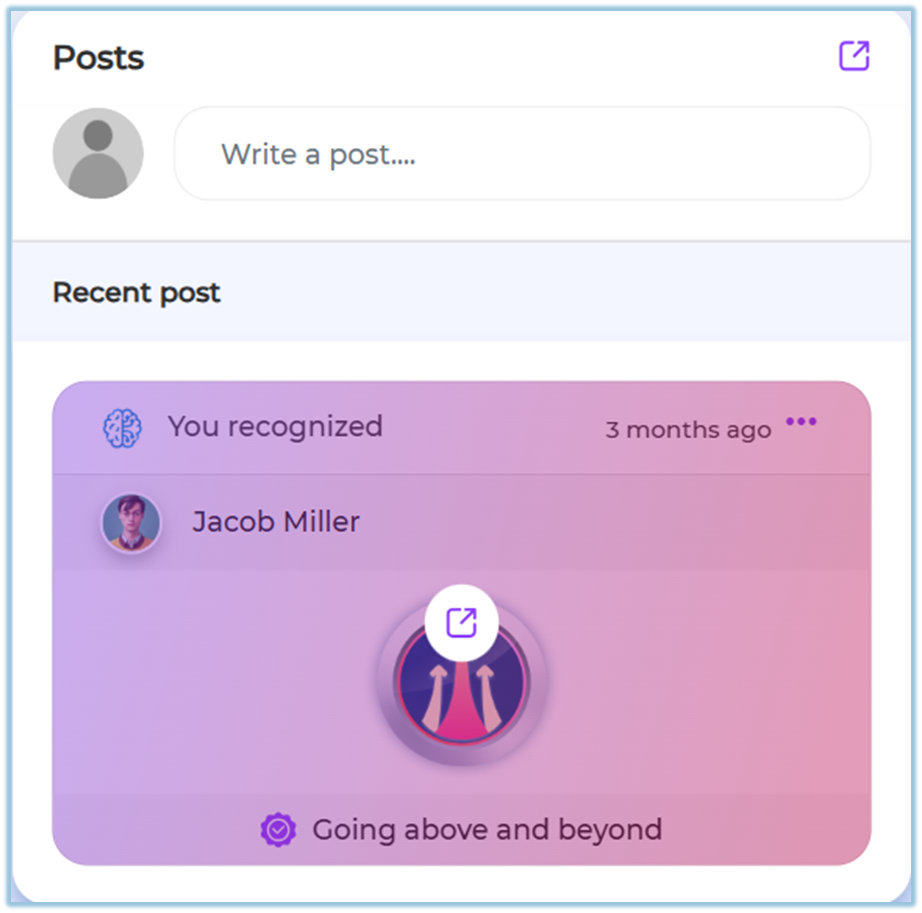
Posts appear on the Home page under the Posts section.
-
Users can see:
-
Text posts
-
Image posts
-
Badge recognition posts
-
Certificate posts
-
Polls with live voting results
-
-
Users can react, comment, and vote on polls.
-
Recognitions clearly show the badge or certificate awarded.
7. Best Practices
-
Keep post messages short and clear.
-
Use Copilot to maintain a consistent tone.
-
Tag relevant users to improve visibility.
-
Use hashtags and values for better organization.
-
Use polls sparingly to avoid engagement fatigue.
8. Troubleshooting / FAQs
Q: Can I edit a post after publishing?
No.
Q: Can multiple employees be tagged in one post?
Yes.
9. Related Links
- Birthday & Work Anniversary – Employee Engagement
10. Version Notes
Last Updated: 23 Dec 2025