
How do we create a form from Scratch
1. Overview
Creating a form from scratch in Bsharp Converse allows administrators to design a form entirely from the beginning by defining its basic details, building questions manually using available question types, and configuring how the form behaves and appears. This process includes setting up form structure in the Designer, applying logic and themes, assigning users, and publishing the form so responses can be collected and reported.
2. When to Use
Use this when:
-
You want to create a new form without using an existing template.
-
You need full control over question types and form structure.
-
You want to configure logic, validation, and appearance manually.
-
You are preparing a form to assign users and collect responses.
3. Concepts
-
Forms Section – The area where all created forms are listed and managed.
-
Create Form – The entry point to start building a new form.
-
Form Metadata – Basic details such as title, description, and category.
-
Designer – The workspace where questions are added and configured.
-
Right-side Panel – The panel used to customize selected questions or form settings.
-
Publish Flow – The step-based process to build, assign users, and publish a form.
-
Manage Page – The page used to manage users, reports, responses, and form status.
- Question Inline Controls – Controls available directly on a question card to duplicate, mark required, or delete a question.
4. Set Up Guide
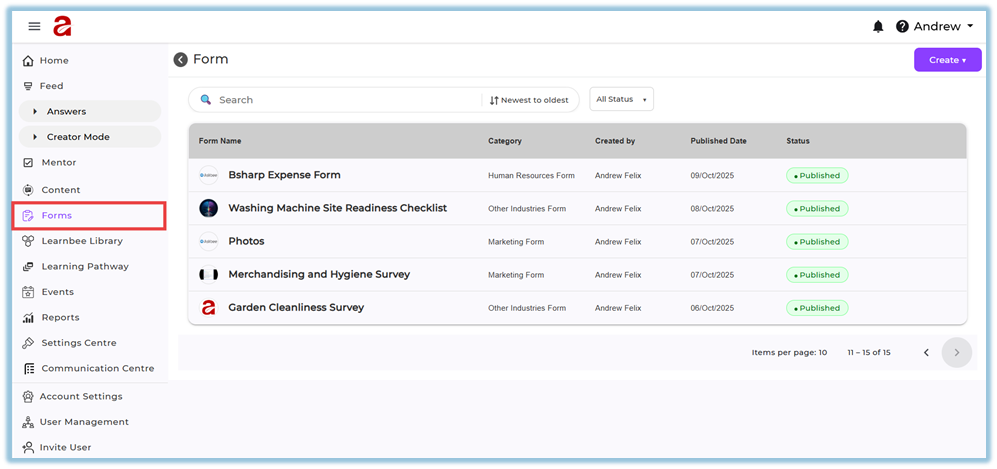
Step 1: Open the Forms section
-
Click the menu bar.
-
Select Forms.
-
The Form list page opens displaying all existing forms.
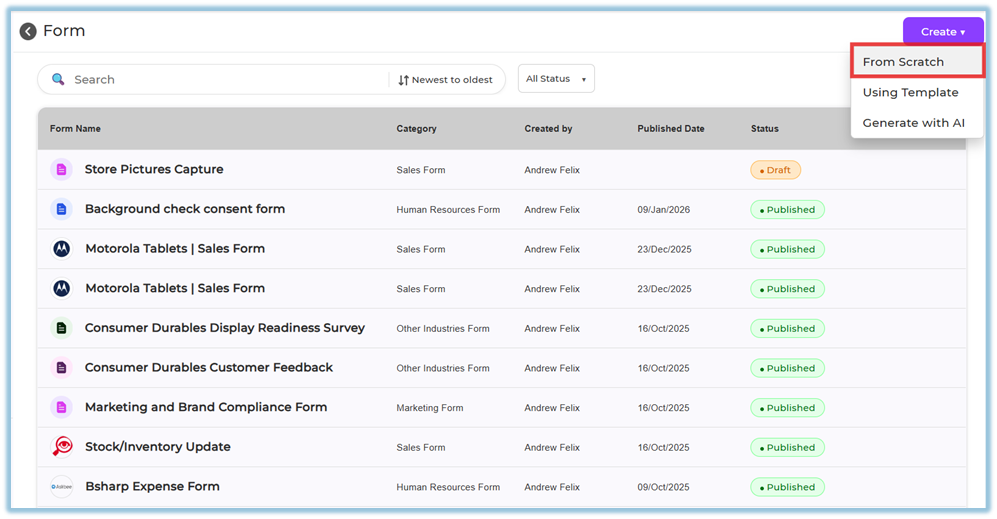
Step 2: Create a form from scratch
-
Click Create in the top-right corner.
-
Select From Scratch.
-
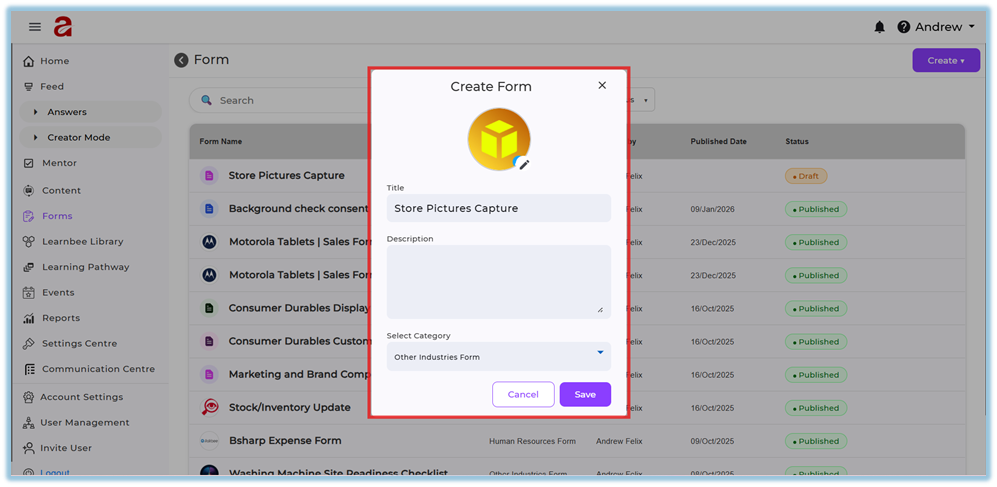
In the Create Form dialog:
-
Enter the Title.
-
Enter the Description.
-
Select a Category (for example, Sales Form or Marketing Form).
-
-
Click Save.
Step 3: Review the Manage Form page
-
After saving, the Manage Form page opens.
-
Review the form details such as:
-
Form name
-
Category
-
Created by
-
Created on
-
Users allocated
-
-
Use available actions like Fill Form or Delete, if required.
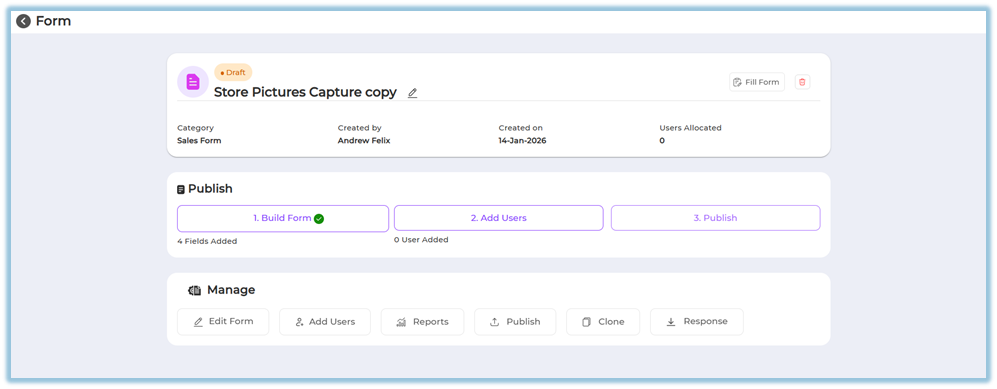
Step 4: Build the form
-
In the Publish section, click Build Form.
-
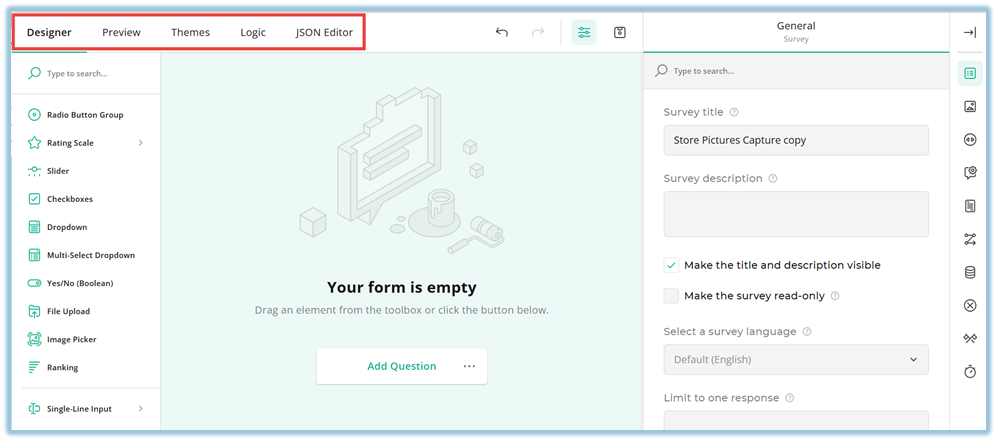
The form opens with the following tabs:
-
Designer
-
Preview
-
Themes
-
Logic
-
JSON Editor
-
Step 5: Add questions using question types
-
In Designer, start building the form manually.
-
Select a question type from the left panel and add it to the form.
-
Use the right-side panel to configure the selected question; any changes made here are reflected immediately in the form.
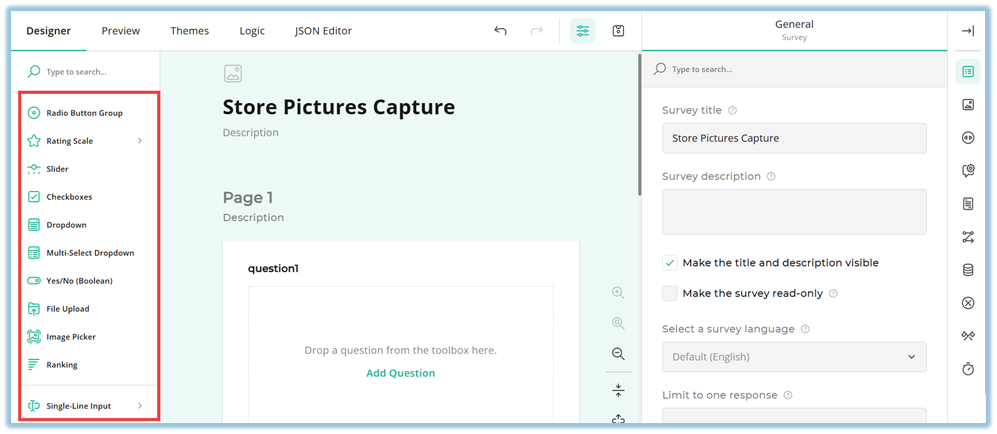
Available question types and their usage:
-
Radio Button Group – Used when users must select one option from a list.
-
Rating Scale – Used to collect ratings using labels, stars, or smileys.
-
Slider – Used to capture a value selected along a defined range.
-
Checkboxes – Used when users can select multiple options.
-
Dropdown – Used to select a single option from a dropdown list.
-
Multi-select Dropdown – Used to select multiple options from a dropdown.
-
Yes/No (Boolean) – Used to capture a binary response.
-
File Upload – Used to collect files from users.
-
Image Picker – Used to select options using images.
-
Ranking – Used to rank options based on preference.
-
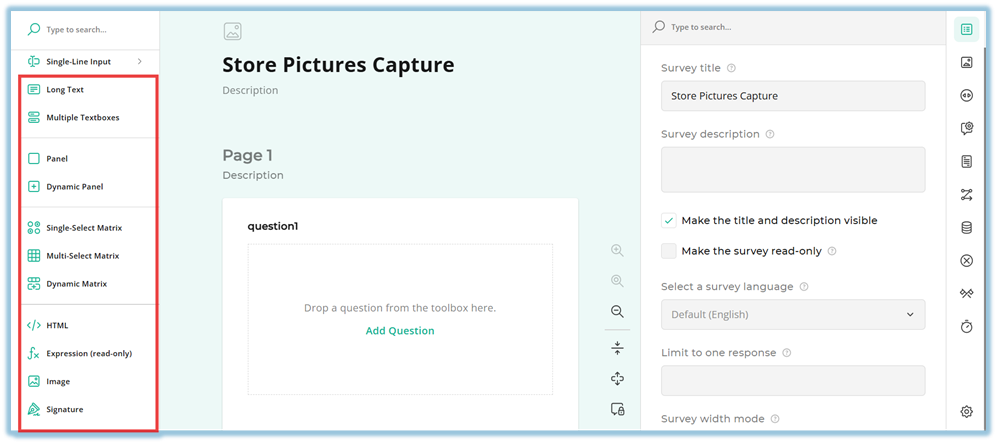
Single-Line Input – Used to collect short inputs such as text, number, email, phone, date, time, URL, month, week, or password.
-
Long Text – Used to collect detailed text responses.
-
Multiple Textboxes – Used to capture multiple text values in one question.
-
Panel – Used to group related questions together.
-
Dynamic Panel – Used to repeat a group of questions dynamically.
-
Single Select Matrix – Used when one option per row must be selected in a matrix.
-
Multi-Select Matrix – Used when multiple options per row can be selected.
-
Dynamic Matrix – Used to dynamically add rows in a matrix format.
-
HTML – Used to display static content such as instructions or text.
-
Expression (Read only) – Used to display calculated values that users cannot edit.
-
Image – Used to display an image without collecting input.
-
Signature – Used to collect a digital signature from users.
Configure questions using question-level controls
When a question is selected, the right-side panel changes to show question-specific settings.
-
The available configuration sections vary based on the selected question type.
-
Common sections include General, Layout, Conditions, Data, and Validation.
-
Any change made in the right-side panel is immediately reflected in the form.
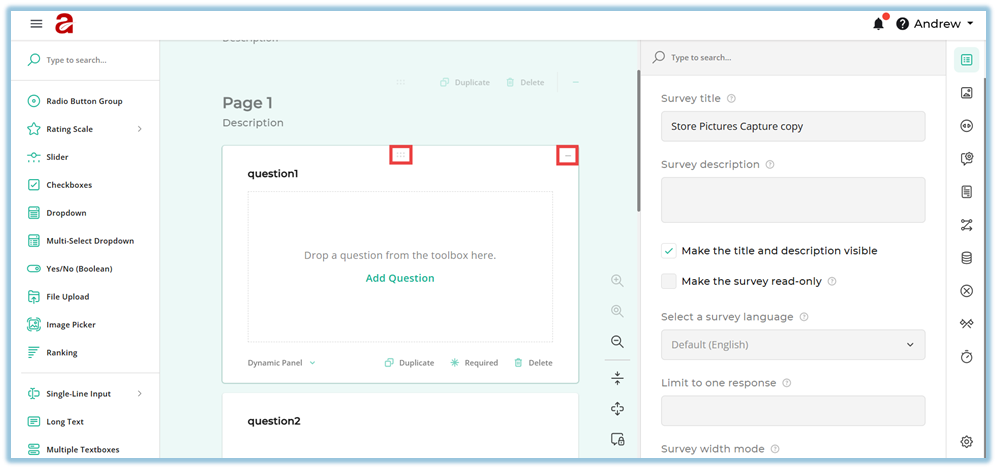
Use question inline controls (inside the form canvas)
Each question card provides inline controls that allow you to:
-
Reorder handle – Used to drag and rearrange the order of questions within the form.
-
Collapse/Expand – The minus (–) icon on the right side of the question card is used to collapse or expand the question to reduce visual clutter while designing the form.
-
Duplicate the question.
-
Mark the question as Required.
-
Delete the question.
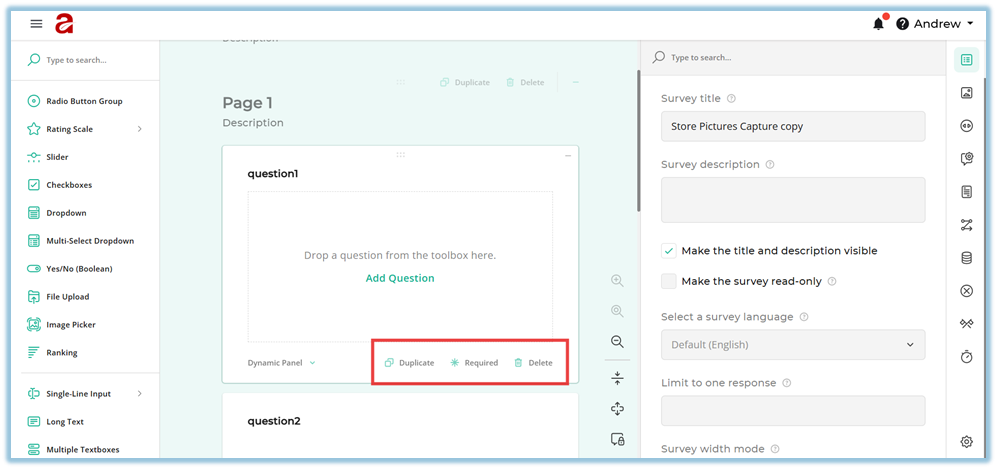
These controls help manage questions quickly without opening the right-side panel.
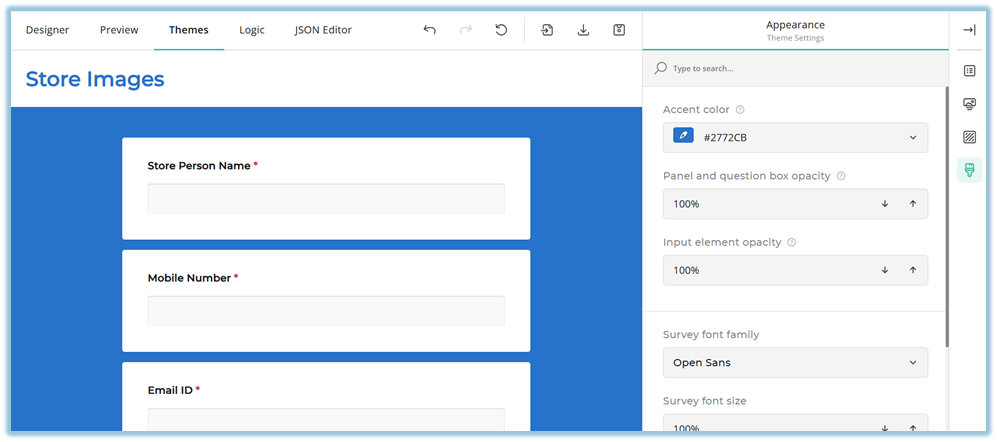
Step 6: Configure form behavior and appearance
-
Use Preview to review the form.

-
Use Themes to configure headers, fonts, alignment, background, colors, and appearance.
-
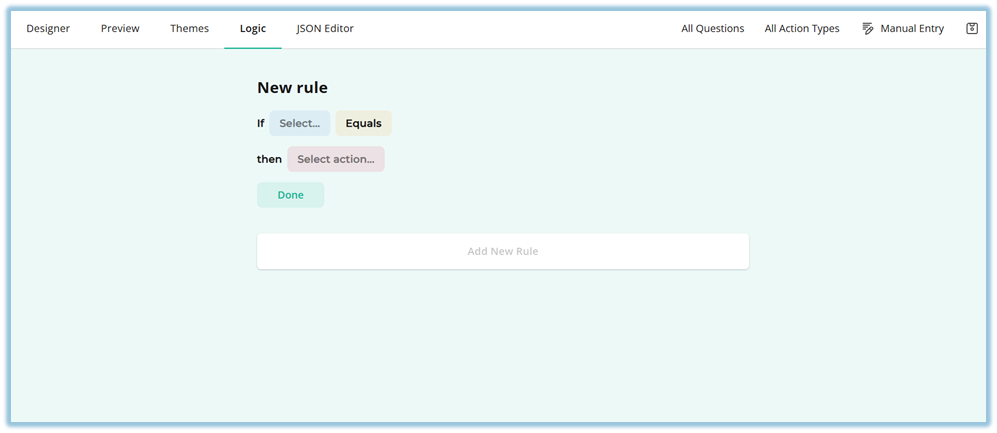
Use Logic to define conditions and actions such as showing or hiding questions, setting values, skipping questions, or completing the survey.
-
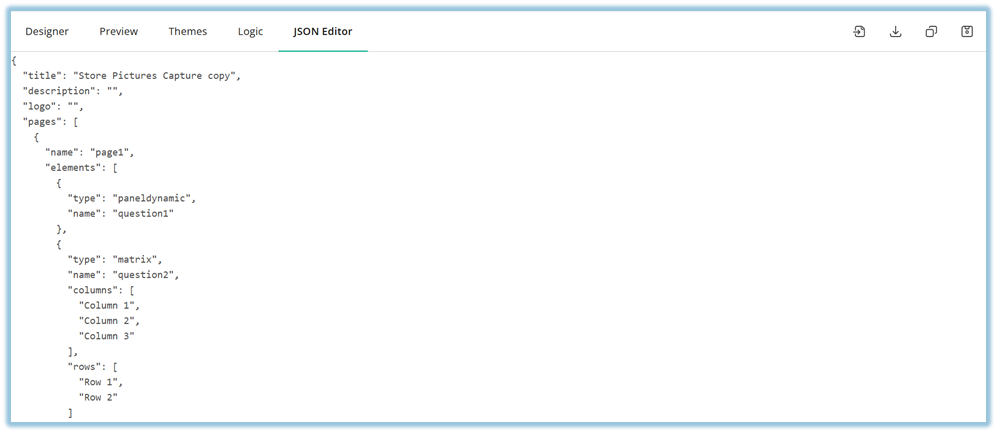
Use JSON Editor to view the automatically generated JSON for the form.
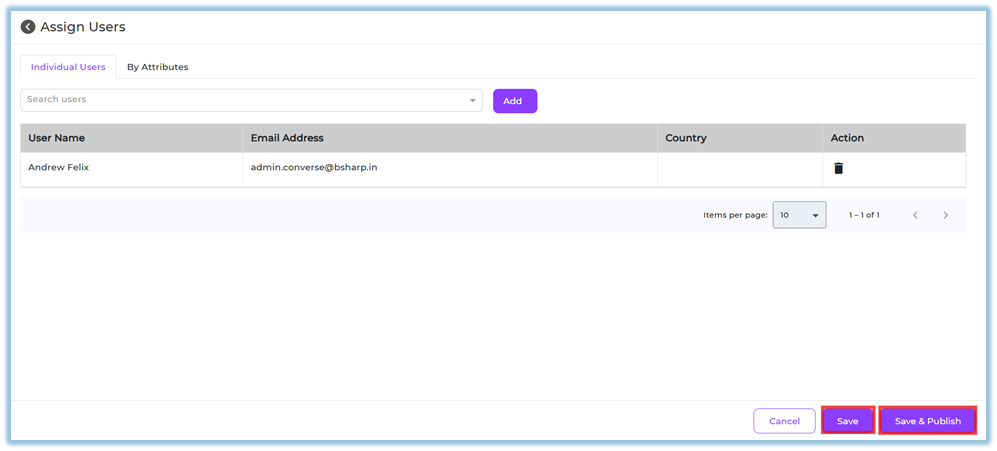
Step 7: Assign users and publish
-
Return to the Manage Form page.
-
Click Add Users.
-
Assign users individually or by attributes.
-
Click Save, Save & Publish, or Publish to make the form live.
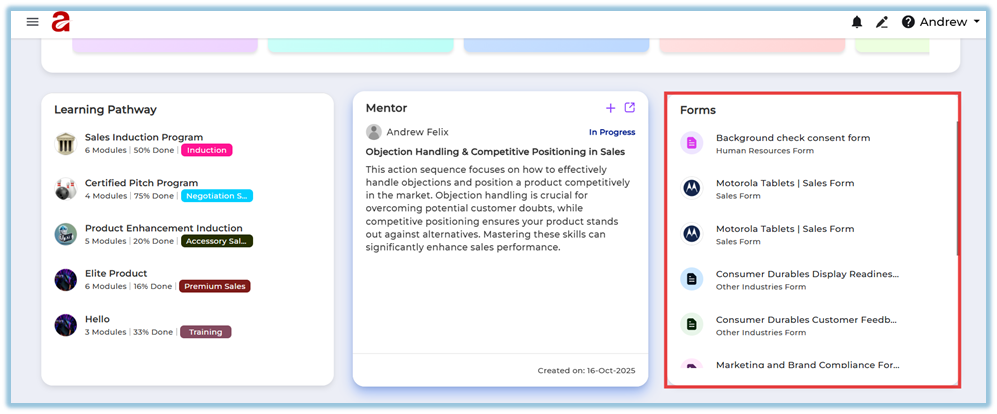
6. User View
If the form is assigned to users, it appears on the Home page.
-
Users scroll down on the Home page.
-
Forms are visible under the Forms section.
-
All assigned forms are listed in this section for easy access.
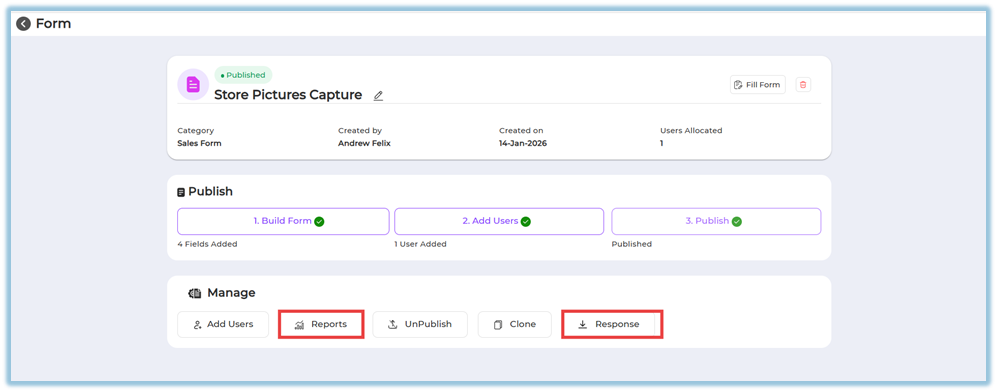
7. Reporting
-
Reports are available only after the form is published.
-
Reports and responses can be accessed from the Manage section.
-
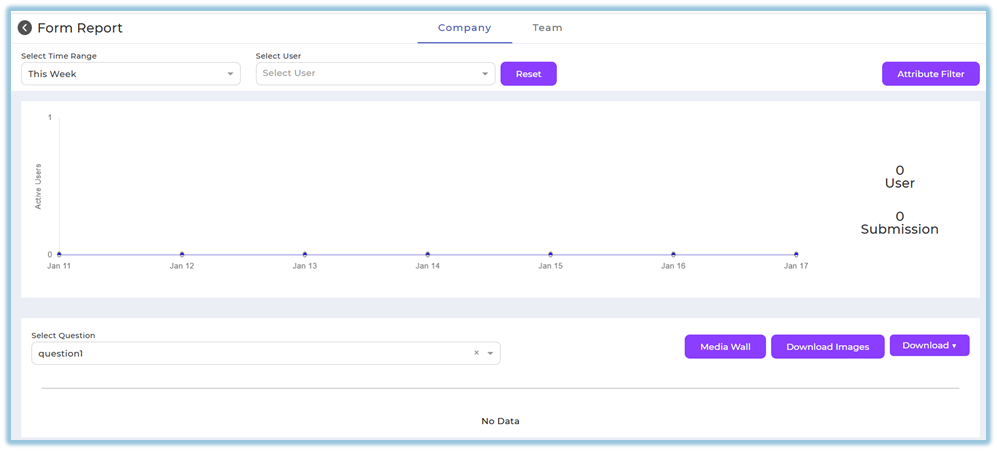
Users can:
-
Select a date range.
-
Filter by user or attributes.
-
View data by question.
-
-
Company tab is visible to administrators only.
-
Team tab is visible to users with team-level access.
-
Responses can be downloaded as images, CSV, or Excel.
-
Media Wall is available for image-based questions.
8. Best Practices
-
Configure question details from the right-side panel for better reporting.
-
Use Preview before publishing the form.
-
Apply logic carefully to control user flow.
-
Assign users before publishing to avoid delays.
-
Review JSON Editor for consistency if reusing form structures.
9. Version Notes
Last Updated: 14 Jan 2026